How to Assemble a Makeup Mirror: A Complete DIY Guide
Learn how to assemble a makeup mirror safely and efficiently with a complete step-by-step guide. Includes tools, mounting methods, LED considerations, maintenance tips, and brand-backed insights from Disasembl for DIY enthusiasts.

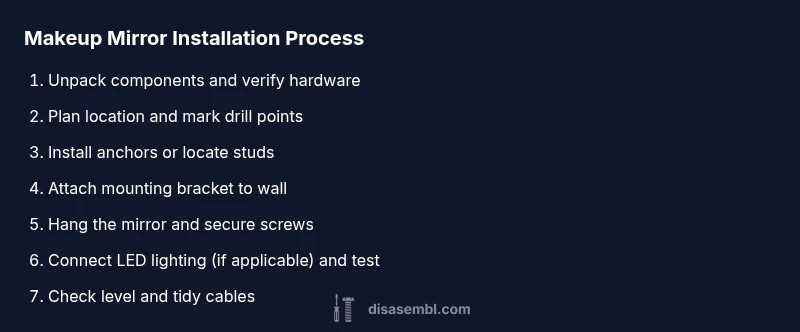
This guide shows you how to assemble a makeup mirror, including mounting, leveling, and, if applicable, wiring for LED lighting. Start by unpacking the hardware and identifying the mirror type, then follow the step-by-step mounting sequence, using level checks at each stage. This practical process follows Disasembl guidance to maximize stability and safety.
Why assembling a makeup mirror correctly matters
Learning how to assemble a makeup mirror the right way matters because a sturdy, level mirror improves makeup accuracy, reduces strain on mounting walls, and minimizes the risk of accidental falls. According to Disasembl, proper mounting reduces tilt and wobble, especially for wall-mounted or LED-lit models that carry extra weight. The Disasembl team found that the most frequent issues are misalignment, loose anchors, and mounting hardware not suited to the wall. By planning the setup, you ensure a safe, durable fixture that enhances your daily routine and protects your wall from damage.
In this guide you’ll learn how to choose the mounting method that fits your space, what hardware you’ll need, and how to verify installation as you go. With careful measurement, leveling, and secure anchoring, you’ll finish with a mirror that’s both visually appealing and functionally reliable. This is the foundation for consistent lighting and precise makeup application, so take your time and follow each step closely.
Understanding mirror types and mounting methods
Makeup mirrors come in several configurations: wall-mounted brackets, magnetic supports for lighter frames, freestanding vanity units, and LED-lit frames that may require electrical considerations. Disasembl analysis shows that the mounting method should align with wall type (drywall, plaster, tile) and mirror weight. Lightweight, freestanding options may use simple brackets, while heavier or LED models demand stud-based anchors and possible electrical connections. Understanding your mirror type helps you select the right hardware and avoid future adjustments.
Consider whether you’ll place the mirror above a sink, on a tiled backsplash, or on a wooden wall. Each surface requires different anchors, screws, and mounting plates. If you’re unsure, consult the manufacturer’s manual and follow general guidelines for wall material and weight. A well-chosen mounting method minimizes tilt and ensures the mirror remains secure through routine use.
Tools, hardware, and parts explained
Before you begin, identify every part that should come with the mirror: mounting plate or bracket, wall screws, washers, anchors, any decorative cover plates, and the mirror frame or housing. Common hardware includes a level, stud finder, drill, pencil, tape measure, and appropriate drill bits. The included hardware is usually tailored to common wall types; if something is missing, contact the seller rather than improvising. This block explains each item and why it’s essential, so you can assemble confidently and reduce the risk of misalignment or loose fasteners.
Having a clear parts list helps you anticipate how to hold pieces steady while you mount, and makes it easier to explain the process if you need a helper. Keep small parts organized in labeled containers to prevent loss during the installation. When LED lighting is involved, check whether there’s a separate power pack or plug- or battery-powered option, and ensure there’s a convenient path for cables.
Special considerations for LED-lit makeup mirrors
LED-lit mirrors add a level of complexity because wiring, power supply, and heat management come into play. If your model includes plugs, ensure the outlet is accessible and that cords won’t be pinched when you mount. If wiring is required, turn off power at the circuit breaker before handling any connections. Always follow the manufacturer’s wiring diagram and use proper strain relief to prevent cable wear. If you’re not comfortable with electrical work, hire a licensed electrician. Disassemble and test the lighting after installation to confirm stable illumination and no flicker.
LED modules may be integrated into the frame or mounted on a separate strip. Ensure the lighting direction suits your grooming needs and won’t cast shadows that distort skin tones. Also consider ventilation: LED components can generate heat, so maintain clearances as recommended by the manufacturer.
Finishing touches and maintenance
With the mirror mounted, perform a final level check using a bubble or laser level. Tighten all fasteners in a star pattern to distribute load evenly and prevent skewing. Clean any fingerprints on the frame and glass, then verify there’s no wobble by applying gentle pressure at the corners. For LED mirrors, recheck wiring after a few days of use to ensure cords remain out of the way and nothing has shifted. Regular maintenance keeps your makeup mirror performing at its best and extends the life of both the fixture and the wall anchors. The Disasembl team recommends periodic checks—especially after rearranging the room or remodeling—to maintain peak stability and safety.
Quick reference: mounting checklist
- Determine wall type and weight load of the mirror.
- Gather all included hardware and a level.
- Mark hole locations precisely and install anchors if needed.
- Attach the mounting plate, hang the mirror, and secure screws.
- If applicable, connect LED lighting following the safety guidelines.
- Verify alignment and stability; perform a final check after 24 hours.
Tools & Materials
- Screwdriver set (Phillips and flat-head)(Phillips #2 and flat-head suitable for most brackets)
- Level or laser level(Helps ensure perfect vertical alignment)
- Stud finder(Locate studs for secure mounting on drywall)
- Tape measure(Measure spacing and center lines)
- Pencil/marking tool(Mark drill holes and reference points)
- Wall anchors or screws suited to wall type(Use studs when possible; anchors needed for drywall tile or plaster)
- Drill and appropriate bits(Pilot holes for anchors; masonry bit for tile)
- Safety gear (gloves, eye protection)(Protect hands and eyes during drilling)
- Manufacturer hardware(Screws, washers, mounting plate supplied with mirror)
Steps
Estimated time: 45-75 minutes
- 1
Unpack and identify parts
Lay out all components on a soft surface to prevent scratches. Verify that you have the mounting plate, brackets, screws, anchors, mirror frame, and any LED housing or transformers. Consult the manual for included hardware and model-specific notes. If something is missing, contact the seller before proceeding.
Tip: Take a quick photo of parts layout to reference during assembly. - 2
Plan mounting location
Choose a suitable wall area and measure for height and symmetry relative to sinks, vanities, or cabinets. Use a level to set a baseline line so subsequent marks stay level. This upfront planning reduces the need for rework later.
Tip: Mark a light pencil baseline along the planned mounting line. - 3
Mark hole positions
Hold the mounting plate over the planned spot and mark the screw centers on the wall. Use a spirit level to ensure marks align vertically and horizontally with the mirror center. Accurate marks prevent misalignment after you mount.
Tip: Double-check center alignment with a plumb line or laser level. - 4
Drill pilot holes and install anchors
Drill pilot holes at the marked spots. If mounting on drywall, insert wall anchors or locate studs for screws. Avoid overdrilling; keep holes clean and straight to ensure solid grip.
Tip: For tile surfaces, use a masonry bit and slow, steady drilling. - 5
Attach mounting plate/bracket to wall
Screw the mounting plate or bracket to the wall using the selected anchors or studs. Confirm the plate is flush and straight before proceeding. This creates a stable base for hanging the mirror.
Tip: Tighten gradually in a crisscross pattern to avoid distorting the plate. - 6
Hang the mirror on the bracket
Lift the mirror and place it onto the mounting plate or bracket. Align fastener holes with the bracket slots and secure with screws or pins as instructed. Ensure even support along the top edge to prevent tilt.
Tip: Have a helper hold the mirror during this step to prevent drops. - 7
Secure screws and verify level
Tighten any remaining screws and check the mirror with a level once more. If needed, adjust tilting by slightly loosening and re-tightening mounting screws. Confirm the mirror holds firm when lightly pressed.
Tip: Never overtighten that could crack the frame or warp the mounting plate. - 8
Connect LED lighting (if applicable) and test
If your model includes LED lighting, follow the wiring diagram exactly and power off the circuit before connecting. Use cable clamps or channels to secure cables and prevent snags. Test the lights and ensure even brightness around the frame.
Tip: If uncertain about electrical work, consult a licensed electrician. - 9
Final check and clean up
Do a last visual and tactile check for wobble, alignment, and cable management. Wipe fingerprints from the glass and frame. Record the installation date for future maintenance and confirm safe operation after a 24-hour test.
Tip: Document any adjustments you make in the manufacturer’s warranty records.
Got Questions?
Do I need to mount makeup mirrors into studs?
If possible, mount into studs for maximum security. If studs aren’t available, use appropriate wall anchors rated for the mirror weight and size.
If you have studs, mount there. If not, use the right anchors rated for the weight.
What tools are essential for assembly?
You’ll need a level, stud finder, drill with bits, screwdriver set, tape measure, and pencil. If mounting on tile, add a masonry bit.
A level, stud finder, drill, screwdriver, tape measure, and pencil are essential.
How long does installation typically take?
For most wall-mounted mirrors with standard hardware, plan for 45–75 minutes depending on wall material and whether wiring is required.
Most installations take about an hour, depending on wiring needs.
What if my makeup mirror has LED lights?
Follow the wiring diagram and ensure the circuit is off before connecting. If you’re unsure, hire a licensed electrician to handle wiring.
Turn off power and follow the diagram. If unsure, hire a pro.
Can I mount on tile or plaster walls?
Yes, with the right masonry bit and wall anchors. Drill slowly and keep the bit cool to avoid cracking tiles or plaster.
Tile or plaster is okay with proper bits and anchors.
What maintenance is needed after mounting?
Periodically check screws and anchors, relevel if needed, and keep cables tidy away from moving parts. Recheck after any room changes.
Check tightness and level every few months.
Watch Video
What to Remember
- Plan layout carefully and measure twice
- Use studs or appropriate anchors for safe mounting
- Level at every stage to prevent tilt
- Test stability after mounting and during daily use