Is It Safe to Disassemble a Hard Drive? A DIY Guide
Learn whether it is safe to disassemble a hard drive, with safety steps, data-security considerations, and practical guidance for DIY enthusiasts and homeowners.

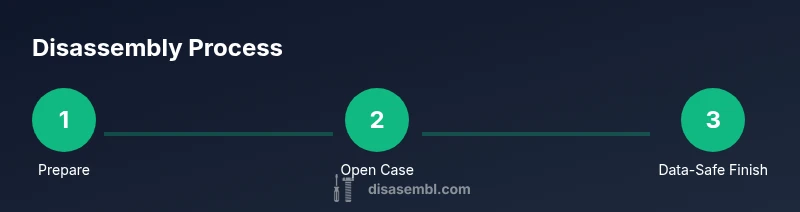
Disassembling a hard drive can be safe if you power down, discharge static, and follow a careful plan. Start with a clean, static-free workspace, the right tools, and a clear goal for data security or recycling. This quick guide outlines safe prerequisites and the boundaries of DIY disassembly for hobbyists.
Safety foundations for hard drive disassembly
Safety is the first consideration when handling any electronic storage device. Before you touch the drive, verify that it is completely powered down and unplugged from any power source. Static electricity can damage delicate electronic components, so work on an ESD-safe mat and wear an antistatic wrist strap connected to a verified ground. Keep liquids away from the workspace to prevent spills that could short circuits. Use clean, dry hands and avoid touching any exposed circuitry with bare skin. The HDD housing and PCB can carry charge even when the device is not spinning, so handle with care. Magnets should be kept away because while many drives use magnetic storage, strong magnets can cause data-related issues if brought close to the drive’s components. If your goal is data preservation, consider consulting a professional data recovery service instead of attempting DIY disassembly. Finally, commit to proper disposal or recycling for any parts you no longer need. Adherence to local regulations for electronics recycling is essential.
Understanding the internal structure and why disassembly is risky
Hard drives are precision devices with sealed interiors. The outer shell protects a delicate internal assembly that includes platters, read/write heads, a spindle motor, and a printed circuit board. In most consumer HDDs, the internal atmosphere is controlled and may be vacuum-sealed; opening the case introduces dust and moisture that can permanently damage or contaminate the platters. Even if you manage to remove the cover, misalignment of heads can cause scratches, data loss, or complete drive failure. Magnetic components inside are oriented with tight tolerances; disturbing them can affect future data recovery attempts. For these reasons, many professionals avoid disassembly unless there is a clear, justified goal such as data destruction or salvage by a certified facility. If you still plan to proceed, proceed with caution and document every connection before detaching anything; this helps in potential reassembly and reduces risk if you change your mind.
When disassembly is necessary: legitimate reasons and alternatives
Disassembly may be considered for specific tasks like isolating a faulty outer housing, salvaging a connector for reuse, or complying with asset disposition policies. However, the internal components are not designed for DIY servicing. Alternatives include using software-based data sanitization to protect your data, or physically destroying the drive through certified e-waste services or shredding that meets data-sanitization standards. For home enthusiasts, you can recycle the drive after removing the outer case and PCB for safe parts reuse, rather than attempting to dismantle the sealed internals. If data must be destroyed, do not rely on mere deletion; consult reputable services that provide documented data destruction. Always verify compliance with local laws and corporate policies.
Tools, workspace, and safety gear
A safe disassembly process starts with the right tools and a clean work area. Essential items include an antistatic wrist strap, an anti-static mat, a small parts tray, a precision screwdriver set (Phillips and Torx sizes typically used for HDDs), and non-magnetic tweezers for handling components. Use labeled containers for screws and small parts to prevent mix-ups. Wear eye protection if you anticipate any risk of small parts becoming dislodged. Cleanliness matters: a dust-free surface reduces the chance of contaminating the drive’s interior. Finally, plan for proper disposal of the drive and any removed components in accordance with local e-waste regulations.
Step-by-step disassembly framework
This section provides a high-level framework for disassembly. If you proceed, do so with extreme caution and only access to the outer shell; opening sealed internals is generally not recommended for non-professionals. 1) Prepare your workspace and safety gear. 2) Power down, unplug, and discharge static. 3) Remove the outer case screws and carefully lift the shell. 4) Photograph and label any connectors before detaching components. 5) If you proceed to PCB removal, use the correct screwdriver and keep track of the order. 6) Do not touch the platters or heads; reassemble only if you are confident in orientation. 7) Clean up and dispose of the drive responsibly.
Data security, disposal, and recycling considerations
If your goal is data security, ensure you perform documented data destruction through an approved service. Physical destruction methods should meet local and federal guidelines; do not rely on casual attempts. Recycling is the preferred path for non-salvageable drives; remove and separate components like the PCB and shell for targeted recycling streams. Always keep a record of disposal for accountability and compliance purposes. When uncertain, contact a certified electronics recycler or data-destruction specialist to minimize risk to yourself and the environment.
Common mistakes and best practices
Common mistakes include attempting internal disassembly, neglecting static protection, mishandling connectors, and misplacing screws. To avoid these, prepare a labeled parts layout, take photos before disconnecting anything, and use non-magnetic tools where possible. Never work on a drive that is powered or connected to a computer. If you are unsure at any point, pause and seek professional guidance. Practicing the safety-first mindset will protect you and preserve any data you intend to secure.
Reuse, recycling, and professional options
For most users, the safest path is to recycle the drive after removing external housings and access panels. If data recovery is required, consult a professional data-recovery service that can work in a controlled environment. If your goal is merely hardware reuse, salvaging non-degradable components such as connectors and casings can be appropriate, but avoid attempting to salvage the delicate internal platters. Always document your disposal process and ensure compliance with local electronics recycling programs.
Tools & Materials
- Antistatic wrist strap(Grounded to a known clean ground; wear on the dominant hand)
- ESD-safe work mat(Place the drive on the mat to minimize static buildup)
- Small parts tray(Keep screws and connectors organized; label by step)
- Precision screwdriver set(Phillips #0/#1 and Torx sizes commonly used by HDDs)
- Non-magnetic tweezers(Use for handling tiny fasteners and components)
- Plastic opening tools( helps to avoid scratching casings; optional)
- Isopropyl alcohol (70%+) and lint-free wipes(For gentle cleaning if needed; avoid touching platters)
Steps
Estimated time: 90-120 minutes
- 1
Prepare your workspace
Set up an ESD-safe mat, connect the antistatic wrist strap to a grounded point, and clear the area of liquids and clutter. This step reduces the risk of static damage and accidental spills during handling.
Tip: Lay screws and small parts in labeled containers to prevent mix-ups. - 2
Power down and discharge static
Unplug the drive and any connected cables. If the device was recently powered, wait a few minutes to ensure all residual charge dissipates before touching any components.
Tip: Keep hands and tools dry; never touch circuitry with bare skin. - 3
Remove the outer case screws
Use the appropriate screwdriver to remove the outer shell screws. Gently lift the case, keeping the internal components aligned as you expose the drive exterior.
Tip: Place screws in a labeled tray by location to avoid misplacement. - 4
Document connectors and orientation
Take photos or sketches of how the PCB, connectors, and cables align to aid any potential reassembly. Label any wires with tape if needed.
Tip: Never force connectors; if resistance is felt, stop and reassess. - 5
Decide on internal access (optional)
If you proceed to internal disassembly, use non-magnetic tools and avoid touching the platters or read/write heads. Aseptic handling reduces contamination and data risk.
Tip: Be aware that opening the sealed internals often renders data unrecoverable outside professional labs. - 6
Reassembly or secure disposal
If you are not reassembling, ensure you have a secure disposal plan aligned with local regulations. If reassembling for reuse, reverse your steps carefully, confirming each connection is secure.
Tip: Do not reuse damaged screws or components; replace with new if uncertainty remains. - 7
Verify data-destruction compliance
If data was sensitive, consult an approved service for documented data destruction. Keep records of the destruction process and dates.
Tip: Document the method and results to ensure future compliance. - 8
Clean up and recycle responsibly
Dispose of the drive’s shell and non-mechanical parts via approved electronics recycling streams. Separate plastics, metals, and PCB-containing modules when possible.
Tip: Use an accredited recycling facility to ensure proper handling and environmental compliance.
Got Questions?
Is it safe to disassemble a hard drive without power?
No. Always power down and unplug the device, and discharge static before handling any internal components. Static can damage sensitive electronics even when the drive is off.
Always power down and unplug before handling, and discharge static to protect the drive’s sensitive electronics.
What risks come from DIY disassembly?
DIY disassembly risks include data loss from contamination, misalignment of heads, permanent damage to platters, and voiding warranties. External casing is the only safe start for most hobbyists.
The main risks are data loss from contamination and damaging the platters, which often means data can’t be recovered.
Can I salvage data if I open the drive?
Data salvage from opened drives is usually only possible in controlled environments by professionals. DIY access often reduces chances of successful recovery and can permanently ruin data.
Data recovery after opening is unlikely outside a controlled lab, so proceed with caution or seek professionals.
What should I do if I accidentally opened the sealed enclosure?
If the enclosure is opened accidentally, stop, isolate the drive, and consult a professional data recovery service or a certified recycler to determine next steps.
If the seal is broken, stop and seek professional help to assess data risk and recovery options.
How should I dispose of an old hard drive?
Dispose through an accredited electronics recycler. Remove any sensitive data with a certified destruction service and recycle components according to local regulations.
Use an approved e-waste recycler and ensure data is destroyed before disposal.
Are there safer alternatives to disassembly for data security?
Yes. Use software-based sanitization to erase data and then physically destroy the platters through certified services if required by policy or law.
Consider software sanitization and professional hardware destruction for security.
Watch Video
What to Remember
- Power down and discharge static before touching any drive
- Opening sealed internals carries high risk and is not advised for most DIYers
- Document every step and label components to aid potential reassembly
- Use proper disposal channels and data-destruction standards