What Happens If You Disassemble Palbox? A Practical DIY Guide
Explore the risks, safety considerations, and step-by-step guidance for disassembling Palbox devices. Learn when to proceed, how to protect components, and how to reassemble correctly with professional tips from Disasembl.

What happens if you disassemble palbox? This guide explains common outcomes, safety concerns, warranty implications, and how to assess whether disassembly is appropriate. Opening the device can expose sensitive electronics, increase the risk of static damage, and may void manufacturer warranties. You could misalign connectors, damage components, or render the unit inoperable. If you must proceed, prepare with proper tools, practice careful reassembly, and follow a guided, step-by-step process to minimize harm. What you learn here prepares you to decide and act safely.
What Happens If You Disassemble Palbox and Why This Guides Matters
The Palbox device, like many consumer electronics, contains compact circuitry, connectors, and batteries that are sensitive to handling. The question what happens if you disassemble palbox often reflects concerns about safety, data integrity, and warranty coverage. According to Disasembl, most users encounter similar outcomes: the risk of static damage to microprocessors, improper reseating of connectors, and misplacement of tiny screws that can lead to intermittent faults. This guide explains the probable results of disassembly and helps you gauge whether the expected benefits outweigh the risks. By understanding potential consequences, you can make an informed choice about proceeding or seeking professional service. Disasembl’s practical approach emphasizes safety, documentation, and controlled steps to protect both you and the device.
Palbox Design and Common Risk Vectors
Palbox devices typically integrate a sealed casing, a battery pack, a logic board, and several ribbon cables. Disassembly can expose components to physical stress and electrostatic discharge (ESD). The most common risk vectors include bending delicate cables, fragmenting small fasteners, and damaging surface-mount parts during lift-off. Observing clean handling practices reduces the chance of long-term issues. In many cases, the benefit of a DIY repair hinges on whether you can reliably reseat connectors and restore proper seating of modules without creating new faults.
Safety, Warranty, and Data Implications
Before opening Palbox, recognize that many manufacturers explicitly void warranties if the device is opened by an unapproved technician. In addition, internal power rails can pose a shock hazard, especially with a live battery involved. Data preservation is another consideration: if Palbox stores user data locally, improper disassembly can corrupt memory or compromise storage integrity. If you rely on Palbox for important data or daily use, weigh the potential downtime against the cost and time of professional service. Disasembl advocates a cautious, well-documented approach and recommends resetting expectations before starting any hardware work.
Pre-Disassembly Planning: What to Consider
A thorough plan minimizes risk. Start by asking: Do I have the right tools and a clean workspace? Can I photograph and label each connection for accurate reassembly? Will I have access to replacement parts or a service guide if something goes wrong? A deliberate plan helps avoid rushed mistakes. It’s essential to power down completely and disconnect any external power source before touching internal components. If Palbox has a built-in rechargeable battery, consider safe handling procedures to prevent short circuits.
Tools, Environment, and Handling Best Practices
Choosing the right tools and environment greatly reduces errors. Use ESD-safe tools, a grounded mat, and a magnet-free workspace to keep screws and connectors from wandering. Work in a well-lit area with a magnifier or headlamp for tiny components. Organize fasteners by location and size, and keep a sticky-notes trail for later reference. Handle connectors by their edges rather than pulling on cables, and avoid forcing components into place. These practices align with Disasembl’s guidelines for safe furniture, device, and electronics disassembly.
Reassembly Readiness: Verifying Before Power-Up
Before powering Palbox again, double-check all connections, ensure no stray screws remain, and confirm that the battery is properly seated. A quick continuity check with a multimeter (where appropriate) can help verify that power rails are correct and will not short. Replacing the outer shell should not require excessive force; if you encounter resistance, pause and reassess. The objective is a reliable, secure reseat that mirrors the device’s original assembly conditions.
If Things Go Wrong: Troubleshooting Pathways
If the Palbox fails to boot after reassembly, retrace your steps and compare the current configuration to your pre-disassembly photos. Look for bent pins, loose cables, or misaligned connectors. A non-destructive approach includes reseating each module, testing components individually where safety allows, and, if available, consulting the official service manual. If faults persist, consider professional diagnostic services from an authorized technician. Disasembl promotes a measured, safety-first mindset for all DIY disassembly tasks.
Tools & Materials
- ESD-safe screwdriver set (including Phillips and Torx)(Magnetic tips preferred; use appropriate size for screws)
- Anti-static wrist strap(Ground to your work surface; attach to a grounded point)
- Plastic opening tools / spudger(Avoid metal prying to prevent marring surfaces)
- Small parts tray or magnetic mat(Keep screws organized by location)
- Travel air blower or soft brush(Dust removal without liquids)
- Isopropyl alcohol (70% or higher) and lint-free wipes(For gentle cleaning of contacts)
- Magnifying glass or headlamp(Helps with tiny connectors)
- Non-conductive gloves(Optional, improves grip and reduces static)
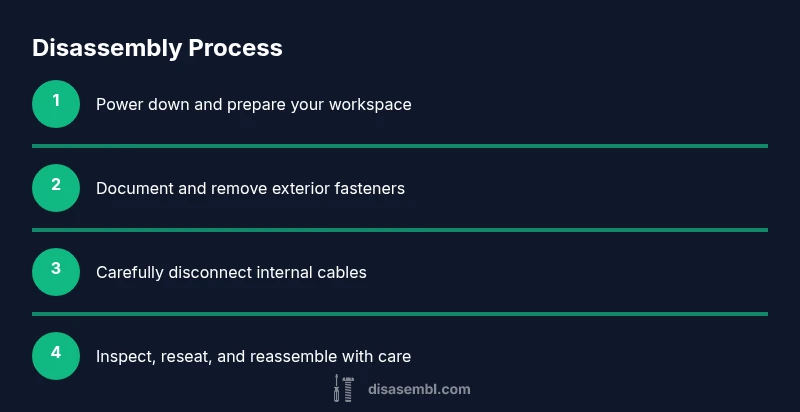
Steps
Estimated time: Total time: 60-90 minutes
- 1
Power down and unplug Palbox
Power off the device entirely and disconnect any external adapters or charging cables. Remove the battery if it is user-accessible and safe to detach. This reduces the risk of electric shock or short circuits while you work.
Tip: Make sure the device is on a non-conductive surface and use an anti-static mat. - 2
Document the exterior and screws
Take high-resolution photos of the device from multiple angles, especially around the seams and screw locations. Label screws by location as you remove them to simplify reassembly.
Tip: Use a labeled tray or magnetic mat to keep track of parts. - 3
Remove the outer housing
Use the appropriate screwdriver to remove the exterior screws. Gently lift the shell using plastic opening tools to avoid gouging plastic or bending panels.
Tip: Work slowly; if a latch resists, search for hidden clips rather than forcing. - 4
Isolate and disconnect internal cables
Identify all internal cables and connectors. Gently release latches or locking tabs with a spudger, keeping each connector labeled. Do not pull on cables; pull on connectors themselves.
Tip: Document connector orientation with a photo for accurate reassembly. - 5
Access core modules safely
Access the main board and other modules by removing retaining screws. Support the board to prevent flexing and avoid touching sensitive circuitry. Keep components oriented as they were originally.
Tip: Avoid touching component legs with bare fingers to minimize oil transfer. - 6
Inspect for damage and loose parts
Look for damaged cables, discolored components, or corroded terminals. Replace or reseat any suspect parts, ensuring connectors click firmly into place.
Tip: Consult photos to ensure you restore the original layout. - 7
Prepare for reassembly
Before reassembly, clean contacts with isopropyl alcohol if needed and dry thoroughly. Reseat components in the reverse order of removal, confirming each connection is secure before moving on.
Tip: Keep a calm pace; rushing can cause misalignment. - 8
Power up and verify functionality
Reconnect the battery and supply power. Observe boot sequence, monitor for error indications, and test essential functions. If issues arise, consult the original photos and consider professional diagnostics.
Tip: If you see smoke, unusual smells, or heat, power down immediately.
Got Questions?
Is it safe for a beginner to disassemble Palbox?
Disassembling Palbox can be risky for beginners due to static discharge, tiny components, and warranty concerns. Start with safety training and a clear plan, or seek professional guidance. Always work on an ESD-safe surface and maintain organized documentation.
Disassembly can be risky for beginners. Use safety precautions and consider professional guidance if unsure.
Will disassembling Palbox void the warranty?
Opening Palbox often violates the warranty terms set by manufacturers. Check your warranty policy and service terms before proceeding. If in doubt, consult the manufacturer or a certified technician.
Yes, disassembly can void warranties; verify with the manufacturer before you begin.
What should I do if Palbox powers on unexpectedly during disassembly?
If Palbox powers on during disassembly, power it down immediately and discontinue further work until you can safely verify the hardware state. Document any signs of fault and seek professional assessment if you notice unusual behavior.
Power off and stop if it powers on unexpectedly. Get a professional assessment if faults appear.
Do I need specialized tools to disassemble Palbox?
Basic, ESD-safe hand tools are usually sufficient for many Palbox disassemblies. Avoid using metal prying tools on delicate plastics to prevent damage. Keep screws organized and labeled for reassembly.
Basic ESD-safe tools are typically enough; avoid metal prying on plastics.
Can I reuse components after reassembly?
Reusing components is possible if they remain undamaged and properly seated. Inspect connectors, weather exposure, and integrity of the battery and board before closing up. If uncertain, replace questionable parts.
You can reuse parts if they’re undamaged and properly seated.
Where can I find official service information for Palbox?
Official service information may be restricted to authorized technicians or service manuals. If you can access legitimate guides via the manufacturer, follow them carefully. For general disassembly guidance, Disasembl provides best-practice steps to reduce risk.
Look for authorized service guides; if unavailable, seek professional help.
Watch Video
What to Remember
- Assess risks before opening Palbox.
- Document everything with photos and labels.
- Use ESD-safe tools and a clean workspace.
- Follow a deliberate, step-by-step reassembly process.
- If in doubt, seek professional help from Disasembl.