can you disassemble thuma bed: a practical guide
Learn how to safely disassemble a THUMA bed with a comprehensive, step-by-step approach. Gather the right tools, follow the setup, and store hardware for easy reassembly. Disasembl provides a clear, organized method for DIY homeowners.

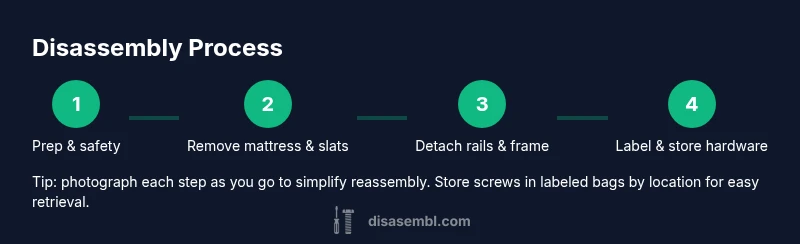
Yes. You can disassemble a THUMA bed using common household tools. With careful prep, removal of the mattress and slats, then disconnecting rails and posts, most owners can take it apart for moving or storage. This quick guide provides the essential steps, tool list, and safety points to keep parts organized for reassembly.
can you disassemble thuma bed
According to Disasembl, can you disassemble thuma bed? Yes—most THUMA models are designed for easy disassembly, allowing owners to move or store the bed without professional help. This guide from the Disasembl Team outlines a safe, step-by-step approach, starting with prep and tools, then moving through each dismantling phase, and finishing with storage tips. By following these instructions, you’ll minimize damage to finish and hardware while keeping all screws and connectors organized for reassembly later. The Disasembl team found that taking photos before each step helps align parts during reassembly and reduces the risk of mismatched connectors. Always verify model-specific instructions from THUMA’s official manual and inspect parts for wear before you begin to ensure a smooth process.
Tools and materials you'll need
Before you start, assemble a basic toolkit and a few organization aids. Essential items include a Phillips screwdriver, an Allen/hex set for standard THUMA hardware, and a small socket wrench if your model uses bolts. Also gather protective blankets or moving pads to prevent scratches, bags or labeled containers to hold screws by location, a camera or smartphone to document steps, and a marker for labeling. Optional items like a power drill should be used with caution and only if you know the correct bit sizes and torque settings. Clear workspace, good lighting, and a place to set apart removed pieces are crucial for a smooth process.
Disasembl recommends laying out hardware by subassemblies and keeping a dedicated space for each part to avoid mix-ups.
Safety considerations before you start
Safety comes first when disassembling furniture. Start by removing the mattress and bedding to prevent accidental damage or pins/edges catching fabric. Wear gloves to protect your hands from sharp edges and screws. Work on a soft, clean surface and keep a clear, well-lit path. If you use tools with power, unplug any nearby devices and avoid forcing components—if a connector won’t budge, pause and reassess. Maintain good posture to avoid back strain, and take short breaks if you’re dealing with heavy pieces. These precautions reduce injury risk and help preserve the bed’s components for reassembly.
Understanding THUMA bed design
THUMA beds typically use a modular rail-and-post framework with a slatted base. The design aims for a clean, minimal look and relatively simple disassembly, but model variations exist. Before you start, confirm which pieces belong to your model (headboard, footboard, side rails, central supports, slats) and which connectors secure them (screws, bolts, brackets). Knowing the layout helps you anticipate where to apply force, which parts come apart first, and how to avoid damage to finishes or wear on connector holes. Disassembling with this awareness reduces the chance of pinched fingers or dropped parts during the process.
Dismantling pieces and connectors overview
Most disassembly involves removing the mattress, then separating the slats from the frame. Rails are typically connected to posts with brackets or screws. Work in stages: release fasteners, separate components, and lay pieces flat or store upright to minimize warping. Do not force a joint that feels stubborn; stop and inspect for hidden screws or safety catches. A consistent approach—untighten, then separate—helps prevent stripped heads and misaligned holes, which complicate reassembly.
Labeling and organizing hardware
Label every hardware bag by the subassembly it belongs to (e.g., left rail screws, center bracket bolts). Use a permanent marker and small, sealable bags or magnetic trays to keep parts together. Photograph or sketch the orientation of each piece before removal, especially for non-standard connectors. This labeling discipline pays off when you reassemble, saving time and reducing errors. Disasembl emphasizes keeping a master inventory so you know precisely what was removed and where it should go.
Protecting surfaces during disassembly
Protect wood finishes and metal surfaces with moving blankets or soft cloths. Place pieces on blankets when you set them down to prevent dents. If you’re working on a hard floor, use a carpet square or mat to cushion impact. Avoid sliding heavy components across the room; lift with proper form to prevent damage to joints. These protections are simple steps that extend the life of your bed and prevent incidental damage during transport.
Common mistakes and how to avoid them
Rushing through fasteners is a frequent error. Take time to locate every screw and bracket—missing pieces cause reassembly headaches. Mixing similarly sized hardware can lead to misfit joints, so corral fasteners by size and thread type. Ignoring model-specific cautions or skipping photos can complicate reassembly. By slowing down and organizing, you’ll prevent damage to the frame, hardware, and finishes, and you’ll have a smoother relocation or storage experience.
Authority sources and further reading
For general furniture disassembly safety guidelines, consult these reputable sources: https://www.cpsc.gov, https://www.osha.gov, and https://extension.illinois.edu. These references provide safety best practices that complement the hands-on steps for disassembling a THUMA bed. Always verify product-specific guidance from THUMA’s official manuals to address model variations and warranty considerations.
What to do if you want to reassemble later
Keep the hardware bags organized and label each piece with its original location. Store components in a dry, stable container to prevent loss or warping. When reassembling, reverse the removal order and double-check alignment before securing fasteners. If you encounter a stubborn joint or missing hardware, pause and source the correct replacement parts before continuing.
Tools & Materials
- Screwdriver (Phillips head)(Phillips head #2 or appropriate size for bed hardware)
- Allen/hex wrench set(Common sizes 3–6 mm depending on model)
- Socket wrench or adjustable wrench(For bolts or nuts in the frame)
- Moving blankets or thick padding(Protect finishes during handling)
- Labels or zip bags(Label by subassembly and store screws separately)
- Camera or smartphone(Take photos of each step for reference)
- Marker(Label bags and parts clearly)
- Optional power drill(Only if you know the correct drill bit and avoid stripping)
Steps
Estimated time: 60-120 minutes
- 1
Prepare workspace and safety checks
Clear a generous working area around the bed. Remove bedding and mattress to prevent tripping or damage. Gather tools, bags, and a camera for documentation. Ensure good lighting and take a moment to plan the removal sequence.
Tip: Lay out a simple map of the bed frame so you know which pieces come off first. - 2
Remove mattress and bedding
Take off all textiles and set the mattress aside on a padded surface. If you have a padded frame guard, add it to protect both the mattress and floor while moving. Keep the bedding in a separate bag to avoid mix-ups.
Tip: Document the mattress position before moving to help with reassembly. - 3
Disconnect rails from posts
Inspect fasteners at rail-to-post connections. Use the appropriate bit or hex wrench to loosen without stripping. Keep each fastener with its corresponding rail by bagging them or placing in labeled cups.
Tip: Loosen gradually; avoid sudden torque that could bend the rail. - 4
Remove slats and base components
Detach the slats from the frame and set them on padding. If the slats are held by brackets, release brackets carefully and stack slats in order for easy reassembly.
Tip: Number the slats in order as you remove them. - 5
Dismantle major frame sections
Separate longer frame rails from cross supports. Do not force if a bracket resists; re-check for hidden screws or bolts. Place large pieces flat and stable to prevent tipping.
Tip: Take a quick measurement of each rail length to aid reassembly. - 6
Label and store hardware
Bundle screws, bolts, and brackets by subassembly and label bags clearly. Photograph the components before removal for reference. Store everything in a labeled box or drawer to avoid misplacement.
Tip: Use a magnetic tray to keep small parts within reach.
Got Questions?
Is disassembling a THUMA bed difficult for a DIYer?
For most DIYers, disassembly is straightforward if you follow a structured plan and use the right tools. Take your time, label hardware, and refer to the THUMA manual for model-specific quirks.
Most DIYers can disassemble a THUMA bed by following a structured plan and using proper tools.
Will disassembly affect the warranty?
Check THUMA’s warranty terms for model-specific guidance. Generally, authorized disassembly done carefully with proper parts handling won’t void general warranty, but avoid altering structural components.
Warranty terms vary by model; consult THUMA’s documentation before disassembly.
Do I need a professional to disassemble?
Not usually. A careful, methodical DIY approach with basic tools is sufficient for most THUMA beds. If you encounter unusual hardware or feel unsure, pause and consult the manual or support.
Usually you don’t need a pro, but consult the manual if you’re unsure.
How should I store the hardware for reassembly?
Bag hardware by subassembly and label clearly. Keep the screws with their respective rails and brackets so reassembly is straightforward.
Label and bag hardware by subassembly for easy reassembly.
Can I disassemble THUMA bed and reassemble later?
Yes. If you label parts and store them carefully, reassembling later is simply the reverse of the removal steps.
Yes—store pieces and reassemble later by reversing the steps.
What if I can't find a necessary screw?
If a fastener is missing, contact THUMA support or match a compatible replacement. Do not substitute with an incompatible screw, as it can compromise safety.
If a fastener is missing, seek a proper replacement before proceeding.
Watch Video
What to Remember
- Plan before you start and verify model-specific instructions
- Keep hardware organized by subassembly
- Document with photos to ease reassembly
- Protect finishes and handle parts with care
- Double-check for missing pieces before storage