Disassemble and Assemble: A DIY vs Pro Pathways Guide
A practical, analytical comparison of disassemble and assemble workflows for furniture, appliances, and electronics. Learn when to DIY, how to plan, and when professional guidance reduces risk, with actionable steps from Disasembl.

DIY disassemble and assemble offers cost savings and hands-on control, but it tests your planning, labeling, and tool readiness. For complex or high-risk items, a guided pro approach reduces risk of damage and ensures correct reassembly. This comparison helps you decide when to DIY or hire help. Read on for a detailed table and practical steps.
Why the disassemble and assemble skill matters
Disassembling and reassembling components is a foundational DIY skill that appears across furniture, appliances, and electronics. According to Disasembl, mastering this process begins with a clear plan, proper labeling of fasteners, and a reliable workspace. The ability to safely take apart an item without causing collateral damage sets the stage for successful repairs, upgrades, and part replacements. In practice, the most durable results come from a documented approach: photograph assembly states, inventory every screw, and note torque requirements when available. For homeowners, this skill unlocks extended product life, easier maintenance, and the option to perform minor repairs without professional service. The core idea is to treat disassembly as a reversible, methodical sequence rather than a one-off teardown. In the following sections, we’ll compare two practical pathways to achieve that goal: DIY go-it-alone and guided disassembly with professional support.
The economic calculus: costs and time
From a financial perspective, the path you choose for disassemble and assemble significantly affects both upfront costs and ongoing expenses. The DIY route usually requires an initial investment in basic hand tools, a work surface, and safety gear, but avoids service charges. The guided or professional approach, by contrast, incurs higher upfront costs or hourly rates; however, it can dramatically reduce the total time spent and the risk of costly mistakes. According to Disasembl analysis, many homeowners recoup some of the extra expense through faster completion, less downtime, and fewer follow-up visits for fixes that go wrong. When evaluating options, consider not just the sticker price but also the opportunity cost of your time, potential warranty implications, and the value of preserving original parts. This section lays out a framework for comparing cost and time trade-offs across common disassembly tasks—furniture, appliances, and electronics—so you can make a plan that aligns with your budget and schedule.
Risk management and safety considerations
Safety is paramount in any disassemble and assemble project. Start by unplugging devices and removing batteries; for furniture, secure a stable workspace and clamp items to prevent movement. Use safety glasses to guard against flying debris and steady potential pinch points. Disasembl advocates documenting every safety step before tools make contact, including handling of springs, hidden fasteners, and potentially sharp edges. Create a simple safety checklist: isolate the item, clear the workspace, and confirm there is a plan for reassembly. For electronics, discharge capacitors following manufacturer warnings and avoid working on live circuits. If a device is under warranty, verify that disassembly will not void coverage. Remember that the goal is to minimize risk through a staged process: plan, isolate, test-fit, and reassemble only after a dry run. If anything feels beyond your skill, pause and seek guidance to prevent irreversible damage. The right safety mindset distinguishes successful projects from costly mistakes.
Tools, fasteners, and documentation
A robust toolkit is the backbone of any disassemble and assemble effort. Start with the basics: screwdrivers (flat and Phillips), an assortment of hex keys, pliers, a utility knife, and a magnetic tray or labeled bags for fasteners. Add a camera or notebook to document each stage, and keep a labeled parts map to ensure correct reassembly. For electronics or precision furniture, you may need specialty tools like spudgers, torque wrenches, or dowel pins; in many cases, these are borrowed from a local maker space or included in a guided service. Documentation is critical: number the steps, photograph each stage, and store screws by category. Consider color-coding fasteners and keeping replacement parts organized in a labeled bin. The Disasembl approach emphasizes planning this before you begin, so you can reference your notes during reassembly and confirm that every component goes back where it belongs.
Step-by-step approach to DIY disassemble and assemble
- Define the goal: understand what is being disassembled and why. 2) Gather tools and safety gear, and set up a clean workspace. 3) Take high-resolution photos from multiple angles and label fasteners as you remove them. 4) Remove components methodically, testing fit intermittently to avoid misalignment. 5) Store parts in labeled bags, mapping each screw to its original location. 6) Reassemble in reverse order, consulting photos and notes at each critical junction. 7) Perform a dry run, then apply final torque where specified. 8) Test functions and safety features after completion. 9) Document the finished state for future reference. This approach emphasizes meticulous planning, labeling, and incremental testing to ensure accuracy and minimize risk.
Pro-backed disassembly: when to hire help
Professional disassembly is most beneficial when the item involves hazardous materials, high torque requirements, or critical alignment. Electronics with complex boards, appliances with specialized connectors, or antique furniture with fragile joints are common candidates for pro support. A guided disassembly service offers an external safety check, ensures torque and fit match original specifications, and typically includes a reassembly guarantee. If your time is constrained or the item holds significant value, professional help can pay for itself in reduced risk and faster completion. For many homeowners, a hybrid approach—DIY for simple tasks plus a short consult or check-in from a pro for the tricky steps—provides an optimal balance between cost and reliability.
Case studies: furniture vs electronics
Furniture disassembly often involves hardware like cam-locks, dowels, and tongue-and-groove joints. DIYers can leverage clear photos, labeled fasteners, and careful reassembly to restore modular furniture to service. Electronics disassembly adds layers of risk due to fragile boards and high-voltage components; here, a guided approach, especially for devices under warranty or with embedded safety features, is frequently advisable. In both domains, the decision to DIY or hire guidance may hinge on the item’s complexity, the potential impact of a mistake, and your comfort with handling tools near sensitive components. Disasembl emphasizes testing intermediate assemblies to catch misalignment early and to verify that each stage meets expected tolerances before proceeding.
Common pitfalls and how to avoid them
Common mistakes include skipping labeling, mixing fasteners, and neglecting safety steps. To avoid these, create a standardized labeling system, photograph every step, and keep a spare parts map. Do not force components that resist removal; learn when to pause and seek guidance rather than risking damage. Overlooking warranty implications can also have long-term costs, so verify whether disassembly affects coverage. Another pitfall is insufficient planning for reassembly: always plan the order of operations, verify orientations, and prepare the workspace for an efficient rebuild. Finally, resist the urge to improvise torque values; where possible, use manufacturer guidelines or measured references from your documentation. A measured, patient approach dramatically lowers the odds of irreversible errors.
How to prepare for reassembly: labeling and storage
The reassembly phase requires precise orientation and fastener placement. Label all components with color-coded stickers or laser etching and keep screws in mapped bags. Photograph the item at its most complex junctions, especially joints and mechanical linkages. Create a simple reassembly checklist that lists the order of assembly steps and any torque or alignment notes. Store components in a dedicated organizer or a labeled bin with a clear map showing where each piece belongs. If reassembly is going to take place days later, protect parts from dust and moisture with covered containers. For electronics, store screws in anti-static bags and seal connectors to prevent contamination. Proper labeling and organized storage minimize confusion during reassembly and help you maintain consistency with the original design.
Quality checks after reassembly
After reassembly, perform a series of checks to verify structural integrity and safety. Inspect joints for wobble or misalignment and test mechanical functions in a controlled manner. If an item has moving parts, perform a slow, deliberate test for smooth operation and listen for unusual noises or binding. Reinsert batteries or power supplies only after a thorough visual and functional inspection. If you are unsure about a connection, stop and consult the documentation or a professional. A final review should confirm that all fasteners are secured, parts return to their original positions, and safety features operate correctly. This disciplined verification is essential to avoid repeat disassembly and reduce the risk of future faults.
How to choose between DIY and pro pathways
Choosing between a DIY and pro pathway requires weighing time, cost, and risk. DIY suits confident homeowners who enjoy learning and have a well-organized workspace. Pro pathways are best when the item is valuable, complex, or carries safety concerns. A balanced strategy—start DIY on simpler tasks, then consult a professional for the most intricate steps—often provides the best mix of cost savings and reliability. Consider warranty coverage, the likelihood of hidden damage, and your own available time. Disasembl recommends documenting every step regardless of the chosen path, as strong notes and photos are invaluable for future maintenance.
Maintenance habits after disassemble and assemble
Post-project maintenance focuses on preserving assembly integrity and extending component life. After reassembly, create a routine: inspect major joints periodically, tighten fasteners as needed, and replace worn hardware before it fails. Keep a running log of maintenance actions, along with any observations about wear and tear. If you suspect misalignment or unusual noises over time, revisit the documentation and verify that every piece remains in its intended position. For electronics and appliances, schedule periodic checks that align with user manuals and safety guidelines. A proactive maintenance mindset reduces downtime, extends the usefulness of repaired items, and supports smoother future disassembly should you need to reopen the project. The end result is a durable, well-documented system ready for long-term use.
Comparison
| Feature | DIY Disassemble & Reassemble | Guided Disassembly with Pro Help |
|---|---|---|
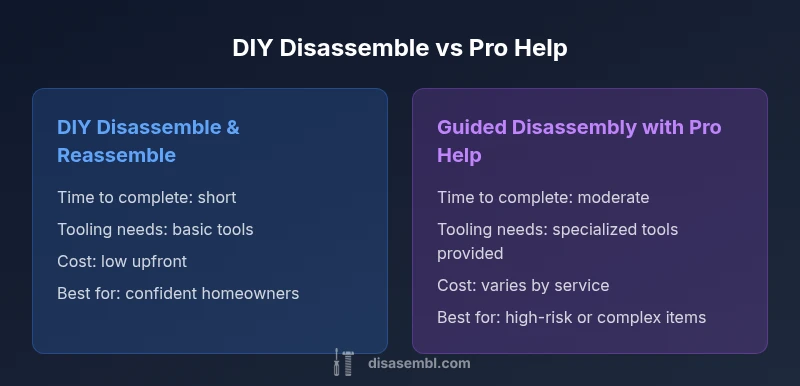
| Time to complete | short | moderate |
| Risk of damage | low with DIY basics | low to moderate with professional guidance |
| Tooling needs | basic hand tools | specialized tools provided or recommended by professionals |
| Cost range | low upfront (DIY) | variable depending on service and scope |
| Best for | homeowners confident with planning and labeling | items with complex assemblies or strict specs |
Benefits
- Lower upfront cost when you DIY and have the right tools
- Greater learning and practical skill development
- Full control over scheduling and workflow
- Ability to repurpose or reuse parts with confidence
Drawbacks
- Higher risk of damage from missed steps or torque errors
- Time-intensive, especially for large or complex items
- Requires a broad toolkit and work area
- Potential for incomplete reassembly if documentation is poor
DIY path works for confident homeowners, but for high-risk or complex items, professional guidance minimizes damage risk.
DIY disassemble and assemble can be cost-effective and empowering, yet it demands careful planning and documentation. For high-risk items or tight schedules, pro-guided disassembly reduces the chance of costly mistakes while preserving original specifications.
Got Questions?
What does disassemble and assemble involve for furniture?
Disassemble and assemble involves taking apart furniture in a controlled, reversible way. It requires labeling hardware, documenting the order of steps, and testing fit as you go to ensure a correct reassembly.
Disassemble and assemble is about taking apart furniture step by step, labeling pieces, and then putting it back together exactly the same way.
Do I need special tools to disassemble and assemble safely?
Most tasks start with common hand tools like screwdrivers, hex keys, and pliers. Electronics may require spudgers and precision drivers. Always consult manuals and avoid improvising with improvised tools.
Yes—start with basic tools, and add specialty tools only if the task calls for them.
When should I hire a professional for disassembly?
Hire a professional when the item is high-value, complex, or poses safety risks. Pro guidance can save time, preserve warranties, and reduce the chance of irreversible damage.
If it’s valuable or risky, getting a pro is often the smart move.
How can I prevent losing fasteners during disassembly?
Label and bag fasteners as you remove them, photograph each step, and create a color-coded map. This reduces confusion during reassembly and protects small parts.
Label, bag, and photograph everything so nothing goes missing.
How do I verify that reassembly is correct?
Check that all fasteners are secure, joints align without gap, and moving parts operate smoothly. Compare to your initial photos and notes, and test safety features before final use.
Double-check alignment with your notes and run safety tests.
Are there safety risks I should consider before starting?
Yes. Risk areas include sharp edges, heavy parts, and live electrical components. Use PPE, unplug devices, and work in a well-lit, ventilated space.
Watch out for sharp edges and live components; prep a safe workspace.
What to Remember
- Plan thoroughly before starting any disassembly.
- Label fasteners and photograph steps for accurate reassembly.
- Weigh risk vs cost when deciding between DIY and pro help.
- Keep tools and parts organized to streamline the process.