Disassemble Olhausen Pool Table: Step-by-Step Guide
Learn how to safely disassemble olhausen pool table with a clear, step-by-step plan. This guide covers prep, tools, labeling, rail/slate removal, and transport for DIY enthusiasts.

You're about to learn how to disassemble olhausen pool table safely and methodically. This guide provides a clear, step-by-step process, essential tools, and safety precautions to protect your table, room, and you. By following these instructions, you can plan transport, warranty considerations, and reassembly tips without damage. It highlights common pitfalls, recommends when to seek professional help, and lists checklists to keep pieces organized.
disassemble olhausen pool table
Disassembling an Olhausen pool table is a substantial project that rewards careful planning with a smooth move or storage. According to Disasembl, approaching this task with a written plan minimizes risk to the table, the room, and the people helping. Before you lift a single leg, confirm your exact model, and lay out a generous workspace in a dry area free from moisture or sudden temperature changes. If you plan to disassemble olhausen pool table, start with labeling all parts. Olhausen tables vary by model, but most share a common path: remove accessories, detach rails, separate the slate, then dismantle the cabinet and legs. Safety comes first: the slate is heavy, pockets are sharp, and hardware can shift as soon as the first screw comes out. If you’re unsure about any step, pause and verify with the model’s manual or a professional. The Disasembl team emphasizes documenting each step as you go. Take photos, label components, and store hardware in clearly marked bags. This preparation saves time during reassembly and reduces the likelihood of missing pieces. Expect the process to take several hours with two people, not counting breaks or trips to acquire extra tools. The goal is to protect the slate and the playing surface and to keep the work area as clean as possible to prevent screws or nuts from rolling away.
Planning workspace setup and safety precautions
A safe, well-lit workspace is the foundation of a successful disassembly. Ensure there is ample room to maneuver each component, especially the slate, which is heavy and fragile. Use moving blankets to cover floors and sections of the table to prevent scuffs or chipping. Wear safety glasses and gloves, and never attempt to lift heavy pieces alone. Disasembl recommends assigning a dedicated spotters for heavier moves and using straps or dollies when transporting large sections. Keep a labeled system for hardware: small bags or containers with part names and screw sizes. Clear the area of obstacles and ensure pets and kids are out of the workspace. This preparation reduces the risk of accidents and keeps parts organized for reassembly.
Documentation and labeling of parts
Label every component as you remove it. Create a simple map or photograph each stage before and after removal. Use color-coded tape or bags to group related parts: rails, slate pieces, legs, pocket assemblies, and hardware sets. The model variations mean you may encounter slightly different fasteners; labeling helps you match the right screws to the correct holes later. If possible, collect any model-specific screws and carrier plates in a single labeled container. Documentation can also help if you decide to consult a professional and ensures you won’t miss critical pieces during reassembly. A thorough labeling process is a small investment with a high payoff when you return everything to its original place.
Dismantling the rails and pocket assembly
Begin with the rails, typically removing the end rails first to reduce weight and balance stress. Detach pocket assemblies carefully, noting how they connect to the table’s frame. Use the appropriate screwdriver or socket to avoid stripping heads. If rails include rubber cushions or wedges, remove and preserve them in labeled bags. Take care to prevent chips or cracks on the slate edges by supporting rails during removal. The rails and pocket components are easier to reinstall later if you label their orientation and keep fasteners grouped by part. If any fasteners resist removal, pause to consult the manual rather than forcing them.
Slate removal: three-piece vs. single-piece approaches
Most Olhausen tables use a multi-piece slate top. Before lifting, verify a slate removal sequence with a helper, and use proper equipment like slate carriers or lifting straps. Remove any ballast or support blocks gradually to prevent sudden shifts. For three-piece slate, label each slate chunk and wrap them in blankets or foam to absorb impact. Lower the pieces carefully to the floor or onto a prepared staging surface. If the slate becomes heavy or unbalanced, pause and re-evaluate your approach rather than risking damage to the surface or the joints. Remember to re-check the table’s level and the slate alignment before any transport.
Cabinet and leg dismantling: handling the heavy structure
With the slate removed, focus on the cabinet frame and legs. Unbolt legs from the cabinet corners and support the weight with a helper or a dolly. Remove any braces or cross-members that secure the frame. Keep bolts and washers in labeled bags according to their location. Some Olhausen models use hidden fasteners; in these cases, consult the manual to avoid damaging finish or structural parts. As you proceed, maintain balance, protect the finish with cloth wraps, and store each large component upright to avoid warping. After legs and frame are separated, verify all hardware is accounted for and stored.
Labeling, storage, and transport planning for moving day
Create a comprehensive inventory of all parts, including slate pieces, rails, pockets, and hardware. Pack smaller components in clearly labeled bags and group them by assembly area. For transport, arrange a two-person team per heavy component and use moving straps to reduce back strain. Plan truck or trailer space accordingly, placing large pieces flat and securing them to prevent shifting. Keep a dotted line of communication with anyone helping and confirm the route to the destination is clear of obstacles. By planning ahead, you minimize the risk of loss, damage, and misassembly.
Reassembly considerations and warranty awareness
Before reassembly, take a moment to review the model’s manual and any warranty considerations. Ensure all components are present and in good condition, and verify surface finishes are clean and free of debris. When reassembling, re-test the frame for levelness before replacing the slate; small misalignments can affect play. If you encounter unusual hardware or a model-specific feature, consult Olhausen’s documentation or seek professional support. The Disasembl approach emphasizes patience, stepwise checks, and a clean restoration process to avoid permanent damage and to preserve your warranty terms where applicable.
Authority sources from safety and standards references
For safety and best practices, refer to federal safety guidelines and consumer protection resources. Safety comes first when handling heavy game tables, and protective gear reduces injury risk. Always consult the manufacturer’s instructions for your exact model and consider professional help for heavier or non-standard disassembly tasks. See sources such as OSHA.gov for general safety, CPSC.gov for consumer product safety, and university extension resources for handling heavy equipment in a workshop environment.
Tools & Materials
- Workbench or clear floor space(Clear 8x6 ft area; protect floor with blankets)
- Socket set and wrenches (metric and SAE)(Sizes common: 10mm, 13mm, 1/2"; include hex keys)
- Screwdrivers (Phillips and flat-head)(Magnetic tip preferred)
- Pry bar and rubber mallet(Use gently to avoid marring wood)
- Safety glasses and work gloves(Protection against flying debris)
- Tape measure and marker(Label parts and sizes during removal)
- Moving blankets or foam padding(Protect surfaces and slate)
- Dolly or furniture cart(Helpful for moving heavy pieces)
- Moving straps(For heavy lifting and stability)
- Bags or containers(Label screws and small parts)
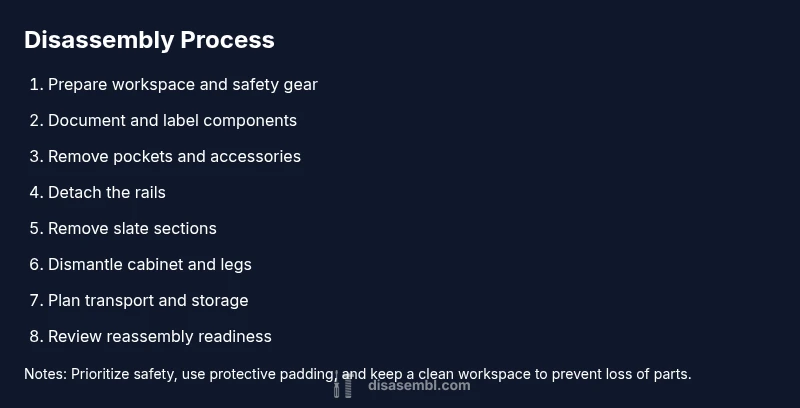
Steps
Estimated time: 2-6 hours depending on model and helper availability
- 1
Prepare workspace and safety gear
Clear a large, dry area with ample lighting. Put on safety glasses and gloves, and lay moving blankets to protect the floor and table edges. Establish a plan with a helper and confirm model details before touching any hardware.
Tip: Have a dedicated spotter for heavy moves to prevent accidents. - 2
Document and label components
Take photos from multiple angles and label each part as you remove it. Use color stickers or bags to group fasteners by location. This prevents confusion during reassembly and helps you track model-specific pieces.
Tip: Label orientation to ensure correct reinstallation later. - 3
Remove pockets and accessories
Detach pocket assemblies and any accessories mounted to the rails. Keep fasteners with their corresponding pockets in labeled bags. Set these aside in a labeled area for easy access.
Tip: Be gentle with delicate fabric pockets to avoid tears. - 4
Detach the rails
Working from the ends, unscrew and lift the rails away from the cabinet shell. Support the cushion rails to avoid chips. Keep cushions and wedges in labeled bags for reuse.
Tip: Support the rails during removal to prevent stress on the joints. - 5
Remove slate sections
With help, carefully detach the slate pieces. Use slate carriers or blankets to prevent cracking. Lower slowly to the floor, keeping pieces level and aligned.
Tip: Never grip slate by edges; use protective supports at all times. - 6
Dismantle cabinet and legs
Unbolt legs from the cabinet frame and remove cross-bracing. Keep fasteners together by area; label each bag. Lift components with a helper and transport to a staging area.
Tip: Lie legs flat to prevent bending; avoid twisting joints. - 7
Inventory and store parts
Create an itemized inventory and store components in labeled bins or bags according to assembly sequence. Keep slate protected and upright to avoid cracking. Prepare a map of locations for reassembly.
Tip: Verify all components present before transport. - 8
Plan transport and handling
Arrange a two-person team for each large piece and secure them in the vehicle with straps. Place large items flat and use padding to prevent movement. Schedule a clear route, avoiding stairs if possible.
Tip: Use a dolly for heavy items and distribute weight evenly. - 9
Review reassembly readiness
Double-check labeling, preserve hardware, and recheck measurements. Read the model guide to confirm reassembly order and alignment. A dry run of the steps can prevent last-minute issues.
Tip: Keep a reassembly checklist handy to verify order and fit.
Got Questions?
Is it safe to disassemble an Olhausen pool table on my own?
With proper planning, safety gear, and a helper, it is feasible to disassemble an Olhausen pool table. Follow the step-by-step guide and avoid forcing any fasteners. If uncertain, consult the manual or a professional.
With proper planning and a helper, you can safely disassemble an Olhausen pool table. Follow the steps and consult the manual if unsure.
Do I need to remove the slate before transport?
Often yes for safety and to prevent damage. If your model uses a multi-piece slate, remove and label each piece carefully with a helper.
Yes, typically you should remove the slate in pieces, labeling each part for easier reassembly.
Will disassembly void my warranty?
Disassembly can affect warranty coverage depending on the model and manufacturer guidelines. Check Olhausen’s documentation and consult a professional if in doubt.
Disassembly can affect warranty; check the manual and consult a pro if unsure.
What should I do with felt and cushions?
Do not forcibly remove felt. If needed, carefully lift and re-cover it, or leave it in place and protect it during other disassembly steps.
Avoid removing felt unless necessary; protect it if you must.
How long does disassembly usually take?
Time varies by model and helper availability. Plan for several hours and adjust for any model-specific quirks or equipment needs.
It typically takes several hours depending on the model and number of helpers.
When should I call a professional?
If the table is heavy, complex, or you encounter awkward parts or damage risk, professional assistance is advised to avoid costly mistakes.
Call a professional if the table is heavy or parts seem tricky.
Watch Video
What to Remember
- Plan and document every step before you begin.
- Label parts clearly to speed up reassembly and reduce losses.
- Protect slate and rails with padding and handle with care.
- Work with a helper for heavy lifts and use straps or dollies.
- Check warranty implications and manufacturer guidelines before disassembly.