Easy Assemble: Step-by-Step Guides to Build and Disassemble Furniture and Devices
Learn practical, label-first workflows for easy assemble across furniture, appliances, and electronics. This guide covers planning, parts organization, step-by-step methods, tool prep, and safe practices to reduce mistakes and speed up assembly.

Easy assemble means planning ahead, labeling parts, and following a clear, step-by-step process for reliable results when building or taking apart furniture, appliances, or electronics. It relies on labeled components, organized hardware, and verifying fit before finishing. Practically, this approach minimizes rework and helps users of all skill levels complete projects confidently.
Why 'easy assemble' matters in DIY projects
DIY projects thrive when you can transform ideas into tangible results without getting bogged down by missing screws or ambiguous diagrams. The concept of easy assemble blends design practicality with methodical planning. By focusing on labeled parts, consistent hardware, and a clear assembly sequence, you reduce guesswork and rework. This approach is particularly helpful for beginners and busy homeowners who want dependable outcomes with minimal frustration. According to Disasembl, embracing a standardized process turns complex assemblies into manageable steps that anyone can complete with confidence. When you practice easy assemble, you also benefit from better quality results and easier maintenance down the road.
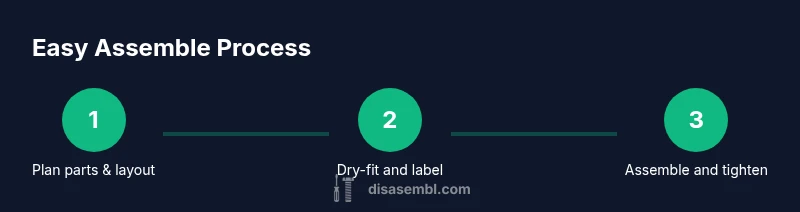
Key strategies to achieve easy assembly
- Plan before you touch a screw: read the instructions, identify all parts, and group hardware by size.
- Label everything: mark bags or labels with the part numbers; take a photo of the layout to reference later.
- Prepare a dedicated workspace: a clean, uncluttered surface reduces mistakes and missing parts.
- Dry-fit and test connections: don't tighten everything until fit is confirmed.
- Follow a logical sequence: match the manufacturer's numbered steps; if steps are missing, use a logical order (frame first, then panels, then fasteners).
- Check alignments as you go: use a level or straight edge to ensure pieces align; re-check before final tightening.
Easy assemble also helps beginners feel confident, since every action has a clearly defined purpose. Disasembl insights emphasize the value of pre-planning to prevent late-stage disassembly.
Choosing parts and hardware
Quality matters most when you want an easy assemble experience. Look for hardware labeled for the kit, matching screw lengths, and dowels sized to fit the holes. Inspect bags before starting; report any damaged or missing pieces to the seller or manufacturer. If you are unsure about a screw length, test with a single fastener in a sacrificial piece to avoid cross-threading. A well-organized hardware kit reduces the likelihood of misfitting parts and speeds up assembly, aligning with the idea of easy assemble.
Step-by-step example: assembling a flat-pack desk
Inspect the kit and lay out parts: open the box, count parts, label them, and confirm you have all screws, dowels, and fittings. Attach the desk frame: connect the side panels to the base using the supplied screws, ensuring the frame sits level. Secure the legs or supports: attach legs with the appropriate washers or spacers as required, aligning holes before tightening. Add cross-bracing and intermediate panels: insert dowels or connectors, then loosely secure to allow minor adjustments. Attach the top panel: align with the frame and secure with screws in a crisscross pattern to avoid warping. Final checks and cleanup: tighten remaining fasteners evenly, wipe surfaces, and test stability by applying gentle pressure. This narrative illustrates how an easy assemble mindset translates to real-world furniture projects, reducing surprises during furniture assembly.
Common pitfalls and how to avoid them
Mistakes often happen when parts aren’t organized or when screws are forced into the wrong holes. To avoid this, always group hardware first, check each part against the instructions, and never skip dry-fitting. Misalignment is another frequent issue; use a level, clamps, or straightedge to verify planes before final tightening. Over-tightening can strip threads or crack panels, so tighten gradually and in a star pattern when multiple fasteners connect a single piece. Finally, never improvise replacements; if a piece is missing or damaged, contact the manufacturer or vendor rather than making a risky substitute. Following these habits keeps the process smooth and reinforces the core idea of easy assemble.
Tools, aids, and printable checklists for easy assembly
Having the right tools on hand speeds up any project. A basic toolkit should include the following items, plus a printed checklist you can reference during assembly:
- Allen wrench (hex key): usually included in the kit
- Phillips screwdriver (size #2): for common screws
- Flathead screwdriver: optional but useful for slotted screws
- Measuring tape: helps ensure correct spacing and alignment
- Rubber mallet: gentle taps prevent damage when parts are snug
- Safety glasses: protect eyes during impact or debris
Creating a printed, step-by-step checklist helps you stay on track and serves as a reliable reference for future projects. Disassembling and reassembling tasks become faster when you use checklists to capture part counts and the sequence of steps you followed.
Maintenance and tips for long-term ease
After completing a project, a quick post-assembly routine can keep future disassembly and reassembly straightforward. Wipe down surfaces to remove dust, check for loosening fasteners after a few days of use, and store hardware in labeled bags to simplify reassembly. Periodic checks of legs, braces, and joints extend the life of furniture and devices, making future tweaks or upgrades easier. By embedding these habits into your workflow, you reinforce the easy assemble mindset and reduce the time needed for maintenance and future projects.
Tools & Materials
- Allen wrench (hex key)(Typically included; use the size indicated in the hardware bag.)
- Phillips screwdriver (size #2)(For most Phillips screws included in flat-pack kits.)
- Flathead screwdriver(Useful for slotted screws or prying; optional.)
- Measuring tape(Helpful for ensuring correct spacing and alignment.)
- Rubber mallet(Taps without damaging parts; helpful for snug fits.)
- Cordless drill with screwdriver bit(Saves time on multiple screws; use moderate torque.)
- Safety glasses(Protect eyes from debris and accidental slips.)
- Cleaning cloth(Finish wipe after assembly to remove smudges.)
Steps
Estimated time: 60-90 minutes
- 1
Prepare workspace and read instructions
Clear a stable surface and review the diagram. Gather all parts and hardware, matching labels to the instruction list. Confirm you understand the order to avoid backtracking.
Tip: Keep the instruction sheet within sight and mark any unclear parts for later clarification. - 2
Sort parts by type and bag label
Lay components on the table in labeled groups (frames, panels, screws, connectors). This reduces mis-sorting and speeds up assembly. If bags are unmarked, reference the part numbers in the manual.
Tip: Take a quick photo of the parts layout for future reference. - 3
Dry-fit the major frame without screws
Connect the main pieces loosely to check alignment. This helps you catch misdrilled holes or warped panels before committing to fasteners.
Tip: Do not tighten yet; allow tiny adjustments if needed. - 4
Assemble the frame and base
Join side panels to the base using the appropriate bolts or screws. Use washers if specified and keep joints square as you tighten gradually.
Tip: Tighten in small increments in a crisscross pattern to avoid skew. - 5
Attach legs or supports
Affix legs or central supports according to the kit’s layout. Ensure floor contact points are level and that fasteners sit flush.
Tip: If a leg is misaligned, loosen nearby screws slightly and reposition before retightening. - 6
Add cross-bracing and intermediate panels
Install braces and panels to increase rigidity. Align holes before inserting connectors to prevent cross-threading.
Tip: Work methodically: install one side, then the opposite to balance tension. - 7
Tighten fasteners in sequence and verify alignment
Go back through all fasteners, tightening evenly and in order. Recheck plumb and level with a straightedge or level before finalizing.
Tip: Avoid overtightening; excessive torque can damage material. - 8
Mount top panel and perform final checks
Attach the top panel, ensure flush edges, and perform a final stability test. Clean surfaces and stylize cables or cords as needed.
Tip: Test the final product by applying moderate force to verify sturdiness.
Got Questions?
What is easy assemble in practice?
Easy assemble means planning ahead, labeling parts, and following a clear, step-by-step plan to minimize mistakes.
Easy assemble means planning, labeling parts, and following a clear step-by-step plan.
Do I need special tools for every kit?
Not always; many kits include needed tools. A basic toolkit helps, but you can often complete tasks with common hand tools.
Usually you can start with basic tools; check the kit.
What should I do if parts are missing or damaged?
Contact the seller or manufacturer and request replacements. Keep packaging and order numbers for reference.
If parts are missing, contact the seller and request replacements.
How can I avoid common mistakes during assembly?
Plan, label parts, dry-fit connections, and tighten in a logical sequence.
Plan, label, dry-fit, tighten in order.
Is it safe to use a power drill for assembly?
Only with appropriate torque settings and slow speed; avoid overtightening and damage to parts.
Only use power tools with care.
Watch Video
What to Remember
- Plan before you start for smoother assembly
- Label parts and organize hardware to save time
- Dry-fit before tightening to ensure proper fit
- Follow a logical sequence for faster, accurate results