How to Disassemble a Big Fig Bed Frame
Learn how to safely disassemble a Big Fig bed frame with a clear, step-by-step method. This guide covers prep, tool needs, and a careful teardown to keep parts organized for easy reassembly.

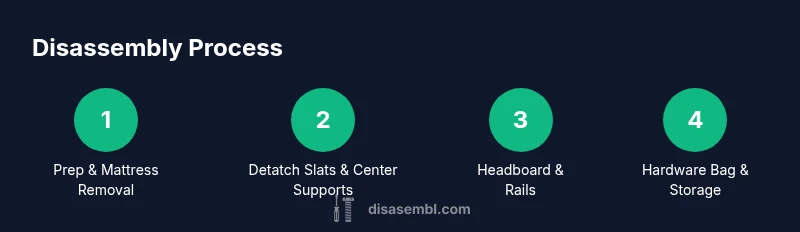
We’ll show you how to safely disassemble a Big Fig bed frame. Start by removing the mattress, then detach slats and center supports, unbolt connectors for the headboard and rails, and label all hardware for easy reassembly. You’ll need basic hand tools, zip bags, and a camera to document the setup. Disasembl’s methods prioritize safety and organization.
Understanding the Big Fig bed frame components
If you’re learning how to disassemble big fig bed frame, recognizing its components helps plan the process. Most Big Fig designs include a headboard, side rails, a central support system, and removable slats. Knowing how these pieces connect clarifies which fasteners to remove first and where to store them. This awareness also reduces the risk of bending or snapping parts during takedown.
Safety and prep before you begin
Before touching any hardware, clear the area, protect the floor, and unplug any nearby electronics if your frame has integrated lighting or a powered headboard. Wear gloves to prevent splinters and use a moving blanket to cushion the frame while you maneuver it. Always check weight limits and ask a helper if the frame is bulky; two people reduce strain and prevent damage. Preparing the space not only protects the furniture but also keeps your back safe from unnecessary strain.
Disassembly strategy and sequence
The general sequence helps minimize lost parts. Start with removing the mattress, then take out slats, detach center supports, and finally disconnect the headboard and footboard. Keep fasteners in labeled bags per component and photograph connections as you go. If your frame uses pins or cam connectors, twist or slide them out gently while supporting the adjacent wood. Following a planned order reduces the chance of mixing hardware that fits multiple spots.
Handling, labeling, and storing hardware
Label every bag with the component name and number, and keep small parts in clearly marked containers. Use a portable toolbox or a shallow bin to prevent parts from rolling away during transit. Take sequential photos as you disconnect assemblies so reassembly is straightforward. Disasembl recommends organizing screws by size and length, but always prioritize safety and clarity over speed when handling unfamiliar fasteners.
Common mistakes and how to avoid them
Common errors include attempting to pull apart joints without loosening screws, overlooking hidden fasteners, and failing to protect wooden surfaces. Avoid forcing parts, which can cause chipping or cracking; instead, loosen fasteners a quarter-turn at a time and double-check alignment. Keeping your work area clean and well-lit helps you spot small parts before they vanish behind a blanket or under a rug. The safer approach is to pause, reassess, and proceed with deliberate, controlled movements.
Reassembly readiness and next steps
After disassembly, lay out each component in an orderly grid and confirm that all hardware is accounted for. Photograph each group of pieces if you plan to store them for a long period, and consider placing components in labeled totes for long-term storage. When you’re ready to reassemble, follow the reverse of ваш disassembly steps, pausing to verify alignment and fit before tightening connections. By maintaining organization now, you’ll reduce frustration later and protect your investment.
Tools & Materials
- Mattress and bedding(Remove and set aside to access the frame without obstruction)
- Screwdriver set (Phillips and flat)(Contains multiple bits for various fasteners)
- Allen/hex key set(Have a range of sizes to fit hidden bolts)
- Socket wrench or adjustable wrench(Useful for bolts on rails or braces)
- Zip bags or labeled cups(Bag and label hardware by component and size)
- Marker and tape(Label bags and mark positions during disassembly)
- Protective gloves(Avoid splinters and improve grip)
- Moving blankets or soft padding(Protect wood surfaces while moving the frame)
- Camera or smartphone(Document connections for easy reassembly)
Steps
Estimated time: 45-75 minutes
- 1
Remove the mattress and bedding
Clear the bed completely by removing the mattress, foundation, and any bedding. This creates a clean workspace and reduces the risk of accidentally dropping parts. Taking the mattress off first also helps you access frame components more easily and safely.
Tip: Do this first thing to prevent banging your shins on a rigid mattress frame. - 2
Clear the surrounding area and protect the floor
Move the bed away from walls and lay down moving blankets or a protective surface. This prevents scratches on the floor and on the bed frame as you maneuver components. A clear space also reduces the chance of losing small hardware.
Tip: Have a spotter ready to help with heavy sections. - 3
Detach removable slats from the frame
If your Big Fig bed uses slats, carefully lift or slide them out without forcing. Keep each slat in order and note how they sit within the frame to simplify reassembly.
Tip: Label or photograph each slot to maintain alignment during later reassembly. - 4
Disconnect center supports and braces
Loosen bolts or connectors that hold the center support system in place. Do not yank; support the center piece as you release fasteners to prevent sudden drops or warping.
Tip: Support long sections with both hands to control weight. - 5
Remove headboard and footboard connections
If your model uses a headboard or footboard, locate the main connectors and gently separate them. Keep hardware together in clearly labeled bags.
Tip: If bolts are tight, use a longer lever or a bit of gentle tapping with a mallet on the non-threaded side. - 6
Take apart side rails and cross members
Loosen any remaining fasteners along the side rails and cross braces. Remove components in manageable chunks to avoid overloading single joints.
Tip: Work in small sections to avoid creating a tangled cluster of pieces. - 7
Bag and label all hardware
Group screws, bolts, washers, and nuts by component. Use a marker to label each bag with the corresponding piece of the frame.
Tip: Always double-bag tiny parts to prevent loss. - 8
Perform a final check and prepare for storage
Inspect all removed components for damage. Wipe dust and place pieces in labeled containers or wrap in blankets for storage.
Tip: Take a final photo of the full teardown for reference during reassembly.
Got Questions?
Do I need to remove the mattress before disassembly?
Yes. Remove the mattress and bedding to access the frame safely and to prevent damage to parts during teardown.
Yes—start by removing the mattress and bedding so you can access the frame without obstruction.
What if I can’t find some bolts or fasteners?
Look for hidden or recessed connectors and use a flashlight. Photograph each area as you explore to avoid misplacing parts.
If you can’t find bolts, check for hidden connectors and take photos so you can locate them later.
Will disassembling affect warranty terms?
Warranty terms vary by brand and model. Check the Big Fig manual or contact support to confirm whether DIY disassembly affects coverage.
Warranties vary; check the manual or contact support to be sure how disassembly impacts coverage.
Can I disassemble a Big Fig bed frame by myself?
Yes, but large frames can be heavy. If possible, have someone assist you to prevent injury and reduce damage.
You can, but a helper makes it safer and easier to manage the weight and awkward angles.
What should I do with the slats after removal?
Store slats in a labeled bag or flat container to prevent bending and misplacement during storage or transport.
Keep the slats flat and labeled so you don’t mix them up later.
How can I avoid damaging wood during disassembly?
Work slowly, support joints, and avoid twisting components. Use padding and keep surfaces clean to prevent scratches.
Take it slow and support parts to avoid wood damage.
Watch Video
What to Remember
- Plan before you touch any fasteners
- Label and bag hardware by component
- Protect floors and wood surfaces during teardown
- Document connections for easier reassembly
- Check for hidden fasteners before forcing joints