How to Tell if a Strut Assembly Needs Replacing: A DIY Troubleshooting Guide
Learn how to tell if a strut assembly needs replacing, diagnose common signs, and follow a safe, step-by-step replacement guide for furniture and appliances.

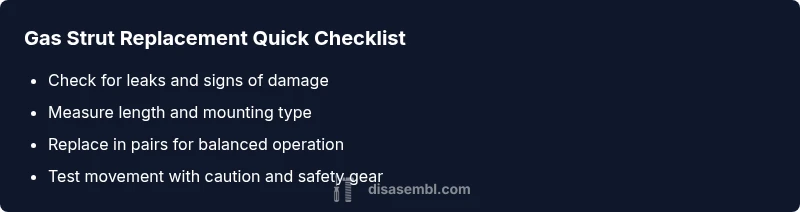
A leaking or weak gas strut is the most common sign that a strut assembly needs replacing. Start by inspecting for oil seepage and hardened seals, then test movement and holding force by lifting and releasing the load. If the strut fails to hold, slows to close, or shows visible damage, plan a replacement.
Signs your strut assembly may be failing
If you’re wondering how to tell if strut assembly needs replacing, start with the symptoms you observe with your furniture or door. According to Disasembl, the most telling signs are when the load no longer holds, the strut sags, or the mechanism becomes stiff or noisy. Look for oil leaks around the seals, visible scratches on the piston rod, and misalignment at the mounting points. In a cabinet or door, a slow-close action that suddenly becomes abrupt or stops midway is a red flag. In a chair with a gas lift, the seat may drop under light pressure or fail to stay at your chosen height. If you notice any of these issues, plan for replacement rather than repair, as leaks or bent components rarely regain full performance after long-term use.
How to inspect a gas strut: visual and physical checks
Begin with a visual inspection for signs of leakage along the seals, especially at the end fittings. A damp or oily residue around the joint often means the gas chamber is failing. Check the rod for pitting, corrosion, or burrs that could indicate damage. Gently compress and extend the strut by hand to feel for uneven resistance or binding. Confirm mounting hardware is tight and that the strut is properly aligned with its pivots. If the strut moves jerkily or sticks, or you notice reduced force holding the load, it's time to consider replacement. Always support the object securely before testing and wear protective gloves to avoid pinching.
When to replace versus repair
Most strut failures require replacement rather than repair. If you see any sign of gas leakage, a visibly bent or cracked housing, or consistent loss of holding power, replacement is the safer, longer-lasting option. Lubrication or tightening a mounting screw may help briefly if the issue is purely friction, but only as a temporary measure. In furniture that uses two or more struts, replace in pairs to maintain balanced operation. Verify you buy the same length and the same lift rating as the original, or the mechanism may operate poorly or fail early.
Tools, safety, and best practices
Gather a basic toolkit: screwdriver or hex key, pliers, adjustable wrench, replacement strut of the same length and load rating, and a cloth for catching any drips. Work on a stable surface and support the weight to prevent the furniture from dropping. Disconnect any adjacent components that could move unexpectedly, and wear eye protection. Do not attempt to disassemble or replace struts while the item is mounted in a way that could cause sudden release. When in doubt, consult the manufacturer’s guidelines or a professional. Disasembl emphasizes choosing the correct mounting orientation and handling the job with care to prevent injury, pinching, or accidental drops.
Steps
Estimated time: 30-60 minutes
- 1
Identify correct replacement
Measure the extended length, collapsed length, and mounting style of the existing strut. Note the pivot type and which end attaches where. This ensures the new unit matches perfectly and provides predictable performance.
Tip: Take photos of both ends before removal to reference during installation. - 2
Prepare workspace and safety
Clear the area, support the load securely, and gather the necessary tools. If the item is heavy, enlist a helper. Wear gloves and eye protection to avoid pinching or oil exposure.
Tip: Work on a flat, stable surface to prevent slips during removal. - 3
Remove the old strut
Carefully disconnect the end fittings from their mounts using the appropriate tool. Keep screws or bolts in a labeled container so you don’t mix hardware. Do not pry the piston rod directly; release any tension gradually.
Tip: Support the load with one hand while disconnecting the fittings. - 4
Install the new strut
Attach the top pivot first, then the bottom. Ensure orientation matches the original unit and that the strut moves freely without binding. Fasten all hardware securely but avoid over-tightening.
Tip: Double-check the alignment of the joints to prevent binding on movement. - 5
Test operation with load
Carefully reintroduce the load and test the lift and hold function. Confirm the strut extends smoothly and maintains position without drooping. If it sticks, check mounting points for misalignment or debris.
Tip: Keep hands clear of pinch points during testing. - 6
Finalize and dispose
Secure all covers, clean up any residue, and dispose of the old strut per local regulations. If you replaced a paired set, repeat the same steps on the other unit for balanced performance.
Tip: Record the replacement model for future maintenance.
Diagnosis: The strut fails to hold load or returns slowly.
Possible Causes
- highGas chamber leakage or loss of pressure
- highDamaged or worn seals
- mediumBent or damaged piston rod
- lowCorrosion or excessive wear
Fixes
- easyTighten mounting hardware and re-seat pivots if loose
- easyClean and lubricate pivot points where permitted by the manufacturer
- mediumReplace the strut with a new unit of the same length and load rating
- mediumIf two or more struts are used, replace in pairs and verify orientation
Got Questions?
What are the telltale signs that a strut needs replacing?
Common signals include oil leakage, loss of load, slow or stiff operation, and unusual noises. If you notice these, replacement is usually the best option rather than repair.
Look for leaks and loss of resistance; replace the strut if you see visible damage.
Can struts be repaired, or should they be replaced?
Most gas struts cannot be repaired once they leak. Replacement is the standard solution. Minor friction or stiffness might improve with cleaning or lubrication where approved by the manufacturer.
Leaks usually mean replacement; repairs are rarely effective long-term.
How long do struts typically last?
Lifespan varies based on use and environment; there is no fixed number. High-use furniture or outdoor exposure can shorten life.
There isn’t a set lifespan; it depends on use and conditions.
Should I replace both struts at the same time?
For balanced performance, replace both struts in a pair. If you only replace one, check the other for wear and plan to replace it soon.
If it’s a two-strut setup, replace both to keep balance.
What tools do I need to replace a strut?
Common tools include a screwdriver or hex key, pliers, an adjustable wrench, and a replacement strut of matching length and rating.
You’ll usually need a few common hand tools and the right replacement unit.
Is DIY replacement safe?
DIY replacement is possible if you follow safety steps, support the load, and keep others away from pinch points. If unsure, hire a professional.
Yes, it can be safe if you follow steps and take precautions; otherwise seek help.
Watch Video
What to Remember
- Inspect for leaks and test hold before buying.
- Match length and load rating exactly.
- Replace in pairs for symmetrical setups.
- Prioritize safety and proper disposal.