How to Use Assemble: A Step-by-Step DIY Guide
Learn how to use Assemble for reliable disassembly and reassembly tasks with practical steps, safety tips, and expert guidance from Disasembl.

In this guide, you will learn how to use assemble to perform safe, effective disassembly and reassembly tasks. You’ll start by preparing your workspace, selecting the right tools, and following a clear, repeatable process. This quick answer serves as a blueprint for the full step-by-step approach that follows.
How to use assemble: core idea and scope
When people ask how to use assemble, they’re seeking a reliable, repeatable approach to taking things apart and putting them back together. Assemble is not just about removing screws; it’s about understanding fastener types, joint designs, and the sequence that preserves material integrity. According to Disasembl, success starts with defining the scope: are you disassembling for recycling, relocating, or repairing? By clarifying intent, you tailor pressure, leverage, and safety steps. This foundation helps you avoid over-tightening, deformation, or misplaced hardware, which are common errors when teams rush through a project. Mastery comes from applying a consistent method across projects—from a flat-pack chair to a complex appliance—so you can reuse parts or reassemble with confidence.
wordCountToKeepNote1
Tools & Materials
- Phillips and flathead screwdrivers (sizes #1-3)(Carry a small set for different screws)
- Allen/Hex wrenches (multi-size)(Common sizes 2.5–6 mm)
- Torx drivers (T10–T55)(Useful for higher-end furniture hardware)
- Pliers (needle-nose)(Grip and twist stubborn hardware gently)
- Tape measure(Verify dimensions and spacing)
- Utility knife(Cut materials if needed during disassembly)
- Mallet or rubber hammer(Gently persuade joints without damage)
- Socket wrench set(Better leverage for stubborn nuts)
- Safety glasses(Protect eyes from flying debris)
- Work gloves(Grip and protect hands)
- Utility light or headlamp(Improve visibility in tight spaces)
- Level and straight edge(Check alignment after reassembly)
Steps
Estimated time: Total 30-60 minutes depending on complexity
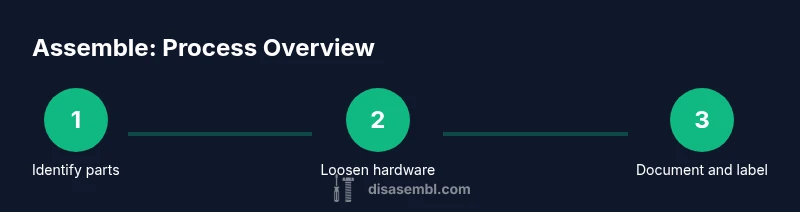
- 1
Identify parts and reference the manual
Unpack components and lay out hardware. Compare against the parts list, note fastener types, and determine the safe order of removal. This reduces surprises that can damage joints or panels.
Tip: Take photos during each phase to document the relationship of parts. - 2
Prepare the workspace and safety setup
Create a clean, well-lit surface with a soft mat to prevent scratches. Put safety glasses on, and remove any clutter that could cause trips or tool misplacement.
Tip: Use a tray or shallow bin to collect small hardware as you remove it. - 3
Disconnect power and water supplies if needed
For devices with electrical or plumbing connections, ensure power is off and hoses are drained before removing shell panels or covers. Label wires or hoses for reassembly.
Tip: Use a voltage tester to confirm no live circuits before touching components. - 4
Loosen fasteners in a systematic sequence
Start with exterior fasteners and progress toward internal connections. Turn screws counterclockwise, but do not fully remove until you know how parts rest. Keep hardware organized by type.
Tip: Loosen one or two turns at a time to avoid sudden shifts that could damage joints. - 5
Document and bag hardware by section
Place removed screws, bolts, and brackets in labeled bags or containers corresponding to their assembly zones. This makes reassembly straightforward and reduces mix-ups.
Tip: Label bags with a marker or tape and snap a quick photo of each bag's contents. - 6
Separate subassemblies and inspect joints
Gently separate subassemblies and check for damage, wear, or glue. If you encounter unusual fasteners, take note and set them aside for replacement or specialized tools.
Tip: Replace any worn fasteners to prevent future failures.
Got Questions?
What is the best order to disassemble furniture using assemble?
Start with exterior panels and visible fasteners, then move inward to screws and brackets. Keep track of steps by bagging hardware and photographing each stage to ensure smooth reassembly.
Begin with the outer panels and visible screws, then work toward interior joints. Bag hardware and photograph each stage to make reassembly easy.
What should I do if a fastener won’t turn?
Do not force it. Check for cross-threading and confirm you’re using the correct tool size. Apply penetrating oil carefully and let it sit, then gently back out or cut a new slot if needed.
If a fastener sticks, don’t force it. Check the size, try a different bit, and loosen gradually. If needed, use a bit of oil and back it out slowly.
Can I reuse screws after disassembly?
Only reuse screws if they show no corrosion, stripping, or head damage. Otherwise replace with matching types and lengths to avoid failures.
Only reuse screws if they’re in good shape; otherwise replace with matching hardware to prevent problems.
How do I prevent damage to delicate panels during disassembly?
Support panels with hands or a soft pad, use a rubber mallet for alignment, and avoid prying with metal tools that could gouge surfaces.
Support fragile parts with your hands, use a rubber mallet for alignment, and avoid metal prying tools.
What maintenance is recommended after reassembly?
Tighten connections gradually after a short test, lubricate movable joints if needed, and inspect for looseness after a light period of use.
After reassembly, test for tightness, lubricate moving parts if needed, and check for any looseness after use.
Watch Video
What to Remember
- Master a repeatable disassembly method with Assemble.
- Organize hardware by section to simplify reassembly.
- Prioritize safety and documentation for long-term success.
- Inspect joints and fasteners for wear before reassembly.
- Label and photograph each step to prevent mistakes.