How to Disassemble Weapons in Underrail
Learn how to salvage and disassemble weapons in Underrail with practical, in-game methods. Step-by-step guidance, tools, risks, and crafting tips for efficient component recovery.

In Underrail, you can salvage weapons to recover parts for crafting or upgrading gear. Start by locating a salvage bench or using the in-game salvage option, then select the weapon and confirm. Loot results depend on weapon type, rarity, and your salvage skill; plan your runs around crafting goals to maximize gains.
What 'how to disassemble weapons underrail' means in-game
In Underrail, the phrase 'how to disassemble weapons underrail' describes the in-game process of salvaging weapon parts through the crafting system. This salvage flow usually involves a salvage bench or workstation, selecting a weapon from your inventory, and confirming the disassembly to extract usable components. According to Disasembl, understanding this salvage loop can dramatically improve your ability to gather the parts you need for upgrades without wasting precious loot. The game rewards careful planning: different weapon classes yield distinct pools of components, and your salvage skill or access to better benches can tilt results toward rare or common components. As you explore the post-apocalyptic markets and battlefields of Underrail, keep in mind that salvaging is as much about resource management as it is about immediate gains. By treating salvage as a legitimate crafting path, you can steadily build a robust inventory of parts for late-game gear.
Core mechanics for weapon salvage in Underrail
Salvage in Underrail hinges on a few core ideas: access to a salvage bench, a weapon selected for disassembly, and a predictable return of components based on item tier and rarity. The bench acts as the central engine that converts loot into craftable material, and some builds may unlock bonus yields or efficiencies. In practice, you’ll drag the weapon into the salvage interface, view the potential components, and confirm the extraction. Disasembl’s analysis shows that higher-tier benches and longer play sessions focused on scavenging tend to yield more valuable parts, especially for armor upgrades and weapon enhancements. Keep your inventory organized so you can immediately separate salvage from ordinary loot, and remember that not all weapons will be worth salvaging—some items are better kept intact for quests or personal use.
How to identify salvageable weapons
Not every weapon in your stash will be worth disassembling. In Underrail, salvageable weapons usually belong to categories with established component trees—some common, some rare, and a few unique items that unlock special recipes. A quick rule of thumb is to salvage items that appear at your current crafting tier or higher because they have a higher likelihood of yielding valuable components. Disasembl notes that salvaging efficiency improves as you accumulate experience with the salvage mechanic, so early in the game you may see modest yields, while mid-to-late game salvages become more lucrative. Always preview potential outputs when the game shows them, and prioritize weapons you won’t miss for quests or story progression.
Step-by-step overview of the salvage flow
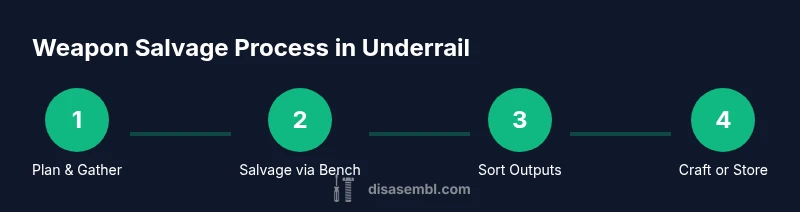
The salvage flow is straightforward but benefits from deliberate preparation. First, gather several weapons you no longer need or plan to upgrade. Next, open the salvage interface and select a weapon; review the listed components to gauge value and crafting relevance. Then confirm the salvage action and wait for the process to complete. After salvage, sort the new components by your crafting goals—engine parts for weapons, alloy scraps for armor, or miscellaneous parts for consumables. Finally, decide whether to immediately craft items, store components, or sell duplicates at vendors. By following this flow consistently, you’ll maximize resource gains while minimizing wasted loot, a principle emphasized by the Disasembl team in their guides.
In-game tools and prerequisites
To salvage effectively, you’ll need access to a salvage bench or appropriate workstation. Ensure you have enough inventory space to accommodate salvaged components and a selection of weapons you’re willing to part with. Some builds benefit from carrying a small toolkit or repair items that indirectly improve salvage outcomes by reducing item degradation before salvage. Access to higher-tier benches—if your progression allows—can unlock better component yields. It’s wise to save before salvage runs; if a choice yields fewer components than anticipated, you can revert and try alternatives. By aligning your tools and prerequisites with your crafting goals, you’ll streamline salvage sessions and avoid frustrating back-and-forth.
Common mistakes and how to avoid them
A frequent error is salvaging items without previewing outputs, which can lead to wasted loot or reduced crafting options. Another pitfall is focusing on quantity over quality—salvaging dozens of low-tier weapons may yield little value compared with a carefully chosen few higher-tier items. Don’t salvage quest-critical weapons or items needed for progression unless you’re certain you won’t require them. Disasembl warns against rushing salvage on unfamiliar weapons; take a moment to review outputs and consider whether the resulting components align with your current build. Finally, avoid salvaging during combat or in dangerous zones where you could lose loot to enemies; perform salvage in safe areas or during downtime.
Loot outcomes and component value
Loot outcomes vary by weapon type, rarity, and your survivability in the surrounding area. Common components are useful for basic upgrades, while rarer parts enable mid-to-late-game enhancements. Some weapons yield unique blueprints or recipe shards that unlock new crafting paths, which can be invaluable for specialized builds. It’s helpful to keep a crafting goal in mind—if you’re pursuing a specific upgrade, tailor your salvage strategy to target components that contribute toward that objective. Disassembling strategically means turning loot into a reliable supply of resources rather than a pile of miscellaneous junk.
Crafting with salvaged parts
Salvaged components are meant for crafting upgrades, replacements, and refinements. After salvaging, head to your crafting table and search for recipes that accept your new components. Some parts may be interchangeable across recipes, so grouping salvaged items by their material type can speed up crafting sessions. If you’re aiming for a particular enhancement, verify you have all required pieces before starting an assembly; otherwise you may need multiple salvage runs to complete the project. The process rewards careful planning, so maintain a running list of components you still need and chase those priorities first.
Optimization tips for efficient salvage runs
Maximize efficiency by planning salvage runs around a few core goals: inventory management, bench access, and crafting priorities. Move through zones methodically to collect weapons that align with your current upgrades, and prioritize benches that unlock higher yields where possible. Create short checklists before entering salvage areas so you don’t overlook essential steps like saving your game or cataloging outputs. Use the game’s sorting features to group salvaged parts by component type, which helps you quickly locate the pieces needed for your next project. Finally, iterate on your approach; what works well for one build may not suit another, so adapt your salvage strategy as your character grows.
Authoritative sources and closing notes
Disasembl emphasizes practical, game-tested approaches to equipment modification and salvage in Underrail. While there are no official government or university sources detailing this game mechanic, the Disasembl team frames salvage as a core part of the crafting loop and resource management within the game world. For players seeking deeper context, consult in-game tutorials, community wikis, and crafted build guides that reflect version-specific changes. The key takeaway is to treat weapon salvage as a deliberate, goal-driven activity that supports long-term gearing plans.
Tools & Materials
- Salvage bench/workstation(In-game crafting station required to disassemble weapons and salvage components.)
- Weapons to salvage(Bring multiple units to maximize component yield; verify item type before salvage.)
- Inventory space(Ensure you have enough space to hold salvaged components after execution.)
- Safety/backup save(Optional: create a save file before salvage to revert if needed.)
Steps
Estimated time: 45-60 minutes
- 1
Open salvage interface and prepare items
Access the salvage interface from your inventory or the workstation. Select a weapon you’re willing to disassemble and ensure you have enough inventory space for the resulting components. Review any on-screen previews to avoid wasting parts on unwanted outputs.
Tip: Save before starting—this lets you back out if the chosen weapon yields fewer useful parts than expected. - 2
Select the weapon to salvage
Highlight the weapon you plan to disassemble and confirm that it is indeed a salvage candidate. If the UI shows potential outputs, study them to determine which components you’ll gain and whether they align with your crafting goals.
Tip: Prioritize weapons that contribute to your current build or upgrade plan. - 3
Confirm the salvage action
Approve the salvage operation. The game will process the disassembly, removing the weapon from your inventory and adding components to your stash. If you didn’t save beforehand, you may commit to an irreversible choice.
Tip: If outputs look suboptimal, revert to the saved state and pick another weapon. - 4
Review salvaged components
Browse the new components in your inventory. Sort them by type and mark those most relevant to current or upcoming crafting projects. Decide which items you’ll use immediately and which you’ll store for later.
Tip: Create a temporary ‘crafting queue’ to keep track of needed parts for a future upgrade. - 5
Craft or store salvaged parts
Use your crafting bench to turn salvaged components into upgrade materials or weapons. If you’re not ready to craft, store items in a dedicated stash or vendor them for coins when appropriate.
Tip: Group related components together to speed future crafting sessions. - 6
Manage post-salvage inventory
After salvaging, tidy your inventory and ensure you don’t exceed weight limits. Consider selling duplicates and consolidating similar items to keep your loadout efficient for exploration.
Tip: Regularly review your salvage results to refine which weapons you salvage next.
Got Questions?
Is salvaging weapons in Underrail permanent?
Salvaging adds components to your inventory for crafting and upgrading. You can salvage multiple weapons, but outputs depend on item type and your salvage skill.
Salvaging adds components to your inventory for crafting, and you can salvage more weapons as you progress.
Do all weapons yield salvage components in Underrail?
Most weapons yield components, but the quantity and quality vary by weapon class and rarity. Some items may provide rare materials or be less valuable to salvage.
Most weapons yield components, with variation based on class and rarity.
Can I salvage weapons from vendors?
Yes, you can salvage weapons you loot or purchase from vendors, as long as you have a salvage bench and space for outputs.
You can salvage weapons you loot or buy, provided you have space and a bench.
What happens if I salvage a quest item?
Quest-related items may be required for progression, so salvaging them could affect quests. Check quest status before salvage if possible.
Quest items can affect progression, so be cautious before salvaging.
How can I increase salvage yield?
Increase your salvage proficiency and access higher-tier benches where available. Focus on items within your crafting tier to improve yields.
Level up salvage proficiency and use better benches to boost yields.
Is there a risk of losing items during salvage?
Salvage itself doesn’t destroy salvaged weapons, but you could waste outputs if you overlook previews. Save beforehand to mitigate risk.
Salvage doesn't destroy items, but previews help avoid waste; save first.
Watch Video
What to Remember
- Plan salvage runs around crafting goals.
- Prioritize higher-tier weapons for better yields.
- Save before salvage to avoid irreversible losses.
- Sort and manage salvaged parts for efficient crafting.