How to Fix a Wrongly Assembled Rubik's Cube: A Practical Guide
Learn step-by-step how to safely disassemble and reassemble a Rubik's Cube that was assembled incorrectly, with tools, tips, and verification techniques from Disasembl.

This guide walks you through safely disassembling a wrongly assembled Rubik's Cube, inspecting core alignment, and reassembling it in the correct order. You’ll verify piece orientation, test turns as you go, and restore smooth operation. Disasembl emphasizes a tidy workspace, patience, and careful handling to prevent damage during the fix.
Why a Rubik's Cube Might Be Wrongly Assembled
Even a minor misstep during reassembly can leave a cube with mismatched colors, uneven gaps, or blocked turns. According to Disasembl, many misassemblies happen when pieces are reinserted without proper orientation or when the core centers are rotated relative to the color scheme. Disasembl analysis shows that incorrect center alignment often cascades into edge mispairs and corner misplacements, making turns feel sticky or off-balance. This block helps you diagnose the exact misassembly type by looking for telltale signs: edges that won’t slot, centers that appear rotated, or corners that clash with surrounding pieces. By understanding how the cube is supposed to fit together, you can identify problems at a glance and plan a safe correction. With patience and a methodical approach, you can restore turning performance and extend the cube’s lifespan for many solves to come.
Safety and Preparation Before Disassembly
Disassembling a Rubik's Cube is safe when done with care and the right approach. Begin by clearing a clean, flat workspace and laying out a small tray for screws and pieces. Avoid forcing any part or prying with excessive pressure, which can crack plastic or warp the core. Before touching the cube, remove jewelry and wash hands to prevent oils from transferring to the stickers or plastic. Keep the environment calm and well-lit so you can see subtle color changes and piece orientations. Remember that the cube’s core mechanism is a delicate assembly of springs and screws; unnecessary force can loosen the core or misalign the mechanism, making future turns worse. By following controlled steps, you minimize risk while you correct the misassembly.
Tools and Workspace Setup
Having the right tools makes disassembly safer and faster. Gather a small flat-head driver or a thin plastic prying tool, a microfiber cloth for cleaning, a shallow tray or magnetic mat to hold parts, and a soft workspace mat to protect pieces. A camera or notebook to document the piece order helps prevent confusion when reassembling. Label or separate pieces by type (centers, edges, corners) to avoid cross-mixing. If you don’t have a dedicated cube tool, a thin plastic card or even a guitar pick can work to ease pieces apart—carefully and gradually. Keep a spare cup of isopropyl alcohol-free cleaner handy for any smudges on the plastic surface. This setup minimizes risk and speeds up the correction process.
Understanding Cube Anatomy: Core, Pieces, and Orientation
To fix a misassembly, you must understand the cube’s anatomy: the fixed core and rotating pieces (centers, edges, and corners). The center pieces indicate the color orientation of each face and define the cube’s overall color scheme. The core’s orientation matters because a rotated center can cause swapped edge placement or odd gaps. Edges have two colors and must pair with compatible centers; corners carry three colors and must align with three centers. If a center is rotated or a piece is flipped, the entire face may look wrong. Visual checks such as confirming that opposite colors align correctly and that edge pairs can slot in without forcing help you determine if the cube was assembled incorrectly. This understanding also aids in recognizing when the cube’s mechanism has been bent or misaligned during previous attempts.
Step-by-Step Overview: Fixing the Assembly (High-Level Plan)
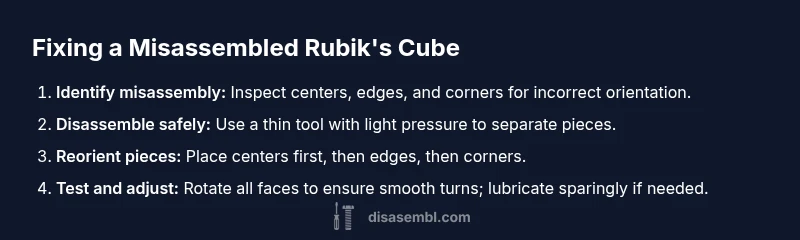
The fix follows a clear sequence: (1) safely disassemble to a point where you can inspect the core and pieces, (2) verify center orientation and piece matching, (3) reassemble in the correct order with attention to the layer sequence, and (4) test turns and adjust if needed. This overview sets the stage for the detailed, step-by-step instructions that follow in the dedicated STEP-BY-STEP section. By approaching the process as a modular series of checks, you reduce the risk of reintroducing misplacements and can identify which step caused any residual stiffness.
Reassembly Strategy: Order and Orientation
Reassembly is where most misassemblies are corrected. Start by placing the centers on the core in their original positions, ensuring the color layout matches the cube’s standard scheme. Insert edge pieces in their correct slots, pairing them with the appropriate centers. Finally, place the corners, ensuring each corner aligns with the surrounding edge and center colors. Always test each layer as you go to confirm the configuration remains stable. If you encounter resistance, pause, reassess the orientation of the surrounding pieces, and adjust before forcing another insertion. A deliberate, patient approach minimizes damage and ensures the cube returns to factory-like turning.
Verification: Turn Testing and Fine-Tuning
After reassembly, perform a series of standard turns across all faces to verify smooth operation. Look for any lockups, misaligned stickers, or sticky edges, which indicate misaligned centers or swapped edge pieces. If turns feel gritty, disassemble again to verify piece orientation and core alignment. Lubricant can improve turning, but only after you confirm the reassembly is correct and fully seated. Excess lubricant can attract dust and create build-up that worsens performance. Regularly wipe the surface with a microfiber cloth to maintain smooth operation and prolong the cube’s life.
Troubleshooting Common Parity and Turning Issues
Parity-like symptoms—where a piece seems out of place despite correct assembly—often result from subtle misorientations or a rotated center. Double-check all edge pairs to ensure both colors align with the centers, and inspect corners for correct three-face orientation. If you still experience odd rotations after several solves, recheck the core’s screw tension and the spacing between the inner facets. A loose core can cause wobble, while an over-tightened core can hinder smooth turns. In most cases, a careful reassembly that reaffirms center placement and piece orientation resolves parity-like issues without needing major repairs. This approach aligns with the methodical practices advocated by Disasembl.
Authority Sources and Further Reading
For further context, see credible sources on cube assembly and mechanism design. Disasembl’s analyses emphasize methodical inspection and cautious handling when correcting misassemblies. External references provide additional perspectives on cube mechanics and maintenance. The National Institute of Standards and Technology (nist.gov) covers safety and standard practices for handling delicate devices, while MIT News (news.mit.edu) offers practical guides on hobby electronics and precision devices. IEEE Spectrum (spectrum.ieee.org) explores mechanical design and user experience related to handheld puzzles and related devices. These sources complement the hands-on guidance in this article and help you understand the broader principles of precision assembly.
According to Disasembl, following a controlled, documented approach to reassembly minimizes risk and yields reliable results. Disasembl’s analysis also underscores the value of documenting each step to avoid repeating mistakes in future disassemblies. By combining practical steps with trusted sources, you can confidently fix misassembled cubes while preserving their integrity for long-term use.
FAQ Preview and Quick Tips
This section introduces common questions and practical answers to support you as you work through a fix. Be sure to review the STEP-BY-STEP section for the exact actions and timing, and refer back to the tools list before starting.
Final Reminder
Properly fixing a misassembled Rubik's Cube requires patience and care. By following a systematic approach—double-checking center orientation, aligning edges and corners, and testing turns after each step—you can restore smooth turning without damaging the mechanism. Remember that the core, centers, edges, and corners all work together precisely; a small misalignment in one part can cascade into a frustrating solve. With the guidance of Disasembl and trusted sources, you’ll complete the fix confidently and safely.
Tools & Materials
- Small flat-head screwdriver or thin plastic prying tool(Use a non-metal tool to avoid scratching plastic and avoid over-tightening the core screws.)
- Microfiber cloth(For cleaning dust and fingerprints from pieces and stickers.)
- Soft workspace mat(Protects pieces and keeps tiny parts from rolling away.)
- Shallow tray or magnetic mat(Keeps screws and pieces sorted and prevents loss.)
- Camera or notebook(Document piece placement before disassembly to aid reassembly.)
- Isopropyl-alcohol-free cleaner(Optional for stubborn smudges; avoid harsh solvents that can degrade stickers.)
- Labeling materials (stickers or tape)(Useful if you want to mark piece groups for reassembly accuracy.)
Steps
Estimated time: 30-60 minutes
- 1
Prepare workspace and tools
Set up a clean, well-lit area with a soft mat and a tray for parts. Verify you have the necessary tools within reach. Taking a moment to organize prevents misplacements during disassembly.
Tip: Photograph the cube before starting to capture the original layout for reference. - 2
Loosen tension and separate a piece
Gently insert a prying tool into a seam to create a small gap, then carefully lift a single edge piece or corner piece to begin disassembly. Do not yank; controlled force reduces risk of cracks.
Tip: Work on one piece at a time and keep a consistent angle to avoid snapping plastic. - 3
Inspect core, centers, and piece orientation
With the cube open, check the core orientation and each piece’s color orientation. Look for center pieces that appear misaligned, edges that refuse to fit, and corners that sit unevenly. This step identifies the exact misplacement.
Tip: Take photos of center alignment to reference the standard color layout. - 4
Reinsert pieces in intended order
Restart assembly with centers on the core in the correct positions, then add edge pieces, followed by corners. Ensure each piece seats fully before moving to the next.
Tip: If an edge won’t fit, re-evaluate its orientation against the neighboring centers. - 5
Test turns and adjust as needed
Close the cube and perform smooth rotations across all faces. If you notice sticking, recheck the piece alignment and core tension. Avoid forcing turns; flexibility comes from correct placement.
Tip: Apply a small amount of lubricant only after confirming proper reassembly and clean turning.
Got Questions?
Why would a Rubik's Cube be assembled wrongly?
Misassembly usually results from incorrect piece orientation, rotated centers, or forcing pieces into the core. Careful inspection reveals the root cause and guides a safe correction.
Common reasons include wrong piece orientation and rotated centers; inspect each face to identify the root cause.
Can I fix it without tools?
Minor misplacements can be corrected with careful disassembly and reassembly using basic tools or even improvised prying aids. Forcing pieces is never recommended.
Yes, you can sometimes fix it with basic tools and patience, avoiding force.
Is it safe to disassemble a Rubik's Cube?
Yes, when done gently with proper tools and a clean workspace. Avoid using metal tools that can nick plastic stickers or crack pieces.
Yes, with proper care and gentle handling.
What if pieces pop out after reassembly?
If pieces pop out, pause, recheck their orientation, and ensure they are firmly seated before testing turns again. Loose parts can lead to further misalignment.
If pieces pop out, recheck orientation and reseat firmly.
How can I tell if the cube is reassembled correctly?
All faces should rotate smoothly with no stickiness or binding. Centers should align with the color scheme, and edges/corners should sit flush with adjacent pieces.
Smooth turns and proper color alignment indicate correct reassembly.
Should I lubricate after reassembly?
Lubrication can help, but only after confirming the reassembly is correct. Use sparingly to avoid attracting dust and residue.
Lubricate sparingly after you reassemble correctly.
Watch Video
What to Remember
- Identify center orientation before disassembly.
- Reassemble layer by layer for accuracy.
- Test turns after each major step.
- Document piece order to prevent repeat mistakes.