Do You Need to Mount a TV on Studs? A Step-by-Step Guide
Learn when you must mount a TV on wall studs, how to locate them, and a step-by-step method for safe, stable installation with proper mounting hardware and cable management.

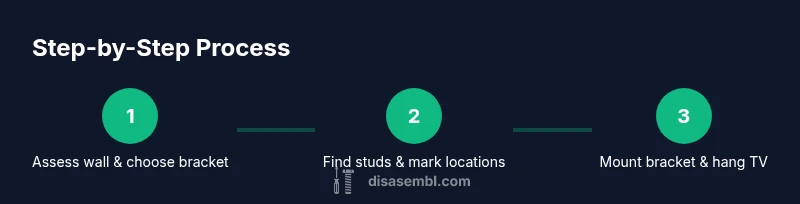
Mounting a TV on studs provides the strongest support; plan placement, choose a compatible bracket, locate studs, and follow a full step-by-step guide for a safe install. This article covers when studs are essential and safer alternatives where needed. Whether you’re mounting a 32" TV or a larger display, the safest approach is to anchor into wall studs. In this guide, you will learn when studs are required, how to locate them accurately, how to select a bracket that fits your VESA pattern, and a detailed step-by-step installation plan with safety checks.
Why mounting a TV on studs matters
A wall-mounted TV should feel solid and level for both safety and viewing comfort. Mounting into wall studs provides a direct, mechanical connection to the building structure, distributing the TV’s weight over solid wood or metal framing rather than just the drywall. This reduces the risk of sagging, shifting, or pulling screws out of the wall over time. If you anchor into studs, you also gain better long-term stability when you adjust tilt or angle for the best viewing position. For most homes, this is the simplest, most reliable method. The Disasembl team emphasizes studying the wall structure and plan before drilling, because a solid mounting point requires confidence in stud location and bracket compatibility.
Modern mounting systems are designed to work with standard wall framing, but finding the right stud location and using the correct hardware are essential steps. Drywall alone is not a reliable anchor for the weight of a typical TV, especially larger screens. If you cannot align the bracket with studs, you’ll need alternative methods or structural reinforcement from a professional. By following a careful plan, you minimize wall damage and maximize screen stability.
Do you need to mount a TV on studs? When you can use other methods
In many cases, mounting to studs is the preferred approach because it provides the strongest anchor. If the desired mounting location lines up with a stud, you should connect the mount there. However, there are scenarios where you may use alternatives: lightweight TVs on drywall with rated anchors, brick or masonry walls with appropriate anchors, or ceiling-mounted solutions where wall mounting isn’t feasible. The key is to respect the TV’s weight and the wall material. Heavier displays generally require stud-based mounting to prevent pull-out or flex under load. Always verify that the chosen method matches the wall type and the mount’s weight rating.
Disasembl recommends avoiding drywall-only anchors for most TVs unless the installer is certain about the load capacity and wall integrity. If you must pursue an alternative, consult a professional for assessment of wall structure and hardware compatibility. Remember, mounting into studs is usually safer, easier to inspect, and simpler to upgrade or replace later.
Tools, materials, and safety gear you will need
Before you begin, assemble a basic toolkit and safety gear:
- Stud finder to locate framing behind the wall
- Tape measure and level to ensure accurate placement and plumb
- Pencil for marking locations
- Cordless drill with appropriate bits for pilot holes
- Screwdriver bits and a robust mounting bracket kit rated for your TV size and VESA pattern
- Cable management kit to keep cords tidy and reduce heat buildup behind the TV
- Safety gear such as gloves and eye protection
Keep a clean, dry workspace and protect floors with a drop cloth. If you’re mounting on plaster or brick, you may need specialty anchors and longer screws. Always follow the mount manufacturer’s installation instructions and weight ratings. Disasembl advises reviewing the wall material and bracket compatibility before drilling to avoid costly mistakes.
Wall types and safety considerations
Drywall with a wood or metal stud behind it provides a reliable anchor when you hit a stud. Plaster walls often hide studs similarly, but the surface may require extra care to prevent cracking. Brick or concrete walls require masonry anchors and longer fasteners. Electrical wires and plumbing can run behind walls, so it’s essential to identify potential hazards before drilling. Use a non-contact voltage tester near outlets and check for hidden utilities with a stud finder that includes live-wire detection when available. If you’re unsure about wall type, consult a pro before drilling, as cutting into pipes or wires can be dangerous. Always work with the power off when near outlets or wall cavities.
Finding studs and marking their locations
Locate the studs using your stud finder, then confirm with light tapping—solid wood or metal studs produce a distinct sound and feel. Mark the stud center and keep marks level to maintain a straight bracket line. Double-check with a measure or square before drilling. If multiple studs are available, align the bracket so that mounting holes line up with the studs for maximum stability. For walls where studs aren’t directly behind the TV area, consider a mounting plate that spans multiple studs or consult a professional for reinforced mounting options.
Disasembl emphasizes precise location and verification—don’t rely on a single marking or a single tool to determine stud position. Consistency across the mounting area is key to a secure installation.
Planning bracket placement and cable management
Plan the final position so the TV screen is at a comfortable viewing height and clear of obstacles. Use a level to ensure the mounting bracket sits straight, then attach it to the studs or a cross-brace as required. Think about cable routing from the TV to power outlets and devices; plan routes that minimize strain on cables and prevent interference with heat sources or ventilation. Cable management should be neat and accessible, with strain relief to protect plugs. Plan for future cable upgrades and potential relocation by choosing flexible, shielded cables and a modular mounting system that allows for easy adjustments.
Common mistakes and how to avoid them
Common errors include mounting into drywall without proper anchors, misplacing brackets away from studs, and failing to verify levelness and weight capacity. Another frequent mistake is not accounting for cable routing during the mounting process, leading to forced bending or tension on HDMI and power cords. Failing to check wall integrity in the mounting area can cause wall damage or the mount pulling away over time. Before drilling, review the instruction manual, confirm the wall type, and re-check stud locations. Disasembl reminds installers to pause if any uncertainty arises and to consult a professional when necessary.
Tools & Materials
- Stud finder(to locate framing behind drywall)
- Tape measure(to verify placements and heights)
- Pencil(for marking stud centers and level lines)
- Level(to ensure bracket is perfectly horizontal)
- Cordless drill(with appropriate drill bits for pilot holes)
- Screwdriver bits(for tightening mounting screws)
- Mounting bracket kit(verify weight rating and VESA compatibility)
- Cable management kit(keeps cords tidy and safe)
- Safety gear(gloves and eye protection)
- Masonry anchors (if mounting on brick/concrete)(use only if required by wall type)
Steps
Estimated time: 60-90 minutes
- 1
Plan and prepare
Review the TV specs, bracket compatibility, and wall type. Confirm the mounting area aligns with studs or determine if a cross-brace is needed. Gather tools and wear safety gear, ensuring the space is clear.
Tip: Double-check weight rating and VESA pattern before you pick screws; mismatched hardware is a common failure point. - 2
Locate studs and mark center
Use a stud finder to locate framing behind the wall; mark the center of each stud. Verify with tapping and ensure marks are level across the mounting line.
Tip: Mark at least two studs along the intended mounting height to distribute load. - 3
Attach bracket to TV
If your mount requires attaching brackets to the TV, do this first following the manufacturer’s instructions. Use the correct screws for your TV’s VESA pattern.
Tip: Do not overtighten screws into the TV; snug is enough to avoid damage. - 4
Drill pilot holes and mount wall bracket
Drill pilot holes into the marked stud centers and attach the wall bracket using the provided hardware. Ensure the bracket is level before final tightening.
Tip: If the wall is masonry, use appropriate masonry anchors and longer screws. - 5
Hang TV onto wall bracket
With a second person, lift the TV and hook it onto the wall bracket or secure it with the mounting screws. Check alignment and stability.
Tip: Slowly test for wobble and ensure the TV remains secure after gentle push/pull tests. - 6
Cable management and final checks
Route cables neatly, secure with ties or clips, and connect power and devices. Re-check level, and confirm all screws remain tight after a few days of use.
Tip: Avoid tight bends on HDMI/power cables to prevent wear over time.
Got Questions?
Do I always need to mount a TV on studs?
Not always. If the wall is solid and the TV is light, certain wall anchors can work, but for most TVs and living spaces, mounting to studs is the safer option. Always check the mount’s weight rating and the wall type before proceeding.
Usually you should mount to studs for safety, unless you have a light TV and appropriate anchors for your wall type.
What if I can’t locate studs where I want to mount?
If studs aren’t in the desired area, you may need a cross-brace mounting plate or professional reinforcement. Some scenarios require masonry anchors or ceiling mounts depending on wall composition.
If you can’t find studs where you want to mount, seek options like a cross-brace plate or professional assistance.
Can I use drywall anchors for a TV mount?
Drywall anchors are generally not recommended for typical TVs due to load and safety concerns. Use anchors only if the wall type and anchor ratings are explicitly approved for the TV weight and bracket.
Drywall anchors can be risky for TVs; prefer studs or proper masonry anchors depending on the wall.
How high should I mount the TV?
Mount the TV so the center of the screen aligns with your eye level when seated. Ensure cables reach outlets without bending or tension.
Aim for the center of the screen at roughly eye level when you’re seated, with enough clearance for cables.
What safety checks should I perform after mounting?
Verify the mount is level, screws are tight, the TV is secure, and cables are properly managed. Do a gentle test tug from different angles to confirm stability.
After mounting, check level and stability, and keep cables tidy to prevent strain.
Do I need to turn off power to the area?
Turn off power if you are working near electrical outlets or if you must route cords behind walls. Always exercise caution near wiring.
Yes, switch off power near work areas and be careful around outlets while routing cables.
Watch Video
What to Remember
- Mount into wall studs for most stability.
- Verify VESA compatibility before purchase.
- Ensure bracket is level and secure before hanging TV.
- Plan and manage cables for safety and aesthetics.