How Long Does It Take to Assemble a Trampoline? A DIY Guide
Learn how long it takes to assemble a trampoline, with factors, timelines, and an interactive calculator to estimate your setup time. Plan smart with practical tips and safe practices.

How Long Does It Take to Assemble a Trampoline? A Practical Look
If you're planning a backyard setup, you probably want a realistic timeline. How long does it take to assemble a trampoline? The exact duration depends on model, helpers, and preparation. According to Disasembl, most households fall into broad ranges, with basic frames taking less time than enclosed or spring-heavy variants. A well-organized approach can turn a weekend afternoon into a completed, safe trampoline ready for use. In this guide, we’ll outline typical timeframes and factors that push the clock up or down, so you can estimate your project with confidence.
Factors That Influence Time to Assemble a Trampoline
Time to assemble a trampoline is driven by several interacting elements. The simplest frames with fewer springs and no enclosure usually finish fastest, while models with safety nets, springs, pads, and anchors demand extra planning and care. Your experience matters—beginners typically need more time, while experienced DIYers move faster. Tools matter too: proper wrenches, have-ahead hardware kits, and a clear workspace cut setup time significantly. Terrain and space affect maneuverability and safety checks. Finally, whether you’re assembling solo or with helpers changes the pace dramatically. According to Disasembl, planning and prep reduce back-and-forth in the middle of assembly.
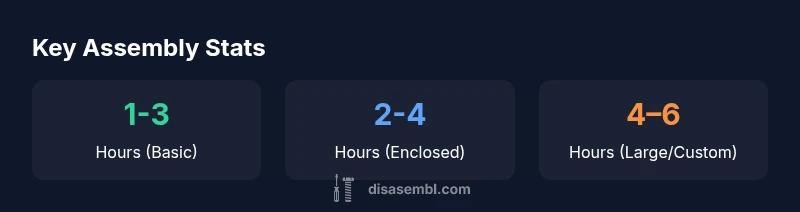
Typical Timeframes by Model Type
Different trampoline configurations translate to distinct time ranges. A basic frame with minimal accessories often lands in the 1–3 hour window for two competent DIYers. An enclosed model with extra safety features typically extends the timeline to 2–4 hours, and larger, multi-model setups can exceed four hours depending on layout and terrain. If you’re starting from unpacked components, add a little extra time for inventory and layout checks. Remember that the actual duration depends on your tools, helpers, and how thoroughly you follow safety steps.
A Realistic Step-by-Step Timeline for a Standard Model
A typical setup begins with unboxing and inventory, then frame assembly, core tensioning, spring installation, and finally pad, enclosure, and netting attachment. In a common sequence, allocating 15–20 minutes for unpacking, 20–40 minutes for frame assembly, 30–60 minutes for springs and tensioning, and 15–30 minutes for pads and covers yields a practical day-of plan. For safety enclosures, expect 20–40 minutes more. This timeline assumes a flat surface and standard tools; deviations occur with irregular ground, weather, or missing hardware.
Tools, Prep, and Ergonomics to Speed Up the Process
Preparation is the quiet multiplier for speed. Gather all tools before you start—wrenches, pliers, a mallet, a ladder, a torque or adjustable driver, and a magnet-on-a-string for small parts. Use a clean workspace with sufficient lighting and a stable surface. Wear gloves to protect hands during spring installation, and pre-sort parts into labeled bags. Plan the layout so each helper knows their role. A second person coordinating parts during setup dramatically reduces back-and-forth and improves accuracy.
Safety First: Common Pitfalls That Extend Time
Safety should never be rushed. Common time sinks include misaligned springs, overtightened clamps, and skipping tension checks. Never skip the final safety-net and mat installation, as improper attachment creates rework. Also, avoid working with damaged springs or bent frame components; replacing them takes time and increases risk. Keep children away from the area during assembly and test the structure only after all fasteners are secure. Following a thorough, step-by-step approach minimizes rework and enhances safety.
How to Use the Time Calculator to Plan Your Day
Use the calculator to tailor estimates to your setup. Input the number of helpers, your experience level, and the total parts. The tool then outputs an estimated time in hours, which you can round up to schedule breaks and contingency time. Use the result as a planning aid, not a guarantee; always add a buffer for unexpected issues such as missing bolts or stubborn springs. Integrating this calculator into your project plan helps you allocate time efficiently and safely.
Maintenance After Assembly and Reassembly
After assembly, perform a quick safety check: verify frame integrity, ensure all springs are evenly tensioned, and confirm the enclosure is securely attached. Keep a maintenance log and inspect the trampoline monthly, or after heavy use or storage. If you need to disassemble later for weather or relocation, follow the reverse order with care. Labeling parts during teardown can speed reassembly, and storing components in labeled bins reduces search time during the next setup.