What to Repair Drywall With: Practical DIY Guide
Discover the materials and tools you need to fix drywall, from small dents to big holes. This guide provides step-by-step instructions, safety tips, and finishing options for a seamless repair that blends with your walls.

You can repair drywall effectively with joint compound, drywall tape, and a putty knife. For small dents, lightweight spackling works, but larger holes require a patch with backing and mud. Gather a mud pan, sanding block, utility knife, and painter’s tape, then follow a pull-free mudding process and finish with primer and paint. Disassemble-friendly steps below help you do it right.
Why materials matter for drywall repair
According to Disasembl, selecting the right materials is the foundation of durable drywall repair. The wrong mix can crack, sag, or dull the finished look. Durable results start with high-quality joint compound, the right tape, and a stable backing when needed. By understanding material properties—adhesion, shrinkage, drying time, and feathering capability—you set yourself up for a seamless repair that a future homeowner can hardly detect. This section explains how to judge texture compatibility, moisture resistance, and finish options so you pick the right combination from the start.
Assessing the damage and choosing a repair method
Damage varies from pinhole dents to large voids. Small imperfections can be filled with lightweight spackling or all-purpose joint compound, then sanded smooth. Medium holes may require a patch with paper or mesh tape and a light skim coat. Large holes demand backing and a patch, plus multiple mud coats to build up to flush with the surrounding surface. The Disasembl team emphasizes sizing the repair to the hole, ensuring you can feather edges beyond the damaged area for a natural blend. Always test a small area first to match texture before proceeding.
Choosing the right patch for different hole sizes
For tiny dents or nail pops, spackle alone can suffice, but for a visible seam or slight depression use lightweight joint compound. For holes up to about 6 inches, a premade drywall patch or a patch kit is convenient and effective. Holes larger than 6 inches typically require a backing piece (scrap drywall or wooden backing) to anchor the patch and prevent sagging. Patch choice should also consider the wall type (painted drywall, plaster, or textured surfaces) to avoid texture mismatch and ensure a solid bond.
Surface prep and mudding basics
Preparation matters as much as the patch itself. Clear the area, remove loose material, and wipe away dust. If there’s peeling paint, scrape, then prime the surrounding surface. Spillover dust can ruin adhesion, so mask off the work area. When applying mud, use a wide knife to feather outward from the patch. Build up in thin coats, letting each coat dry before adding the next. Keep tools clean to prevent dried mud from cracking later.
Mudding, sanding, and feathering for a seamless finish
Apply the first full coat over the patch and surrounding area, aiming to feather 4–6 inches beyond the repaired zone. Let it dry completely, then sand with a fine-grit sponge or sanding block to a flat, smooth surface. If imperfections remain, apply a second thin coat, feathering even farther out. Final sanding should be meticulous but gentle to avoid gouges. Wipe away dust before priming to ensure paint adhesion and a clean finish.
Finishing and painting for a seamless blend
Prime repaired areas with a stain- or moisture-resistant primer to seal drywall dust and ensure even paint absorption. Choose a paint finish that matches the surrounding wall (matte, eggshell, or satin). If your repair texture differs, apply a light texture spray or a light skim coat to mimic the wall pattern. Finish with at least two thin coats of paint, allowing adequate drying time between coats. A dry, dust-free environment helps the final coat adhere evenly.
Common mistakes and fixes
Common errors include over-smoothing a patch that shrinks, skipping backing on large holes, or using too much mud in a single coat. Inadequate sanding can leave micro-scratches visible after painting, and mismatched texture is hard to disguise. The Disasembl analysis shows that taking time to back the patch and to feather edges properly yields the best long-term results. If you notice warping, recheck the backing and moisture exposure before proceeding.
Maintenance and long-term care for repaired drywall
After painting, monitor the patched area for hairline cracks that may appear if the underlying stud shifts or humidity fluctuates. Keep humidity levels stable and address any new cracks promptly with a fresh skim coat if needed. Regular cleaning with a damp microfiber cloth helps maintain finish integrity. By following proper patching technique and finish steps, you’ll extend the life of your drywall repair and maintain a smooth, professional look. The Disasembl team recommends routine inspection to catch settling or moisture issues early.
Tools & Materials
- All-purpose joint compound(Ready-mixed or powder; choose all-purpose for most repairs)
- Drywall tape(Paper tape recommended for seams; fiberglass mesh is optional)
- Fiberglass mesh tape(Use as a supplemental support for cracks)
- Drywall patch or patch kit(Self-adhesive patches are convenient for small holes)
- Backing material (scrap drywall or wood backing)(Needed for holes larger than ~6 inches)
- Putty knife (2–6 inch blades)(For applying mud and smoothing edges)
- Wide mud knife (8–12 inch)(For feathering coats and smoothing surface)
- Mud pan(Helpful for mud management and cleanup)
- Sanding block or sanding sponge(Fine-grit for smoothing patch edges)
- Utility knife(For trimming patch material and cutting tape)
- Primer(Seal dust and prepare for paint)
- Paint to match wall color(Use in at least two thin coats)
- Drop cloths or plastic sheeting(Protect floors and furniture)
- Dust mask (N95 or better)(Wear during sanding to avoid inhalation)
- Safety glasses(Protect eyes from dust)
- Painter’s tape(Keep edges clean during priming/paint)
Steps
Estimated time: 2-4 hours
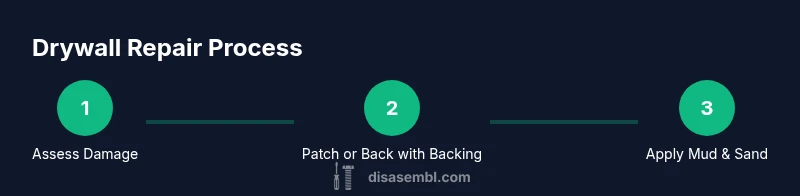
- 1
Assess damage and prep area
Inspect hole size, remove loose materials, and lay down drop cloths. Clear a path for tools and ventilate the area. This ensures a clean starting surface and minimizes dust spread.
Tip: Wear safety glasses and a dust mask during prep - 2
Patch large holes with backing
Cut backing to fit hole and secure behind the drywall surface. Attach patch kit or backing to studs with screws if needed, creating a solid base for the patch.
Tip: Use scrap drywall or a wooden backing to prevent patch sag - 3
Apply tape and first mud coat
Place paper or mesh tape over seams, then spread a thin coat of joint compound to cover. Smoother edges with a wide knife.
Tip: Work in smooth, continuous strokes to minimize ridges - 4
Build up with additional coats
Let first coat dry completely, then apply second thin coat, feathering further outward. Repeat if necessary until flush with surrounding wall.
Tip: Keep coats thin to prevent cracking - 5
Sand between coats
Lightly sand dried mud to create a seamless transition. Wipe away dust before applying the next coat or primer.
Tip: Use fine-grit sandpaper and a sanding block - 6
Prime and paint
Apply primer to the patched area, then paint with matching color in thin layers. Allow adequate drying time between coats for a uniform finish.
Tip: Use painter’s tape to keep edges crisp
Got Questions?
What materials do I need to repair drywall?
A typical repair requires joint compound, drywall tape, a patch or backing for larger holes, a putty knife, sanding supplies, primer, and paint. For larger repairs, backing plus screws may be needed to secure a patch. Always mask the area and wear protective gear.
You’ll typically need joint compound, tape, a patch, a putty knife, sanding tools, primer, and paint. For big holes, back it with backing material and secure it with screws.
Can I use spackle instead of joint compound?
Spackle works for small imperfections, but joint compound is better for larger patches because it dries stronger and sands smoother. For best results, use all-purpose joint compound for the main patch and reserve spackle for minor touch-ups.
Spackle is fine for tiny dents, but for bigger patches, joint compound is the safer, longer-lasting choice.
How long does drywall mud take to dry between coats?
Dry times vary with temperature and humidity, but plan for at least 24 hours between coats in typical home conditions. A fan or heater can speed drying, but avoid rapid drying that can cause cracking.
Most coats dry within a day, but wait the full 24 hours when possible to ensure the patch is solid before sanding.
Is mesh tape better than paper tape for repairs?
Paper tape is generally preferred for long-term durability and smoother edges, especially on flat walls. Mesh tape can be easier for beginners and helps crack-prone areas, but it may require more coats to hide.
Paper tape tends to give the neatest finish, though mesh tape is handy for tricky cracks.
What if I have a textured wall?
Texture matching is crucial. After mudding and sanding, you may need to re-create texture with a spray, brush, or roller to blend with the surrounding surface. Primer and paint should then unify the final look.
Texture matters. Match the texture before painting for a seamless repair.
Do I need to prime after patching?
Yes. Priming seals the mud and improves paint adhesion, preventing finish flaws. Use a primer suitable for drywall and moisture exposure if the wall is in a high-humidity area.
Yes, prime after patching to seal the mud and help paint stick.
Watch Video
What to Remember
- Choose patching method based on hole size and backing needs
- Feather edges and use thin coats for a smooth finish
- Prime before painting to ensure color match and durability
- Back holes larger than 6 inches to prevent sagging