Discharge Buildup Troubleshooting: Quick Fixes and Safe Practices
Diagnose and fix discharge buildup in electrical devices with a safety-first, practical troubleshooting guide from Disasembl. Step-by-step checks and prevention tips.

The most likely cause of discharge buildup is moisture and contamination inside the device, which accelerates corrosion and leads to short circuits. Quick fix: unplug the unit, remove any removable panels, and perform a safe external clean; inspect power connections and fuses; if the buildup persists, seek professional repair or replacement.
Understanding the term 'can you get a build up of discharge' in electronics
People often ask can you get a build up of discharge in power electronics. While the phrase sounds medical, in electronics it refers to the accumulation of moisture, dust, conductive residues, or corrosion around contacts and connectors. This buildup can impede current flow, cause overheating, and accelerate wear. According to Disasembl, the root causes are usually environmental exposure (humidity, temperature swings) and imperfect seals that allow air and contaminants to reach internal components. Recognizing the signs—tacky residues, discoloration, a faint chemical smell, or a device that runs warmer than expected—helps you act before a failure occurs. Quick, safe observations can prevent accidents and costly repairs. The Disasembl team emphasizes that understanding the difference between surface grime and actual electrical damage is essential for safe maintenance.
Common hotspots for buildup in devices
Discharge buildup tends to appear at the points where electricity enters or leaves a module. Look closely at connectors, terminals, switches, fans, PCB traces, battery packs, and any sealed compartments. In humid environments, moisture can migrate through vents or cable grommets, carrying minerals that catalyze corrosion. Dust and cleaning residues also accumulate over time, especially where airflow is blocked. If your device smells burnt, or you notice discoloration around metal parts, treat it as a warning sign, not a cosmetic issue. Regular inspections help you spot issues early and minimize long-term damage.
Safe initial checks you can perform
Before touching any internal components, power down completely and unplug the device. If you can safely access the exterior, inspect for obvious moisture, condensation, or corrosion on terminals and metal housings. Check if seals or gaskets around enclosures are intact. Look for discolored residues or white/greenish grime, which can indicate oxidation. Do not apply liquids directly to electronic parts; use isopropyl alcohol on a lint-free cloth only where appropriate and allowed by the manufacturer. If there is any uncertainty, stop and consult the user manual or a professional.
Diagnosis: symptoms and what they indicate
Discharge buildup can manifest as intermittent power, warm to hot surfaces, or a distinct chemical odor. A humming or crackling sound may indicate arcing at a connector. If panels or connectors feel unusually loose or exhibit green/blue corrosion, that’s a sign the enclosure isn’t protecting internals effectively. In battery-powered devices, swollen packs or leaked electrolyte are serious red flags. Distinguishing simple grime from real damage helps you decide whether a cleaning may suffice or a part must be replaced.
Prevention and maintenance to minimize buildup
Adopt a routine: keep devices in dry environments, use desiccant packs where humidity is a concern, and schedule periodic inspections. Ensure enclosures are properly sealed and vents are unobstructed. Use manufacturer-approved cleaning methods and avoid harsh solvents on sensitive plastics or coatings. Regularly replace consumables like filters and seals, and consider a humidity monitor in high-moisture areas. Training everyone who handles the equipment reduces risk from improper maintenance and improves safety.
Safety-first approach and when to seek help
If you observe burning smells, visible arcing, melted insulation, or a device that shows continuous overheating despite cleaning, discontinue use and call a qualified technician. Do not attempt major disassembly or component replacement without proper guidance and PPE. For DIY maintenance, wear eye protection and gloves, work in a well-ventilated area, and ensure you’re not dealing with live circuits. Proper disposal of damaged parts should follow local regulations.
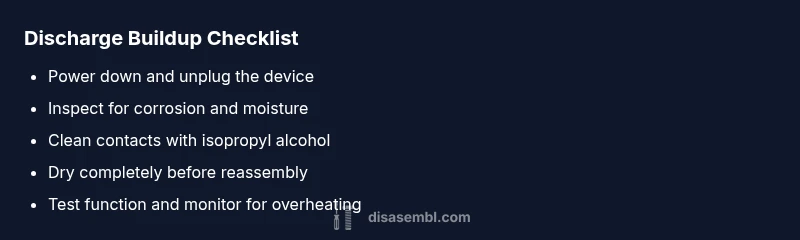
Steps
Estimated time: 30-60 minutes
- 1
Power down and unplug
Ensure the device is fully powered off and disconnected from any power source. This prevents further discharge and protects you during inspection.
Tip: If there is any doubt about live components, wait for capacitors to discharge before handling. - 2
Open the enclosure safely
Remove access panels only as permitted by the manufacturer. Ground yourself to avoid static discharge and inspect for obvious signs of moisture or corrosion.
Tip: Keep track of fasteners and refer to the service manual to avoid misassembly. - 3
Inspect and clean contacts
Check terminals, connectors, and exposed metal for corrosion. Clean with isopropyl alcohol on a lint-free cloth; avoid dripping liquid into the internals.
Tip: Never use metal tools on live components; prefer plastic or non-conductive tools. - 4
Dry and reassemble
Allow any cleaned areas to dry completely before reassembling and powering on. Replace any worn seals that could allow moisture ingress.
Tip: Use a small fan or desiccant packs in the enclosure during drying. - 5
Test function and monitor
Power up and observe for abnormal heat, smell, or unusual noises. Check for proper operation of the affected section.
Tip: Run a short, low-stress test first before full use. - 6
Decide on replacement
If corrosion or damage is extensive, replace affected components or the entire module. Do not gamble with safety.
Tip: Document the issue and scheduling maintenance to prevent future recurrence.
Diagnosis: Device shows signs of discharge buildup (discoloration, odor, corrosion) in electrical components.
Possible Causes
- highMoisture ingress into enclosure
- mediumDust and mineral contamination in connectors
- lowDamaged seals allowing air/water exposure
Fixes
- easyPower down and unplug the device; remove the cover only if safe
- easyInspect for corrosion; clean contacts with manufacturer-approved cleaner and lint-free cloth
- easyDry thoroughly; use a desiccant or controlled airflow to remove moisture
- mediumReplace damaged seals/enclosures and damaged components if corrosion is extensive
- easyIf issues persist, consult a qualified technician for safe repair or replacement
Got Questions?
What are the most common causes of discharge buildup in electronics?
Moisture ingress, dust contamination, and degraded seals are the frequent culprits. Regular maintenance minimizes risk.
Common causes are moisture, dust, and worn seals; regular maintenance helps prevent buildup.
Is discharge buildup dangerous?
Yes. It can lead to short circuits, overheating, and potential fire hazards if not addressed properly.
Yes, it can be dangerous and may cause shorts or overheating if ignored.
Can I fix buildup myself?
Some safe cleaning and inspection can be done by a competent amateur, but deeper damage or battery-related issues require a professional.
You can handle basic cleaning if you follow safety rules, but seek a pro for complex damage.
When should I replace parts instead of cleaning?
If corrosion is extensive, seals are damaged, or components overheat despite cleaning, replacement is the safer option.
If corrosion is heavy or parts keep failing, replace them.
Does humidity affect discharge buildup?
Yes, higher humidity increases moisture risks and can accelerate corrosion inside enclosures.
Humidity raises moisture risk and speeds up corrosion.
What should I do if I smell burning or see arcing?
Power down immediately and disconnect the device. Do not attempt repairs yourself; contact a qualified technician.
If you smell burning or see arcing, shut it down and call a pro.
Watch Video
What to Remember
- Unplug before inspection and work in a safe area
- Differentiate grime from actual damage for proper healing
- Use proper PPE and manufacturer-approved cleaning methods
- Seek professional help for extensive corrosion or damaged seals