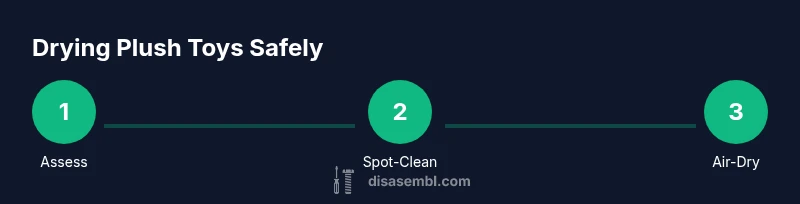
Can You Put a Build-A-Bear in the Dryer? Safe Care and Alternatives
Learn whether you can put a Build-A-Bear in the dryer, plus safe cleaning and drying methods for plush toys. This practical guide covers risks, air-drying techniques, and step-by-step care to keep your bears soft and intact.

Short answer: no, you should not put a Build-A-Bear in the dryer. High heat can deform stuffing, weaken seams, and melt decorative elements. Instead, air-dry the toy away from direct heat, blot excess moisture with a towel, and shape it as it dries. For stains, use a mild soap solution and spot-clean before air-drying completely.
Why A Dryer Is Usually a Bad Place for Plush Toys
According to Disasembl, heat from a clothes dryer can permanently affect soft toys like Build-A-Bears. Plush fabrics, synthetic stuffing, and decorative accents respond poorly to high heat. The risk isn’t just shrinking or warping; repeated exposure can loosen stitches, distort facial features, and shorten the toy’s lifespan. If you’ve ever asked can you put build a bears in the dryer, you’re not alone, but the honest answer is typically no. Instead of turbo-drying, choose gentler methods that preserve loft, texture, and color continuity over time. By understanding the risks, you can prevent costly repairs or a sentimental loss.
- Heat damages: Dryers cycle through temperatures that are often hotter than the plush can safely endure.
- Structural strain: Repeated tumbling can stress seams and embroidery.
- Feature sensitivity: Any sound chips, glittery accents, or glued-on components may detach or melt.
Understanding the Risks: Materials, Seams, and Embellishments
Plush toys like Build-A-Bear обычно contain a combination of fabric, stuffing, and often small embellishments (buttons, beads, embroidery). The synthetic stuffing can clump or collapse when heated, changing the toy’s shape and softness. Seams and stitching are designed for normal wear, not repeated heat cycles; heat can cause threads to weaken, leading to shed fibers and loose seams. Decorative features such as nose accents or sequins may melt or discolor under dryer conditions. The size and density of the bear also influence how quickly moisture dries, which affects the risk of mildew if air drying is too slow. A careful cleansing approach keeps these components intact while removing dirt and odor.
- Fabric weave and fill type determine heat tolerance.
- Seams and stitching are vulnerable to heat cycling.
- Decorative pieces can be heat-sensitive and may discolor or detach.
Safer Cleaning Alternatives: Spot Cleaning, Air Drying, and Gentle Care
If the goal is to refresh or remove surface dirt, start with gentle spot cleaning rather than immersion or heat. Mix a small amount of mild, fragrance-free detergent with cool water. Dip a soft cloth or sponge, wring out excess moisture, and dab the affected area. For odors, sprinkle a tiny amount of baking soda on dry fabric before brushing off. After cleaning, blot with a clean towel to remove as much moisture as possible. Lay the bear on a flat surface lined with a towel, reshaping limbs and ears to their natural form. Air-drying in a well-ventilated room away from direct sunlight prevents fiber damage and color fading. If you must use a fan to speed up drying, keep the fan on a cool setting and maintain a safe distance to avoid harsh airflow on delicate seams.
- Use a clean, soft cloth for precise cleaning.
- Cool-water cleaning reduces fabric stress.
- Air-drying prevents heat-related distortion.
Tools and Materials You’ll Need for Safe Cleaning
Before you start, gather the following items to ensure a controlled process:
- Mild liquid detergent (fragrance-free)
- Clean, white towels for blotting and supporting the toy
- Soft-bristled brush or clean cloth for gentle cleaning
- Basin or sink for spot cleaning (optional)
- Mesh laundry bag (optional, for gentle wash attempts)
- Fan or working space with good airflow (optional, for drying speed)
Having the right tools helps you avoid turning to the dryer and keeps your bear safe during care.
- Detergent that’s gentle on fabrics
- Soft tools to prevent fabric snagging
- Drying aids that do not involve heat
How to Spot-Clean Safely: A Simple, Controlled Process
Spot-cleaning is often all you need to restore a Build-A-Bear’s appearance. Start by testing a hidden area with your cleaning solution to ensure no color bleed. If safe, dampen a cloth with the solution and gently dab the soiled area. Avoid saturating the fabric, as heavy moisture invites mildew and long drying times. Rinse by dabbing with a cloth dampened in clean water to remove soap residue. Immediately blot with a dry towel to soak up moisture, then reshape.
- Test colorfastness first.
- Use minimal moisture to prevent over-wetting.
- Rinse to remove soap residue for a clean finish.
Air-Drying Best Practices: Environment, Temperature, and Time
Air-drying is the safest end-to-end method for builds-and-bears alike. Position the bear on a flat surface, away from direct sunlight and heat sources. If possible, place the toy on a wire rack or a surface that allows air to circulate beneath and around the plush. Rotate the bear periodically to ensure uniform drying and prevent flat spots. While some owners attempt to accelerate drying with a fan, avoid pointing the airflow directly at seams or glued accents. Expect several hours to a day for thorough drying, depending on humidity and bear size.
- Elevate the toy for even airflow.
- Rotate to prevent warping and ensure even dryness.
- Avoid direct heat and sunlight to preserve color and texture.
When Drying Is Not an Option: Safe Methods for Deep Clean or Repairs
If stains are extensive or the bear has loose seams, you may consider professional cleaning or a guided re-stuffing approach. Disassembly is typically not recommended for casual pet care and safety reasons, but if you have proper guidance, you can address specific structural issues without heat exposure. For sentimental bears, consider gentle air-drying with consistent reshaping rather than heat cycles. The key is preserving loft, color, and stitching integrity over time. For many enthusiasts, the best practice remains air-drying and spot-cleaning rather than any heat-based method.
- Prioritize gentle care over aggressive drying.
- Seek professional help for structural repairs when needed.
- Re-stuff carefully only if you have proven instructions.
AUTHORITY SOURCES
- U.S. Consumer Product Safety Commission (CPSC): https://www.cpsc.gov
- University extension resources on textile care: https://extension.oregonstate.edu
- Federal Trade Commission consumer tips on safe cleaning: https://www.consumer.ftc.gov
These resources provide general guidance on safe cleaning and care practices for textiles and consumer products.
The Disasembl Perspective: Safe Practices for Plush Toys
From a disassembly and repair standpoint, the safest approach to plush toy care is prevention. The Disasembl Team emphasizes avoiding heat-based methods and prioritizing gentle handling, air-drying, and spot-cleaning. If a bear sustains damage, use non-heat stabilization techniques and seek professional guidance for re-stuffing or repair. By prioritizing controlled cleaning and shaping, you extend the lifespan of a cherished Build-A-Bear while maintaining its softness and original appearance.
Tools & Materials
- Mild liquid detergent(Fragrance-free; use sparingly for spot cleaning)
- Clean white towel(For blotting and supporting the bear during drying)
- Soft-bristled brush or clean cloth(Gentle action to lift surface dirt)
- Basin or sink(Optional for controlled spot cleaning; not required for air-drying)
- Mesh laundry bag(Use for delicate wash attempts only; avoid heat)
- Fan or air-only drying space(Helps speed up air-drying without heat)
Steps
Estimated time: Estimated total time: 2-6 hours
- 1
Remove removable accessories
Take off any detachable items (if safe) to prevent loss during cleaning. This reduces risk of damage from moisture or friction. If any accessory is glued or sewn, leave it in place to avoid tearing.
Tip: Place removed items in a separate container to prevent misplacement. - 2
Blot excess moisture
Gently press a clean towel against the surface to absorb water. Avoid rubbing, which can push moisture deeper into the stuffing or distort fibers.
Tip: Do not twist or wring the bear; this can deform limbs and shape. - 3
Spot-clean with mild soap
Mix a small amount of detergent with cool water. Dampen a cloth and spot-clean only the dirty areas. Rinse by dabbing with a cloth dampened in clean water.
Tip: Test a hidden area first for colorfastness. - 4
Reshape while damp
Gently reshape ears, limbs, and torso as you remove moisture. This helps the bear dry in its intended form and reduces the risk of permanent flattening.
Tip: Support delicate parts with your fingers to maintain contours. - 5
Air-dry in a safe space
Place the bear on a clean towel in a well-ventilated room away from direct sunlight. If possible, elevate it on a wire rack to allow air to circulate around all sides.
Tip: Rotate every couple of hours to promote even drying. - 6
Use a fan with caution
If you use a fan, keep it on a cool setting and avoid direct, forceful airflow on a single spot. Excessive air can cause fibers to become brittle over time.
Tip: Do not place the bear near heat sources like radiators or heaters. - 7
Check for dryness and odor
Before returning it to use, ensure the entire toy is completely dry. Look for damp spots and sniff for any musty odor; re-dry if necessary.
Tip: If odor is present after drying, repeat cleaning steps with more focus on affected areas. - 8
Reinspect and restore shape
Once dry, inspect seams and facial features. If you notice loose threads, repair carefully with needle and matching thread. Do not use heat to seal threads.
Tip: Keep a small sewing kit on hand for quick touch-ups.
Got Questions?
Can I wash a Build-A-Bear in the washing machine?
Machine washing is generally not recommended for plush bears, as agitation and heat can damage stuffing, seams, and decorative elements. Hand washing or spot cleaning is preferred. Always check care instructions if available.
Machine washing is usually not recommended for plush bears. Stick to gentle hand cleaning or spot cleaning to protect stuffing and seams.
Is it safe to tumble dry on low heat?
Tumble drying, even on low heat, can warp the stuffing and distort the toy’s shape. It’s best to air-dry and reshape as it dries rather than risking heat exposure.
Tumble drying isn't safe for plush bears. Air-dry instead to preserve shape and loft.
How long does air-drying take?
Air-drying time varies with size, fabric, and humidity. Smaller bears may take a few hours; larger ones can take half a day or more. Ensure everything is fully dry before use.
Drying time depends on size and humidity; plan for several hours to a day and check thoroughly.
Can I disassemble a Build-A-Bear for re-stuffing?
Disassembly is not typically recommended for casual care. If you pursue disassembly for repair, follow expert guidance to avoid compromising safety or warranty. For most owners, professional repair service is safer.
Disassembly isn’t usually advised. If you must, seek proper guidance to avoid safety issues.
What should I do about odors after cleaning?
If a faint odor remains, repeat the cleaning process focusing on the interior seams and stuffing area. Ensure complete drying and consider ventilation during the process to prevent mildew.
If odors linger, repeat gentle cleaning and make sure the toy is fully dry.
Watch Video
What to Remember
- Avoid tumble drying any plush like Build-A-Bear.
- Prioritize air-drying and spot-cleaning for safety and longevity.
- Use gentle tools and mild cleaners to preserve texture and color.
- Inspect repairs and reshape toys to maintain form.