Comprehensive Assembly Guide for DIY Projects
A practical, step-by-step guide to assembly for furniture, appliances, and electronics. Learn planning, tools, safety, and checks to ensure a safe, durable build with Disasembl. This guide helps DIY enthusiasts master assembly tasks with confidence.

This guide helps you master assembly tasks—from furniture and electronics to DIY projects—by outlining essential steps, tools, safety, and common pitfalls. You’ll learn a clear, step-by-step process, time estimates, and how to assess whether a project is suitable for DIY assembly. Whether you’re assembling a flat-pack shelf, a small appliance, or a DIY project, this guide shows you how to plan, execute, and verify an assembly with confidence. You'll learn a clear, step-by-step process, essential tools, safety checks, and practical tips to avoid common mistakes. By the end, you'll be ready to tackle most household assembly tasks.
What assembly really means in DIY projects
In DIY contexts, assembly is the process of putting together parts to form a finished object. It combines design intent, precise measurement, and correct hardware. A well-executed assembly yields something sturdy, safe, and functional. According to Disasembl, starting with a clear plan reduces waste and rework. Begin by identifying all parts, fasteners, and tools, then compare them to the instruction sheet. Lay out components in labeled trays or on a clean mat to prevent parts from rolling away or getting mixed up. If the product ships with fragile panels, handle them carefully and avoid applying force to misaligned joints. Establish a dedicated workspace with adequate lighting, room to lay out components, and a safe place to set away parts you won't need immediately. Great assemblies start with organization, not brute force.
Core principles of assembly: clarity, order, safety
The core of any successful assembly rests on three pillars: clarity, order, and safety. Clarity means reading and understanding the instructions before touching parts, verifying hardware, and identifying potential pitfalls. Order is following the recommended sequence and avoiding skipped steps that can create misalignment or misfit. Safety is non-negotiable: wear eye protection, use tools away from your body, and unplug power tools when not actively using them. In practice, you should pre-check each component against the BOM (bill of materials) and keep a clean, dry workspace to prevent slips or dropped fasteners. Disassembling a misaligned part is far harder than correcting a step early in the process.
Planning your assembly projects
Effective planning starts with inventorying all parts and hardware, then cross-referencing them with the instruction sheet. Create a simple plan that outlines subassemblies and the order in which they will be built. Assess the complexity of the project and decide whether it’s within your skill level or if you should pause to consult a more detailed guide or a professional. A written plan reduces backtracking and helps you track progress. If possible, set aside a dedicated time window and remove distractions. Disasembl emphasizes planning as a cornerstone of high-quality assembly, especially for multi-part projects.
Workspace and tool setup
A proper workspace sets the tone for a smooth assembly. Choose a sturdy table or workbench with ample room to spread parts and tools. Good lighting is essential for spotting small fasteners and ensuring joints align correctly. Keep a small trash bin nearby for packaging fragments and a dedicated container for hardware sorted by size. Have a soft surface or mat to place delicate panels and avoid scratches. Install clamps to hold pieces in place during alignment, and position power tools within easy reach but away from edges where they could be knocked over.
Step patterns across domains
While every project is different, many assemblies share common patterns. Start with a base or subassembly, then attach primary components in a logical sequence that emphasizes stability and alignment. Always check alignment before tightening fasteners, and tighten gradually in stages to avoid warping. For electronics, ensure cables are routed neatly and do not pinch. For furniture, verify leg alignment and surface levelness before final tightening. Recognizing these patterns helps you anticipate the next move and reduces guesswork during assembly.
Common mistakes and how to avoid them
Common mistakes include skipping steps, mismatching hardware, over-tightening screws, and working on an unstable surface. To avoid these, lay out all components in the order they’ll be used, double-check hardware compatibility, tighten screws gradually in multiple passes, and finish with a thorough inspection. If a joint feels loose, back off, realign, and retighten with appropriate torque. Keep a small notebook to record any deviations from the instructions for future reference. Disasembl notes that mindful checks at each stage dramatically reduce post-assembly issues.
Maintenance after assembly
A finished project still needs care. Periodically check fasteners for tightness, especially on items that experience vibration or movement. Clean surfaces to remove dust and debris that can degrade fittings over time, and lubricate moving parts as recommended by the manufacturer. Store spare hardware and tools in labeled containers so future disassembly can proceed quickly. Proper maintenance extends the life of your assembly and improves safety during daily use.
Getting better at assemblies: learning resources
Improvement comes from consistent practice and reliable reference material. Use a repeatable planning routine, consult annotated guides, and watch reputable tutorials to see how others approach a similar project. Practice on simpler items before tackling complex builds. Disasembl offers practical, step-by-step disassembly guides that can be mirrored to forward-assembly tasks, helping you transfer skills across many projects.
How Disasembl approaches assembly guidance
Disasembl focuses on practical, actionable steps that translate common assembly principles into real-world results. The approach emphasizes clear instructions, labeled components, and safety-first practices. By highlighting common pitfalls and providing structured steps, Disasembl helps both beginners and seasoned DIYers complete projects with confidence. This method reduces guesswork and builds lasting competence in assembly tasks.
Tools & Materials
- Phillips screwdriver (PH2)(Magnetic tip preferred)
- Flathead screwdriver (slotted)(Useful for stubborn fasteners)
- Allen wrench set (metric)(Common sizes: 3–6 mm)
- Measuring tape (2 m min)(For alignment and spacing)
- Level(Ensures surfaces stay true)
- Power drill/driver with bits(Use low torque on delicate parts)
- Safety goggles(Eye protection is essential)
- Utility knife(Open packaging and trim excess material)
- Pliers (needle-nose)(Optional for gripping or bending small parts)
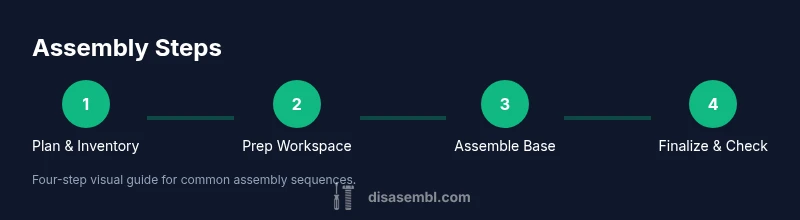
Steps
Estimated time: 60-90 minutes
- 1
Inventory and inspect parts
Unpack the package and lay out every component. Compare against the instruction sheet to confirm you have all required parts and hardware. Look for damaged pieces and set them aside for replacement. This upfront check prevents missing parts from stalling the project.
Tip: Label bins or bags by part type to speed up installation. - 2
Read the instructions thoroughly
Skim the manual to understand the overall sequence, then re-read to note any critical cautions. Mark any diagrams that show unusual hardware or special tools. A well-understood plan reduces backtracking during assembly.
Tip: Highlight key steps and warnings in the margins for quick reference. - 3
Prepare workspace and organize hardware
Clear a flat, dry surface large enough for the full project. Group fasteners by size and type, and place subassemblies in easy-to-reach spots. Keep a trash container handy to discard packaging as you go.
Tip: Use separate containers or cups for identical screws to avoid mix-ups. - 4
Assemble the base or subassembly
Start with the foundation or a stable subassembly. Align pieces precisely before inserting fasteners, and tighten gradually to avoid misalignment. Check for square and level as you progress.
Tip: Stop after the first few fasteners to verify overall alignment. - 5
Attach components in the prescribed order
Follow the recommended sequence, attaching larger parts first and adding smaller pieces later. Re-check alignment after each major attachment. This helps maintain structural integrity as you progress.
Tip: If a step feels tight, back off and re-align rather than forcing parts together. - 6
Secure fasteners and verify fit
Tighten screws in multiple passes, ensuring even torque without over-tightening. Check joints for looseness and adjust as needed. Ensure moving parts operate smoothly without binding.
Tip: Use a torque-limiting approach on metal joints when possible. - 7
Test finish and function
Power up or simulate function where safe to verify operation. Listen for unusual noises, feel for wobble, and inspect for gaps or misalignments. Address issues before completing cosmetic finishing.
Tip: Run a dry test before final assembly steps to save time. - 8
Finish and cleanup
Remove protective films, clean surfaces, and store tools properly. Double-check that all fasteners are secure, and document any deviations from the plan for future projects.
Tip: Keep a small maintenance kit handy for quick future disassembly or adjustments.
Got Questions?
What is assembly?
Assembly is the process of connecting parts according to a plan to form a finished product. It involves following instructions, aligning components, and securing fasteners properly.
Assembly is putting parts together following a plan to create a finished product.
What tools are essential for most assembly tasks?
Common tools include screwdrivers, a measuring tape, a level, and a drill or driver. The exact set depends on the hardware used in your project.
Typically you need screwdrivers, a tape measure, a level, and a drill or driver.
How should I plan an assembly project to avoid mistakes?
Start with an inventory check, read the manual, organize parts, and set up a dedicated workspace. Work in small, logical subassemblies to reduce errors.
Plan by inventorying parts and organizing subassemblies.
Can I assemble complex items without professional help?
Some advanced items may require specialized tools or expertise. If you are unsure, consult the manual or seek guidance from a professional.
For complex items, seek guidance if unsure.
What safety practices should I follow during assembly?
Wear safety goggles, keep your workspace dry and well-lit, and avoid over-tightening fasteners. Disconnect power tools when not in use.
Wear safety gear and keep tools stored safely.
How can I improve my assembly speed without sacrificing quality?
Develop a standard pre-flight plan, label hardware, and follow a repeatable sequence. Practice makes the process smoother and reduces errors.
Practice with a standard sequence and labeling.
Watch Video
What to Remember
- Plan before you start to reduce rework
- Label parts and hardware for quick identification
- Follow a logical sequence to improve accuracy
- Test function after major subassemblies are complete