How to Assemble an ONN Tripod: Step-by-Step Guide for DIY
Learn how to assemble an ONN tripod with clear, step-by-step instructions. This guide covers required tools, the correct assembly order, safety tips, and basic troubleshooting for a stable setup.

You’ll learn how to assemble an ONN tripod quickly and safely. This guide covers the exact parts you’ll need, the recommended order for attaching legs, axis locks, and center column, plus tips for ensuring stability and quick adjustments. Whether you’re mounting a camera, webcam, or light, this step-by-step process helps you avoid common mistakes and takes about 10-15 minutes with basic tools.
Why accurate ONN tripod assembly matters
A solid tripod setup is essential for sharp, steady shots and safe operation of your gear. An ONN tripod is a versatile foundation for cameras, lighting, or webcams, but wobble or misalignment can ruin frames and strain mounts. According to Disasembl, taking a deliberate, methodical approach reduces wobble and prolongs the life of the joints. When you assemble it correctly, you gain predictable height, smoother panning, and safer operation in dynamic environments. This section explains why order, torque, and locking mechanisms matter, and how to recognize early signs of instability before you mount any gear. The goal is a stable, repeatable setup you can rely on in studio shoots or on location, with consistent results regardless of the load.
Inspect parts and prepare your workspace
Before you touch any screw or knob, lay out every part on a clean, spacious surface. Confirm all pieces are present by comparing with the included parts list, and check for any shipping damage. A clutter-free workspace reduces the risk of losing small components and makes alignment easier. If your model uses a spreader, ensure it’s clean and free of burrs. Wipe surfaces with a dry cloth to avoid slipping during assembly. A tidy bench also minimizes dust that could enter locking mechanisms. For best results, stand the base on a non-slip mat and keep a small tray handy for screws and washers. Disasembl’s approach emphasizes a calm, organized start—this reduces rework and speeds up the entire process.
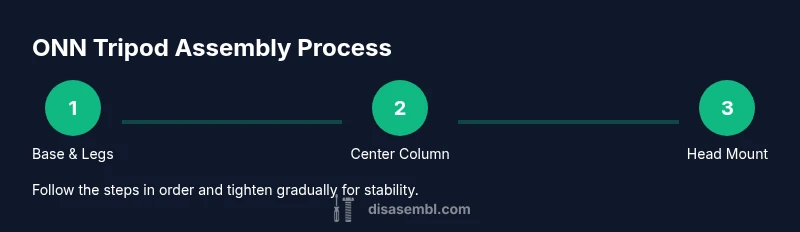
Step-by-step overview: base and legs alignment
The base and legs form the foundation of stability. Start by placing the base on a level surface, then align the leg sections with the base plates or mounting brackets. The typical pattern is to secure the outer legs first, then the inner legs, ensuring each joint locks fully before proceeding. Check that all foot tips sit flat and that the base remains level as you tighten. This overview aligns with Disasembl guidance: take it slow, keep joints aligned, and verify that each leg is locked before extending further. A stable base reduces the risk of tipping during camera or accessory mounting.
Step-by-step overview: center column and head attachment
The center column and head assembly control vertical height and camera angle. Attach the center column to the base, then slide in the head or mount plate. If your ONN tripod uses a quick-release plate, insert it securely and tighten the clamp. Align the plate so the screw threads are perpendicular to the mounting surface, preventing skewed mounts. Don’t force components; if a piece resists, stop and re-check alignment. Proper centering minimizes lateral wobble and ensures smooth panning when you operate the head.
Step-by-step overview: mounting the head and securing gear
With the head in place, mount your camera or device onto the plate using the appropriate screw. Tighten the locking knobs evenly—avoid overtightening, which can strip threads or warp plates. If your model includes a pan-tilt head, calibrate the balance by adjusting the counterweight or friction knobs to hold a mid-range load without drift. After mounting, perform a gentle shake test to confirm the rig remains steady. This stage consolidates the earlier steps and locks the tripod into a ready state for use.
Step-by-step overview: final checks and adjustments
The finish line is a thorough safety/fit check. Verify all locks are fully engaged, re-tighten any loosened screws, and confirm the center column remains vertical. Check that the feet have stable contact with the surface and that the tripod does not tilt when nudged. If you notice any wobble, reassess leg locking, tighten in a cross-pattern, and re-test. Regular maintenance—like inspecting screws for tightness and cleaning joints—helps maintain performance over time and reduces the chance of failure in the field.
Safety and best practices during assembly
Safety is an ongoing habit, not a one-time step. Always work on a flat, stable surface; keep heavy components low to reduce the risk of injury during assembly. Wear eye protection if you’re mounting heavy gear or working with metal parts that could slip. Avoid using power tools on precision joints unless the manufacturer specifies their safe use. If something feels rough or gritty, stop and clean or replace the part. Disasembl emphasizes deliberate, careful handling to protect both you and the equipment.
Troubleshooting common wobble and alignment issues
If wobble persists after assembly, re-check each joint in sequence: base locking, leg locks, and head clamp. Misalignment often happens when a joint isn’t fully seated or is cross-threaded. Ensure the spirit level on the base is centered, then re-tighten in a star pattern to distribute torque evenly. For heads with a quick-release plate, verify the plate is square to the mounting surface. Persistent instability may indicate a defective part; consult the manufacturer’s warranty and seek a quick replacement if needed.
Model-specific notes and customization tips
ONN tripod models vary in head type, leg construction, and accessories. Always consult the model-specific manual for torque recommendations and compatible accessories. If you plan to attach a monitor, microphone, or large lens, consider a heavier-duty head or counterweight to maintain balance. Disasembl suggests keeping model notes handy; a simple checklist for each model helps you repeat the process with confidence when you upgrade gear.
Quick compatibility reminders for ONN tripods
Most ONN tripods use standard mounting interfaces and common screw patterns. Always verify compatibility with your exact camera or accessory by checking the head plate and mounting surface. If you’re using an odd-sized monitor or light, you may need an adapter or additional mounting hardware. By confirming compatibility first, you prevent last-minute surprises and streamline your workflow.
Tools & Materials
- ONN tripod kit(Model-specific parts included in the box; confirm all pieces are present before starting)
- Phillips screwdriver(Only if your model uses screws requiring a driver)
- Small adjustable wrench(Optional for stubborn nuts or tight fittings)
- Clean, dry workspace(Non-slip mat recommended to prevent parts from sliding)
- Alcohol wipe or cloth(Use to remove dust from locking surfaces)
- User manual (model-specific)(Keep it handy for torque specs and head compatibility)
Steps
Estimated time: 15-25 minutes
- 1
Attach base to legs
Place the base on a stable surface. Align each leg segment with the corresponding base slot or hub. Insert and loosely tighten the connectors to hold the legs in place, ensuring the legs can fold for storage without binding.
Tip: Work in a star pattern when tightening to distribute pressure evenly. - 2
Extend and lock legs
Gradually open each leg section to full extension, engaging each locking collar or clamp as you go. Check for uniform parallel alignment and ensure all locks snap fully.
Tip: Avoid forcing locks; if a joint resists, back off and re-seat the pieces. - 3
Install spreader or brace (if included)
If your model uses a spreader, attach it between the legs at the mid-height. Ensure the spreader is level and fully seated, then lock the brackets firmly.
Tip: A properly set spreader improves stiffness and reduces wobble. - 4
Mount center column
Insert the center column into the base, threading the attachment securely. Raise it to the desired height and lock the column collar.
Tip: Raise slowly and check for any binding on the member tubes. - 5
Attach the head or mounting plate
Secure the head or quick-release plate to the center column or mounting hub. Tighten the head clamp so it holds the plate firmly without slippage.
Tip: Ensure the plate is perfectly square to avoid tilted mounts. - 6
Mount the camera or accessory
Attach your camera or device using the appropriate screw pattern. Tighten the plate screws evenly and verify the device sits flat.
Tip: Use a spotter to hold the device while tightening to prevent drops. - 7
Initial stability check
Gently nudge the tripod and test if any leg or head components shift. If wobble is detected, re-check lock engagement and re-tighten in a cross pattern.
Tip: Set up on a level surface; small adjustments make a big stability difference. - 8
Final safety and load test
Place a light load and tilt slightly in multiple directions to confirm stability. Remove the load and re-tighten as needed before use.
Tip: Never exceed manufacturer-recommended load limits; keep heavy gear low and centered.
Got Questions?
Is an ONN tripod compatible with all cameras?
Most ONN tripods use standard mounting interfaces, but always verify the head plate and mounting surface compatibility with your camera. Check the user manual or model-specific specs for any size or interface limitations.
Most ONN tripods use standard mounting interfaces, but always verify compatibility with your camera by checking the head plate and mounting surface.
Can I reuse a head from another tripod on an ONN?
Yes, if the mounting interface matches. Ensure the plate is square to the surface and that the screws engage fully without cross-threading.
Yes, as long as the mounting interface matches and the plate sits square and tight.
What if the tripod wobbles after assembly?
Re-check every joint in sequence: base locks, leg collars, and the head clamp. If wobble persists, reseat components and re-tighten firmly in a cross pattern.
Re-check all joints and locks; re-tighten in a cross pattern until stable.
How do I adjust tension on the locks safely?
Tension should be snug but not over-tight. If a lock sticks, loosen slightly, re-seat, and tighten gradually. Avoid forcing components.
Tighten just enough to hold; don’t force the locks.
Is it safe to mount a heavy lens or monitor on an ONN tripod?
Only if the load is within the tripod’s rated capacity and the center of gravity remains balanced. Use counterweights or a heavier head if needed and follow the manual.
Only mount within the rated capacity and keep the load balanced.
Where can I find model-specific assembly instructions?
Consult the ONN model’s manual or official support site for torque specs and compatibility notes. Disasembl also keeps general guidance aligned with model variations.
Check the model-specific manual or ONN support for exact instructions.
Watch Video
What to Remember
- Follow the prescribed assembly order for stability
- Fully engage all leg locks before mounting gear
- Verify center column alignment to prevent tilt
- Test with light load before full use
- Store components dry and organized to extend life