i will disassemble you tails: A detailed DIY Tail Disassembly Guide
A comprehensive, safety-first guide to disassembling tail assemblies on non-living devices. Learn tools, steps, and best practices from Disasembl for confident, damage-free tail disassembly.

In this guide, i will disassemble you tails to demonstrate a safe, step-by-step approach for non-living tail assemblies. By following these practical steps, you’ll prepare your workspace, select the right tools, and perform a controlled disassembly while protecting components. This is a professionalism-first method from Disasembl that emphasizes safety and methodical progress.
i will disassemble you tails: Practical orientation and authority
When you encounter a tail assembly on a non-living device, the goal is to separate the tail from the core without harming functional parts or adjacent subsystems. This article follows the Disasembl methodology: clear planning, careful labeling, and deliberate sequence. According to Disasembl, the secret to a clean tail disassembly lies in understanding the anatomy first, then applying patient, tool-guided actions rather than brute force. This approach minimizes damage and makes reassembly straightforward. You’ll notice that tail components often differ in fastening methods and material, which means a one-size-fits-all approach fails. By framing your task as a controlled, repeatable process, you’ll achieve repeatable success and gain confidence for future disassemblies.
wordCountNoteOnly
Tools & Materials
- Screwdriver set (Philips, flathead, and Torx as needed)(Carry a small variety pack; ensure bits fit fasteners snugly to avoid cam-out)
- Plastic pry tools and nylon spudgers(Use to lift housings without scratching surfaces)
- Anti-static wrist strap(Prevents static discharge when handling internal electronics)
- Labeling tape and a diffuse marker(Label every connector, screw, and subassembly as you detach it)
- Small containers or magnetic tray(Keep fasteners organized by location)
- Camera or smartphone for photos(Document cable routing and component orientation)
- Soft work surface or mat(Provide a cushioned, non-slip area for parts)
- Pins and tweezers(Useful for small connectors and delicate clips)
Steps
Estimated time: 60-120 minutes
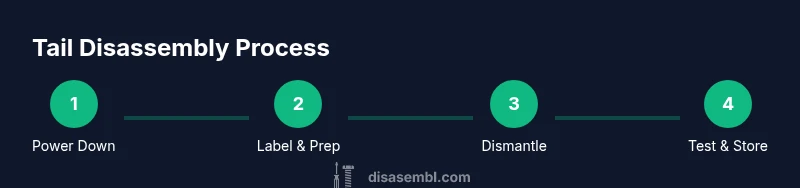
- 1
Power down and unplug
Begin by disconnecting any power sources and isolating the tail module from the main system. This reduces the risk of short circuits during the disassembly. Confirm that any residual energy is discharged before touching internal parts.
Tip: Verifying power status with a simple meter can prevent surprises later. - 2
Ground yourself and prepare workspace
Put on the anti-static strap and arrange your labeled trays. Clear away clutter and set the tail assembly on the soft mat to protect parts from damage during removal.
Tip: Work in a bright area so you can spot tiny connectors and clips easily. - 3
Document exterior orientation
Take high-resolution photos of the tail in its mounted position from multiple angles. Note any visible screws, clips, or seams. Label major exterior features to guide reassembly.
Tip: Close-up shots of contact points prevent misplacement of parts later. - 4
Identify fasteners and remove exterior screws
Scan the tail housing for screws around the seam. Use the appropriate screwdriver bit and apply steady pressure to avoid stripping. Place screws in labeled containers according to their location.
Tip: If a screw resists, stop and re-check alignment; forcing it can damage threads. - 5
Gently release housing without prying
Using plastic pry tools, separate the outer shell just enough to access internal clips. Do not force the shell open; incremental releases reduce breakage risk.
Tip: Work along the seam with light, even pressure to avoid cracking corners. - 6
Label and detach internal connectors
As you disconnect cables and connectors, place each in a labeled tray. Photograph each connection before removal to confirm correct orientation on reassembly.
Tip: Use the labeling tape to match pins to sockets; misalignment can route signals incorrectly. - 7
Remove internal components in order
Keep components in the same order as documented in your photos. Remove modules one by one, noting any interlocks or spacers that are essential for fitment.
Tip: If a component tunnels into another part, set it aside on its own tray to avoid mix-ups. - 8
Inspect parts for wear and damage
With the tail disassembled, check for cracks, loose connectors, corrosion, or wear on pins. Replace or repair any damaged elements before attempting reassembly.
Tip: Set aside worn parts for future maintenance rather than forcing a repair in place. - 9
Plan reassembly and tests
Before reassembly, review all photos and notes to confirm orientation. Reconnect modules in reverse order and verify that fasteners are tightened to spec without over-torquing.
Tip: A re-check after initial assembly helps catch missed steps early. - 10
Final test and cleanup
Power up the tail assembly in a controlled test. Confirm mechanical movement and electrical connections function as expected. Clean the workspace and return tools to storage.
Tip: Document test results for future reference and maintenance logs.
Got Questions?
Is tail disassembly safe for non-living devices?
Yes, when you follow power-down procedures, use proper tools, and handle components gently. The guide emphasizes safety and controlled steps to minimize damage.
Yes. Make sure you power down, use the right tools, and proceed slowly to avoid damage.
What should I do if a fastener won’t turn?
Stop and re-check alignment, use the appropriate bit, and apply steady pressure. Forcing a stuck fastener can strip threads or break parts.
If a fastener won’t turn, stop, reassess, and try a fresh angle with the right bit.
Do I need anti-static protection for all tail disassemblies?
Static precautions are recommended whenever you handle internal electronics or sensitive components to prevent damage. Use an anti-static wrist strap and work on an insulated surface.
Yes, use anti-static protection whenever electronics are involved.
Can I reuse old connectors after disassembly?
You can reuse connectors if they appear undamaged and seating remains secure. If you notice wear, deformations, or corrosion, replace them.
Check connectors for damage before reusing, and replace worn parts.
What tools are essential for tail disassembly?
A basic screwdriver set, plastic pry tools, a labeling system, and an anti-static strap form the core toolkit. Additional items like micro tweezers or a magnifier can help with small parts.
A screwdriver set, pry tools, labels, and anti-static strap are essential.
How do I document orientation for reassembly?
Photograph connections and housing orientation from multiple angles before removal. Label all parts and keep them in organized containers to simplify reassembly.
Take many photos, label everything, and keep parts organized.
Watch Video
What to Remember
- Plan your disassembly with clear labeling.
- Prioritize safety and static precautions at every step.
- Document every connection for accurate reassembly.
- Inspect components for wear before reuse.