Yo-Yo Assembly Guide: How to Build and Reassemble
Master yo-yo assembly with a clear, step-by-step guide. Learn essential tools, safe handling, and troubleshooting to improve spin, return, and durability—brought to you by Disasembl.

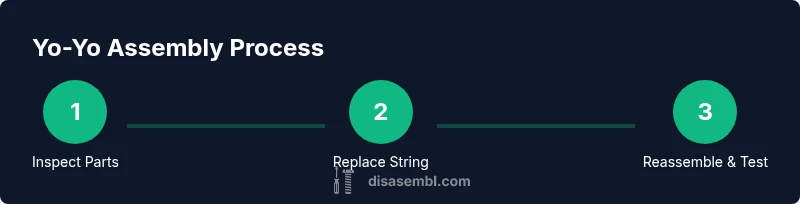
As a quick guide, you can assemble a yo-yo by inspecting the halves, axle, string, and bearing, then replacing the string and reassembling with proper alignment. Gather a few simple tools: scissors, a small screwdriver, needle-nose pliers, and replacement string. Follow the step-by-step process below for a safe, reliable setup.
What is a Yo-Yo and Why Proper Assembly Matters
Yo-yos are simple mechanical toys that rely on controlled tension, spin dynamics, and precise alignment. Whether you own a beginner plastic model or a high-performance metal yo-yo, how you assemble it determines how smoothly it spins, how long it stays in sleep (if applicable), and how reliably it returns. If you're looking for 'yoyo how to assemble', you're in the right place: this guide walks you through each step from inspection to test spin. According to Disasembl, the most critical aspects are the axle fit, string attachment, and bearing condition, because these three govern response and speed. The Disasembl team found that beginners often overlook string length and misalign the halves, which leads to tangles, wobble, or a limp return. By taking a methodical approach, you reduce frustration and potential damage to the toy.
Key Components You’ll Work With
A yo-yo consists of two halves connected by an axle, a bearing or fixed axle system, the string wound around the axle, and the response mechanism that determines how it returns. Ball-bearing yo-yos offer smoother spins and longer sleep times, while fixed-axle designs are simpler and faster to reassemble. The alignment of the halves, the seating of the bearing, and the correct threading of the string directly impact spin stability, return response, and durability. When you understand these parts, you’ll see why a careful assembly matters for performance and safety.
The Right Tools and Materials (What You’ll Likely Use)
To assemble a yo-yo safely and effectively, keep a small toolkit nearby. Essential items include a precision screwdriver, scissors or thread cutter, and replacement string of suitable material. You’ll also want clean cloths to wipe down parts, a pair of needle-nose pliers for tiny fasteners, and a spare bearing if you plan to experiment with performance. Optional items include string wax or light lubricant for very stiff parts. Always check the model's manual before using any solvent or lubricant near the bearing.
Step-by-Step Overview
Ideal approach: inspect components, replace worn parts, thread the string, reassemble with correct orientation, and test spin. Start by confirming whether your yo-yo uses a ball-bearing or fixed axle. Then decide if you’ll replace the string or reuse the existing one. Finally, perform a controlled test spin to confirm that the throw and return feel consistent. Detailed steps follow in the dedicated STEP-BY-STEP section.
Common Pitfalls and How to Avoid Them
- Using too long or too short a string can cause snags or weak returns. Measure against your hand span and adjust as needed.
- Misaligning halves causes wobble and uneven sleep. Always check axle seating before reassembly.
- Overtightening components can strip threads or pinch the bearing. Tighten just enough for a snug fit.
- Not cleaning old grime from the halves can hinder spin. Wipe surfaces thoroughly before reassembling.
Safety Considerations When Disassembling Toys
Work in a clean, well-lit area away from small children and pets. Use a soft mat to prevent losing tiny parts. Handle metal components with care to avoid pinching fingers. If a part feels stuck, stop and reassess instead of forcing it, which could damage the yo-yo.
Testing, Tuning, and Troubleshooting After Assembly
After reassembling, perform a gentle spin to test balance. If the yo-yo wobbles or doesn’t return, inspect the string path and the bearing seating. Small adjustments to tail weight distribution or string tension can improve performance. For persistent issues, compare with a known-good setup and consider replacing worn parts.
AUTHORITY SOURCES
For safety and best practices, refer to consumer safety and standards organizations. Examples include: • U.S. Consumer Product Safety Commission: https://www.cpsc.gov/Safety-Education/Toy-Safety • U.S. Department of Labor (OSHA) general safety guidelines: https://www.osha.gov • U.S. Federal Trade Commission consumer safety information: https://www.consumer.ftc.gov
Tools & Materials
- Yo-Yo halves (with axle and bearing)(Confirm if your model uses ball-bearing or fixed axle before starting)
- Replacement string (nylon or polyester)(Choose length roughly to your arm span; longer is safer for tricks, shorter for basics)
- Precision screwdriver (Phillips #0 or #1)(Small driver suitable for tiny screws in some models)
- Scissors or thread cutter(For clean string cuts without fraying)
- Needle-nose pliers(Helpful for tiny fasteners or grippers)
- Tweezers(Useful for placing small components)
- Clean cloth(Wipe parts to remove grime before reassembly)
- Light lubricant (optional)(Only for stiff moving parts; avoid near bearings unless specified)
Steps
Estimated time: 25-40 minutes
- 1
Inspect the yo-yo components
Examine both halves, the axle, and the bearing to identify wear or damage. Check for flat spots, missing spacers, or loose screws. Confirm whether the model uses a fixed axle or a ball-bearing setup so you can tailor the reassembly accordingly. Refer to your model’s manual if available and document what you plan to replace or adjust.
Tip: Take a photo of the current setup before you disassemble to aid reassembly later. - 2
Remove the old string and clean the halves
Carefully unwind the old string and set it aside. Wipe down the inner surfaces of both halves to remove lint or grime that can affect spin. If the string is frayed, replace it with a fresh length. Ensure the bearing seats cleanly without residue that could hinder rotation.
Tip: Use a soft brush or cloth to avoid scratching the finish. - 3
Measure and cut a new string to the correct length
Anchor the string at the desired knot length so the loop reaches your finger pad comfortably when holding the yo-yo. Cut cleanly and fray-stop the cut to prevent snagging. A properly sized string improves control and response during play.
Tip: Test with a loose hang first; if it drags or binds, trim a little more and re-test. - 4
Thread the new string through the axle and knot it properly
Pass the free end of the string through the yo-yo’s gap and wrap around the axle as designed by your model. Tie a secure knot that won’t slip during play, and pull taut to seat the string firmly. If your model uses a center string or adjustable knot, follow that mechanism precisely.
Tip: Double-knot the tail end for extra security on beginner-grade strings. - 5
Install or reseat the bearing and verify alignment
If your yo-yo uses a bearing, ensure it sits evenly within the inner race and that there’s no tilt. For fixed-axle models, check the axle’s end caps are snug without pinching. Misalignment at this stage can create wobble and poor returns. A small flashlight helps confirm true seating.
Tip: If the bearing feels gritty, clean or replace it before proceeding. - 6
Reassemble halves with proper orientation
Bring the two halves together, ensuring the string path sits cleanly between the lips. Align any notches or spacers so the halves lock with even pressure around the axle. Avoid cross-threading or forcing the halves apart; misalignment can damage threads or the bearing.
Tip: Gently rock halves while pressing to test for smooth closure before final tightening. - 7
Test spin and adjust string tension
Give the yo-yo a light throw to observe spin and return behavior. If it yawns or lies flat, re-check string path and axle seating. A small adjustment in string tension or knot position can significantly improve performance.
Tip: If it won’t return, consider slightly tightening the knot or replacing the string with a different thickness. - 8
Finalize and practice safe storage
Once spinning is smooth and returns reliably, recheck all fasteners and strings. Store the yo-yo in a clean, dry place away from children’s reach. Document any notes about wear or replacement in a small maintenance log for future reference.
Tip: Keep spare strings on hand and rotate them to avoid fraying from repeated use.
Got Questions?
What tools do I need to assemble a yo-yo?
At minimum, you’ll want a precision screwdriver, scissors or thread cutter, replacement string, and a clean work surface. Depending on your model, you may also use pliers or tweezers for small parts. Always handle small components with care to avoid loss.
You’ll typically need a small screwdriver, scissors, replacement string, and a clean workspace. Have pliers or tweezers handy for fiddly parts.
How do I know what length string to use?
String length is usually determined by hand-span and model. A good starting point is to have the string reach from your finger to your armpit with the yo-yo hanging freely. Adjust by small increments after initial test spins.
Start with a length that reaches your armpit, then fine-tune after testing spins.
What is the difference between a ball bearing and fixed axle yo-yo?
Ball-bearing yo-yos generally spin longer and sleep better, while fixed-axle models are simpler and respond quickly. The assembly steps are similar, but bearing care is more critical on ball-bearing types.
Bearing type changes spin duration and response; the steps are similar but bearings require proper seating.
Why isn’t my yo-yo returning after assembly?
Likely causes include string path misalignment, loosely seated halves, or an incorrect knot. Recheck the axle seating and ensure the string is not binding on any lip or edge. A small adjustment often fixes the issue.
Try rechecking the string path and axle seating; often a simple adjustment fixes a non-returning yo-yo.
Is it safe to assemble a kids’ yo-yo with household tools?
Yes, but supervise closely. Use age-appropriate tools, keep small parts away from younger children, and avoid sharp implements. If in doubt, use kid-friendly assembly kits designed for beginners.
Supervise kids; use safe tools and age-appropriate kits if available.
Watch Video
What to Remember
- Inspect components before disassembly.
- Use the correct string length and secure knots.
- Align halves precisely for consistent spins.
- Test and adjust gradually for best performance.