qx50 Radio Screen Disassembly: Step-by-Step Guide
Learn how to safely disassemble the radio screen in a QX50 with a clear, step-by-step approach. This guide covers tools, safety precautions, and reassembly tips for DIY enthusiasts.

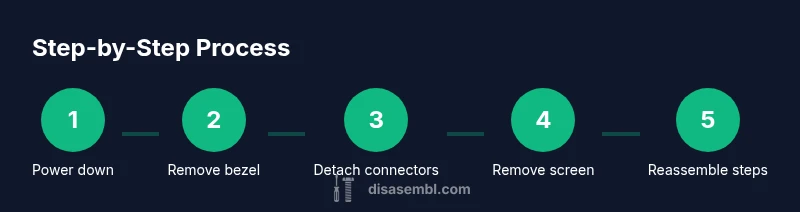
Disassembling the QX50 radio screen is a controlled, step-by-step task designed for safety. This quick overview highlights power-down procedures, basic tools, and the sequence from bezel removal to connector detachment. Following the steps reduces the risk of damage and preserves mounting brackets and wiring for future reassembly.
Understanding the QX50 radio screen assembly
According to Disasembl, the radio screen in the Infiniti QX50 is integrated into a modular dash assembly that blends the display with control housings and HVAC vents. Most model years use a bezel, a display module, a ribbon cable harness, and a mounting screw set. The connectors are typically flat-flex cables and multi-pin power/data plugs. Accessing the screen safely means recognizing these parts and avoiding abrupt prying that can crack the display or damage the ribbon. Before you begin, take a moment to picture how the bezel, screen, and wiring sit together. The more you understand the layout, the easier it will be to follow the steps without accidentally disconnecting or breaking nearby controls.
Safety first: risks and precautions
Disassembling a car radio screen involves interacting with live components and sensitive dash electronics. To minimize risk, always work with the ignition off and the battery disconnected, allow capacitors to discharge for several minutes, and use anti-static precautions. Keep a clean, labeled workspace, and store screws and small parts in labeled containers. If airbags or other safety systems are present near the dash area, avoid any forceful prying that could affect sensors. If anything feels uncertain, pause and seek professional help. Safety first saves time, money, and potential injury.
Workspace, tools, and setup
Create a bright, stable work surface with a soft mat to protect panels. Gather basic tools: plastic trim removal tools, a Phillips head screwdriver, Torx drivers, a sensor-safe magnetic tray, and an anti-static wrist strap if available. A camera or phone to document connector placements can be invaluable for reassembly. Maintain a labeling system for screws and clips, and work slowly to prevent accidental damage. Good lighting and organization reduce the risk of misplacing tiny connectors or misassembling the dash.
Accessing the bezel and dash panel
Access typically starts with releasing the outer bezel surrounding the radio using a plastic trim tool to avoid scratches. Gently pry along the seam while supporting the panel to prevent bending. Once the bezel is free, you can access screws that secure the radio/tray unit. In many variants, a top or bottom retainer clip must be pressed while pulling the module outward. Take care not to bend or tilt the display, and keep holding screws in a labeled tray to avoid mix-ups.
Detaching screen connectors and removing the screen
Locate the ribbon cable and power connectors at the back of the screen module. Some models employ locking tabs; disengage these locks evenly to avoid damaging delicate pins. Carefully disconnect the data ribbon and power cable, noting their orientation for reassembly. With connectors free, remove any mounting screws or brackets holding the screen in place. Lift the display straight out, supporting it along the edges to prevent stress on the glass or circuit board.
Reassembly considerations and tips
Before reassembly, inspect the connectors and cables for wear or damaged pins. Clean any dust with a microfiber cloth and reseat each connector firmly during reassembly. When reinstalling, reverse the removal order and reattach the bezel to verify alignment with surrounding panels. Power the system briefly to confirm basic function before finalizing the dash. If you notice flickering, missing segments, or warning lights, recheck connector seating and harness routing.
Tools & Materials
- Screwdriver set (Phillips #2 and Torx T20)(Magnetic tips recommended for small fasteners)
- Plastic trim removal tools(Avoid metal tools to minimize panel damage)
- ESD wrist strap(Helpful to prevent static damage to electronics)
- Anti-static mat or clean work surface(Keeps components dust-free and organized)
- Labeling containers or tape and a notepad(Track screws, clips, and connectors by location)
- Camera or smartphone(Document connector orientation for reassembly)
- Microfiber cloth(Light cleaning of dust or fingerprints without abrasion)
Steps
Estimated time: 45-60 minutes
- 1
Power down and prep
Park safely, turn off the ignition, and remove the key. Disconnect the 12V battery and wait 5–10 minutes to discharge capacitors. This minimizes the risk of short circuits and component damage during disassembly.
Tip: Use an anti-static strap if available to ground yourself before touching any electronics. - 2
Remove the dash bezel
Gently insert a plastic trim tool into the bezel seam and pry evenly around the perimeter. Work slowly to avoid snapping clips or scratching the surface. Once loose, slide the bezel away from the dash to expose the radio module.
Tip: Keep a hand on the bezel while prying to prevent sudden flexing. - 3
Disconnect screen connectors
Locate the back of the radio screen and identify locking tabs on the data and power connectors. Release the locks and carefully unplug the ribbons and plugs, noting their orientation for reassembly.
Tip: If a lock is stubborn, use a tiny pick to release it—don’t force the connector. - 4
Remove mounting screws/brackets
Use the appropriate screwdriver to remove screws or brackets holding the screen in place. Place screws in labeled containers to avoid mix-ups.
Tip: Take a photo of each step before removal to aid reassembly. - 5
Lift the screen module
With connectors free, lift the screen module straight out from the dash while supporting the edges. Avoid bending the ribbon cable and keep the glass protected.
Tip: Support the screen with both hands and maintain a clean workspace to prevent drops. - 6
Inspect and prepare for reassembly
Inspect connectors, routing, and brackets for wear. Clean dust with a microfiber cloth and organize all parts. Decide if you will reassemble or replace any components.
Tip: Check for torn ribbon ends or pin damage before attempting reassembly. - 7
Test before final reassembly
Before reinstalling the dash, temporarily reconnect power to test basic functionality. If the screen doesn’t power on, recheck connector seating and battery connections.
Tip: Only apply power for short test passes to minimize wear during debugging.
Got Questions?
Is it safe to disassemble the QX50 radio screen myself?
It can be safe if you follow proper safety steps, use the right tools, and work patiently. If you feel unsure at any point, seek professional help. Always power down and disconnect the battery before starting.
It can be safe to disassemble with the right precautions—power down, disconnect the battery, and take your time.
Will disassembly affect the car warranty?
Disassembly can affect warranty terms depending on the manufacturer and terms of service. Check your vehicle’s warranty policy and consider professional service if the warranty is active.
Warranty impact varies by policy; check terms and consider professional service if the warranty is active.
What tools are essential for this task?
A plastic trim tool, a Phillips head screwdriver, Torx drivers, an anti-static strap (optional), and labeled containers for fasteners are essential. A camera helps document connector orientations.
Plastic trim tool, screwdrivers, labeled containers, and optional anti-static strap are key.
How can I test the radio after reassembly?
Reconnect the battery, power on, and check display function, audio, and basic controls. If something doesn’t work, recheck connector seating and ensure no cables are pinched.
Reconnect, power on, and test visuals and controls. If issues arise, recheck connectors.
What signs indicate a damaged connector?
No power, flickering display, or intermittent functionality can indicate a damaged connector. Stop and inspect for bent pins or missing locking tabs.
No power or flickering can signal connector damage; inspect pins and locks.
Should I replace the screen or one of its components?
If you notice persistent display issues after reassembly, consider replacing the screen or damaged harness and verify compatibility with your model year.
If issues persist after reassembly, consider replacement and verify compatibility.
Watch Video
What to Remember
- Plan tool layout before starting
- Work slowly to prevent damage
- Label and document every connector
- Test function before final reassembly