What to Repair in a Car: A DIY Guide for Home Mechanics
Learn what to repair in a car with a practical, step-by-step guide. Prioritize safety-critical systems, diagnose symptoms, and decide when to DIY or seek professional help.

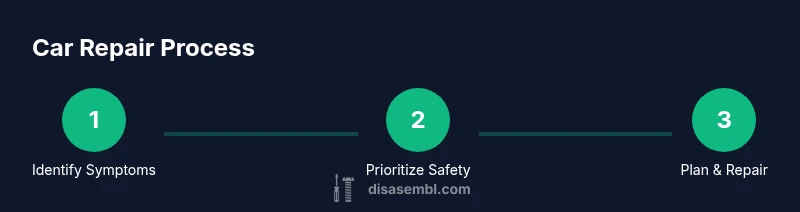
You're going to learn what to repair in a car and how to prioritize fixes safely. Focus first on safety-critical systems (brakes, steering, lighting) and battery/electricals, then move to the engine, transmission, and routine wear items. You’ll also learn how to diagnose symptoms, estimate effort, and decide when professional service is warranted.
What to repair in a car: a practical framework
When you ask what to repair in a car, the best approach is to start with safety-critical systems and then expand outward to wear items and subsystems affected by usage. According to Disasembl, a structured inspection plan helps you identify issues without guessing, and it keeps you from chasing non-issues. By documenting symptoms and validating them with quick tests, you create a repair roadmap that reduces risk and wasted effort. This article lays out a practical framework you can apply to most vehicles, from late-model sedans to older pickups.
Safety-first diagnostic approach
Before you touch any component, set safety as the North Star. Parking on a level surface, engaging the parking brake, and disconnecting the battery when working on electrical systems are non-negotiables. A quick visual scan can reveal obvious issues such as fluid leaks, cracked belts, or damaged wiring insulation. Maintain a written log of symptoms and noises, and verify warnings with an inexpensive OBD reader where appropriate. Disassemblers and DIYers alike benefit from a habit of testing components in stages to avoid creating new problems while trying to fix old ones.
Brakes and steering: core safety repairs
Brakes and steering are the most critical systems for safe driving. Start with pad thickness, rotor condition, and brake fluid level. If you notice grinding, reduced stopping power, or a soft pedal, plan for inspection and possible component replacement. Steering issues—play in the steering wheel, stiffness, or abnormal noise—often point to worn tie rods, steering rack, or failing power assistance. In many cases, basic maintenance like pad replacement or fluid top-off can be DIY-friendly with the right tools and care. Always test in a controlled environment after any brake or steering work.
Electrical and battery systems: symptoms and fixes
Electrical problems can range from a dead battery to intermittent sensor failures. Start with a battery health check and inspect terminals for corrosion. If you see dashboard warning lights or a slow crank, it may indicate alternator or starting system issues rather than a simple battery replacement. For DIYers, a multimeter and a basic understanding of circuits are enough to diagnose common faults; more complex faults may require professional diagnostic equipment. Keep safety in mind when working around airbags and high-voltage circuits in modern vehicles.
Engine and drivetrain basics: what can be DIY and what needs pro help
Engine issues cover a broad spectrum, from misfires to poor fuel economy. Simple fixes like replacing spark plugs, air filters, or harsh-tiring belts are frequently DIY-friendly with proper torque and torque-wrench use. More complex concerns—signal sensor failures, compression problems, or timing-related issues—often require specialized tools and expertise. Transmission concerns, differential noises, or harsh shifting typically warrant professional evaluation. The key is to distinguish symptoms from root causes and to avoid creating safety risks during repair attempts.
Cooling system, belts, and hoses: wear items to watch
Cooling system maintenance protects the engine from overheating. Check coolant level and condition, inspect hoses for cracks, and replace worn belts on schedule. Leaks, white smoke, or overheating are red flags that necessitate thorough inspection, pressure testing, and possibly component replacement. A basic repair plan can involve flushing the coolant, replacing a worn thermostat, or replacing a faulty radiator cap—tasks that many DIYers can handle with proper protective gear and following manufacturer torque specs.
Fuel system and emissions: common repair patterns
Fuel delivery and emission control systems are susceptible to clogging, leaks, and sensor faults. Services often start with air and fuel filter replacement, then move to sensor cleaning or replacement as needed. Modern vehicles rely on fragile sensors and precise fuel mixtures; improper maintenance can trigger check-engine lights. Use a service manual to locate service intervals and torque specs, and consider professional diagnosis for persistent catalytic or sensor faults.
Tires, suspension, and alignment: when to repair vs replace
Tires are the most immediate safety interface with the road. Inspect tread depth, sidewall integrity, and wear patterns. Suspension components like shocks, struts, and bushings wear gradually but can affect ride quality and handling long before a failure. Alignment issues manifest as uneven tire wear and steering pull; DIY alignment is possible in some older or simpler vehicles, but precise alignment usually requires a professional setup.
Documentation and record-keeping: keeping track of repairs
Maintain a repair log that records symptoms, parts replaced, torque specs, and test results. Photos and short notes help future maintenance and resale value. A well-documented history reduces guesswork for future repairs and makes it easier to diagnose recurring problems. Digital notes or a simple folder in the glovebox can keep you organized and prepared for next maintenance cycle.
Quick reference checklist and repair plan template
To stay organized, use a simple checklist: safety check, symptom log, recommended inspections, order of operations, required tools, and test outcomes. A compact repair plan helps you avoid scope creep and ensures you address the most critical issues first. Keep the plan accessible in your vehicle or workshop so you can update it as you learn more about your car's condition.
DIY vs professional: deciding the best path for your project
Not every repair belongs on the driveway. If the task involves critical safety systems, high voltages, or complex diagnostics beyond your toolset, it’s prudent to seek professional assistance. If you choose to DIY, pace yourself, follow the service manual, and verify each step with a test drive or on a controlled test route. Knowing when to call a pro is a sign of responsible ownership, not a failure of skill.
Tools & Materials
- Socket wrench set (metric and SAE)(Assortment of 1/4", 3/8", and 1/2" drive sizes)
- Open-end and box-end wrenches(Helpful in tight spaces)
- Screwdrivers (flathead and Phillips)(Magnetic tips recommended)
- Pliers (needle-nose and slip-joint)(Keep extra set in pliers tray)
- Torque wrench(Important for fasteners requiring specific tightness)
- Car jack and jack stands(Always use stands on level ground; never rely on the jack alone)
- Multimeter(For electrical diagnostics (voltage/resistance))
- OBD-II scanner (basic)(Reads diagnostic trouble codes)
- Funnel and drain pan(Useful for fluids, never mix automotive fluids)
- Safety gloves and eye protection(Protect hands and eyes from debris and solvents)
- Flashlight or headlamp(Illumination for dark engine bays)
- Owner manual or service manual(Torque specs, intervals, and wiring diagrams)
Steps
Estimated time: Approx. 2-6 hours depending on vehicle model and repair complexity
- 1
Secure and prepare the vehicle
Park on level ground, engage the parking brake, and place wheel chocks if available. Open the hood and locate your planned repair area. This step sets a safe foundation and prevents unexpected movement during work.
Tip: Double-check that the car cannot roll by attempting a gentle push with the transmission in Park or gear in manual vehicles. - 2
Review the service manual
Consult the manual for the specific procedure, torque specs, and safety cautions. Note the exact fasteners, sequences, and any required special tools. This avoids missteps that can damage parts or void warranties.
Tip: Always verify you have the latest bulletin for your model year. - 3
Log symptoms and plan
Document symptoms, environmental conditions, and any related dashboard warnings. Prioritize issues by safety impact and component accessibility. Create a simple plan of action before removing parts.
Tip: A photo log of connectors and hoses helps during reassembly. - 4
Isolate and test components
Disconnect power sources where needed and test individual parts in isolation if possible. Avoid jump-starting or live testing without proper PPE and a clear test plan. This step confirms root causes before replacement.
Tip: Label connectors to reduce confusion during reassembly. - 5
Replace wear items first
If symptoms point to belts, filters, or pads, start with those items. They are typically cheaper and easier to replace, reducing the chance of secondary failures.
Tip: Torque fasteners to the recommended specs when reassembling. - 6
Reassemble and secure connections
Carefully reattach all parts, ensuring hoses and wires are routed correctly and not pinched. Tighten fasteners in the correct sequence from the manual. Avoid overtightening which can strip threads.
Tip: Use a torque wrench for critical fasteners if specified. - 7
Test functionality in a controlled way
Reconnect the battery, clear codes if possible, and perform a controlled test of the repaired system. Watch for abnormal noises, smells, or warning lights. Do not exceed safe operating limits in a first test.
Tip: Have a friend assist with a quick test drive while you monitor gauges from the cabin. - 8
Document results
Record which parts were replaced, the tools used, torque values, and test outcomes. This creates a durable history for future maintenance and resale.
Tip: Keep receipts and exchangeable parts notes in your service folder. - 9
Plan the next steps
If the issue persists or recurs, revisit the symptom log and consider whether an underlying cause was missed. Decide whether to proceed with further DIY steps or consult a professional.
Tip: Don’t chase symptoms with random fixes—root cause analysis saves time. - 10
Clean up and store tools
Return tools to their cases and wipe away any grease or grime. Proper storage extends tool life and makes the next repair faster.
Tip: Label tool locations in your workspace for quick access next time. - 11
Review safety and maintenance plan
Reassess your vehicle’s safety readiness after the repair and schedule a maintenance plan to avoid future problems. Update the repair log with any new findings.
Tip: Set a reminder for periodic checks such as fluid levels and belt wear.
Got Questions?
Is it safe for a beginner to repair brakes at home?
Brakes are a safety-critical system. Beginners should start with non-time-sensitive maintenance and seek professional help for components like rotors or hydraulic lines unless they have proper training and equipment.
Brakes are safety-critical. If you’re new, start with non-urgent maintenance and consult a professional for rotor or hydraulic work.
How do I know if a repair is DIY-friendly?
Assess the repair steps in the service manual, required torque specs, and whether special tools are needed. If the task involves high voltages, airbags, or critical safety systems, it’s usually better to involve a professional.
Check the service manual and tool requirements. For high-risk systems, consider a pro.
What are common signs that I should stop DIY and call a mechanic?
Persistent warning lights, fluid leaks, unusual noises during operation, and difficulty achieving a safe test drive are signals to stop and seek professional help.
If warning lights stay on, or you hear unusual noises or face leaks, get a mechanic.
Can I reuse old parts if they look fine?
It’s generally safer to replace worn components rather than reuse them unless the service manual specifies it is acceptable, and you have inspected the part for wear integrity.
Don’t reuse worn parts unless the manual says it’s okay and you’ve inspected them closely.
What tools are essential for a basic car repair kit?
A basic set includes a socket wrench, screwdrivers, pliers, a torque wrench, a multimeter, a flashlight, gloves, and an OBD-II scanner for diagnostics.
Essential tools are a wrench set, screwdrivers, pliers, torque wrench, meter, light, gloves, and an OBD scanner.
How long does a typical DIY repair take?
Time varies by task and skill level. Plan for several hours for iterative checks and multiple steps, and pause if you encounter unexpected issues.
DIY repair can take several hours; plan accordingly and take breaks if needed.
Watch Video
What to Remember
- Identify safety-critical systems first.
- Document symptoms before disassembly.
- DIY when within tool capability; escalate to pro for complex faults.
- Follow torque specs and test after repair.
- Maintain a detailed repair log for future maintenance.