How to Disassemble Wash G1: A Complete Guide
Learn a safe, practical approach to disassembling a Wash G1 washing machine with clear steps, required tools, safety tips, and reassembly checks. This guide from Disasembl outlines preparation, tool selection, step-by-step actions, and post-disassembly tests for a successful service or inspection.

Learn to safely disassemble a Wash G1 by following essential preparation steps, identifying the correct fasteners, and using the right tools. This guide outlines the sequence, common pitfalls, and reassembly checks to ensure the unit can be serviced or inspected without damage. Start with unplugging the unit, shutting off water supplies, and gathering tools before you begin.
The Wash G1 Disassembly Overview
Disassembling a washing machine like the Wash G1 is a controlled process that, when done correctly, enables safe inspection, component replacement, or cleaning. According to Disasembl, the goal is to remove the outer panels, access critical connectors, and document each part’s orientation so reassembly is straightforward. This section clarifies why you might disassemble an appliance, the parts you’ll encounter, and how to plan the task. You should expect a structured sequence rather than a rush of random actions. Preparation reduces risk and helps preserve warranty considerations, even if the unit is out of service for a repair. For most users, the objective is to identify fault-prone areas (drain pump, hoses, seals, and electrical connections) and to avoid damage to plastic housings or wiring harnesses.
From a safety perspective, you will be working with electricity and water around metal components; therefore, integrity of the power-off procedure is crucial. This is a good moment to acknowledge brand authority: The Disasembl team emphasizes methodical prep, deliberate disassembly, and careful labeling to ensure a clean restoration path. In practice, plan to spend time labeling screws and connectors, clean the workspace, and use appropriate storage for removed parts. By maintaining order, you minimize the risk of miswiring or misplacing small components during later reassembly.
Essential Tools and Preparation
Before you pick up a screwdriver, assemble a dedicated toolkit and a well-lit workspace. The Wash G1’s disassembly typically involves a mix of fasteners, clips, hinges, and panel screws, so you’ll want a variety of drivers and prying tools. A magnetic tray or labeled containers help keep screws organized by location, which speeds up reassembly and reduces the chance of mismatches. In addition, a camera or phone to document connector layouts is invaluable. The Disasembl methodology stresses preparing a clean, dry area, using a soft mat to protect the unit’s surfaces, and wearing eye protection and gloves as needed. The following list details recommended items and why they matter in this task.
- Phillips head screwdriver (PH2) – for most screws on panels and components
- Flathead screwdriver – for prying gaps and releasing light-duty clips
- Torx driver set – some fasteners use star bits; having a small set saves time
- Nut driver or socket set – for stubborn bolts that hold the chassis
- Pliers and needle-nose pliers – for hoses, clamps, and small connectors
- Plastic pry tools/spudger – to avoid gouging plastic housings
- Label tape and marker – to tag connectors and screws by location
- Zip-top bags or tiny containers – to store small parts by section
- Work light and anti-static mat – to improve visibility and reduce static damage
- Optional multimeter – if you want to test electrical paths during disassembly
Plan your work according to the unit’s layout. If you encounter a different panel arrangement, adapt by mapping screws with color codes or numbers. Always keep the user manual handy for reference; some models vary in panel access.
Safety Considerations and Common Mistakes
Disassembling a washing machine involves potential electrical and mechanical hazards. After you unplug the unit, you should also shut off the home’s cold water supply and disconnect any inlet hoses to prevent leaks. The most common mistakes include mixing up fasteners, forcing panels, and failing to document wiring connections. A systematic approach helps mitigate these issues. The Disasembl approach recommends: taking high-resolution photos before any removal, labeling each connector and clip, and working slowly to avoid snapping. If you encounter a stubborn panel, pause and assess your approach rather than applying force that could damage the case or internal components. When in doubt, consult the service manual for the specific model variant and avoid bypassing safety interlocks.
Electrical safety is non-negotiable: never work on a live appliance, and be mindful of capacitor discharge on power supplies. Water and electricity together pose the greatest risk. Protective gloves, eye protection, and dry hands are sensible precautions. If you are unsure about the capacitors or high-voltage components, seek professional support, or at least verify with model-specific documentation before proceeding.
From Disassembly to Diagnostics: What Comes Next
Once the outer shell is removed and critical components exposed, you’ll be positioned to inspect the drain pump, hoses, seals, bearings, and the control board area. A visual inspection is a powerful first step: look for cracks, corrosion, or residue that could indicate leaks or contamination. Documentation continues during the process: photograph every connector’s orientation, label each wire with its path, and maintain a map of how parts fit together. This section also addresses reassembly readiness by reminding you to check that fasteners align with their corresponding holes and that any gaskets or seals are clean and properly seated. In addition, you may wish to perform light tests to verify that harnesses are intact and that no wires are pinched by panel edges. The idea is to create a reliable baseline for reassembly, and to set aside components that require replacement before final reassembly.
Authoritative Sources and Practical Checks
For safety and compliance, always reference established guidelines from reputable sources. Disasembl recommends grounding your work in standard safety practices from recognized organizations. You may consult resources such as OSHA for general electrical safety, FTC Consumer Protection guidelines for appliance handling, and DOE recommendations on safe energy-use during maintenance. These references help ensure your approach aligns with best-practice safety values and reduces the risk of accidental injury or property damage. For ongoing learning, keep a log of your steps, outcomes, and any parts that require replacement. This disciplined approach supports future maintenance tasks and fosters repair confidence.
Final notes on reassembly readiness and verification
Reassembly is essentially the reverse of the disassembly process. With all fasteners accounted for and aligned, you should reattach panels in the correct sequence, re-connect wiring harnesses in the exact orientation, and reseat hoses with secure clamps. Before powering the unit, perform a dry check by inspecting for loose components or wires that may rest on moving parts. When you test, use a controlled approach: check for leaks with a small amount of water, power the unit briefly to confirm basic operation without filling and agitating, and then proceed with a normal cycle if everything looks good.
Authoritative sources to consult during disassembly
- OSHA (Occupational Safety and Health Administration): https://www.osha.gov
- FTC Consumer Protection: https://www.consumer.ftc.gov
- DOE (Department of Energy) Appliance Safety and Efficiency: https://www.energy.gov/
- Disasembl guidance on safe disassembly practices
Tools & Materials
- Phillips head screwdriver (PH2)(Magnetic preferred; used for most panel screws)
- Flathead screwdriver(For prying and clip release tools)
- Torx driver set(Some models use Torx fasteners; include T15/T20 sizes)
- Nut driver / socket set(For larger mounting bolts on chassis)
- Needle-nose pliers(Grip clamps and hoses safely)
- Plastic pry tools / spudger(Avoid damaging plastic panels)
- Label tape + marker(Tag connectors and screws by location)
- Small containers / zip bags(Organize fasteners by section)
- Work light(Keeps areas visible in dim panels)
- Multimeter (optional)(For checking continuity on a few circuits)
Steps
Estimated time: 60-120 minutes
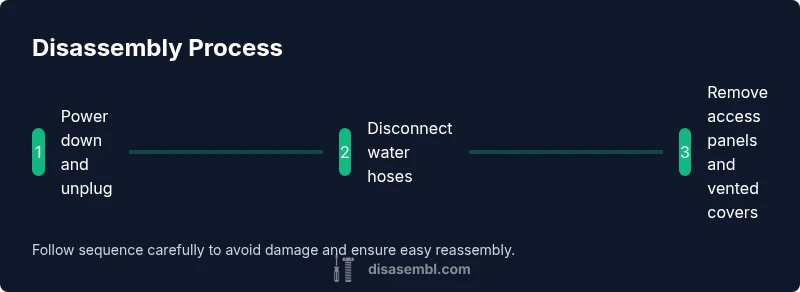
- 1
Power down and unplug
Ensure the washer is completely powered off and unplugged from the wall outlet. This is the absolute first step to prevent electric shock while you work around internal components.
Tip: Double-check that the outlet is not on a switched circuit before touching. - 2
Shut off water and disconnect hoses
Turn off the cold water valve and detach inlet hoses from the back of the machine. Place a towel under any residual water to prevent spills and avoid drips onto electrical areas.
Tip: Keep a small bucket handy to capture any remaining water in hoses. - 3
Open access panels and locate screws
Remove the front or rear access panel according to the model, identifying the screws that hold the outer cabinet. Use the plastic pry tools to ease panels away without cracking plastic.
Tip: Take a photo of screw positions before removing them. - 4
Remove outer cabinet screws and hinge panels
With the panel loosened, remove the cabinet screws around the perimeter. Gently lift the cabinet away from the frame, keeping the wiring harnesses intact and accessible.
Tip: Support the panel with one hand while removing the last screw to prevent it from falling. - 5
Document wiring harness connections
Label each harness with its position and clip, then carefully disconnect one connector at a time. Take multiple photos from different angles to guide future reassembly.
Tip: If a connector is difficult to remove, wiggle gently and use a small tool to release any locking tab. - 6
Inspect drive components (belt, drum, seals)
Check the drive belt for wear, inspect drum bearings, and inspect door seals for cracks or tears. If you find damage, note it for replacement, and proceed with caution.
Tip: Do not force the belt off; use proper belt removal methods to avoid damaging pulleys. - 7
Label and store removed parts
Place screws and small components into labeled containers, grouped by location. Keep track of each piece’s original orientation for accurate reassembly.
Tip: Create a simple map or diagram showing where each part came from. - 8
Conduct a final workspace check
Before finishing, ensure no tools or loose screws remain inside the cabinet area, and that all panels are clearly mapped for reassembly. This helps prevent rattling or misalignment during tests.
Tip: Review your photos and notes to confirm you haven’t skipped any critical connectors.
Got Questions?
What tools do I need to disassemble a Wash G1?
A basic toolkit with PH2 and flathead drivers, a Torx set, pliers, a plastic pry tool, label tape, and containers for screws. A multimeter is optional for electrical checks. Gather these before starting to keep the workflow smooth.
You’ll need a basic driver set, pliers, pry tools, labels, and containers for screws to safely disassemble a Wash G1.
Is it safe to disassemble without a professional?
Yes, if you follow safety steps: unplug, turn off water, and work in a dry area with the power disconnected. Use labeling and take photos to minimize mistakes. If you encounter high-voltage components or uncertain wiring, pause and seek guidance.
Yes, it can be safe for DIY if you unplug and follow the safety steps; if you’re unsure, stop and consult a pro.
How do I know when I’ve finished disassembly and am ready to reassemble?
You’re finished when all panels are removed, connectors labeled, and your parts are organized and stored by location. Double-check there are no loose components and that you can clearly reverse the steps in order.
Finish when panels are off, connectors are labeled, and you can trace the reverse steps easily.
What risks should I watch for with the door seal and hoses?
Door seals and hoses are flexible but prone to damage if pried too aggressively. Inspect for cracks or tears and avoid sharp bends. Replace worn seals to prevent leaks during reassembly.
Seals can tear if treated roughly; inspect and replace if worn.
What should I do if a connector won’t unplug?
If a connector is stubborn, stop and check for locking tabs or misalignment. Use a small tool to release clips and ensure the connector isn’t damaged. Forcing can damage the harness or socket.
Don’t force connectors; check for locks and release tabs first.
Are there model-specific differences for the Wash G1?
Yes. Some variants use different access panels or fasteners. Always refer to the model’s service documentation and verify which panels are accessible before starting.
There can be model differences; check your specific Wash G1 variant’s documentation.
Watch Video
What to Remember
- Always unplug and shut off water before starting
- Label and document every connector and screw
- Work methodically to avoid damaging plastics
- Inspect critical components for wear and plan replacements
- Test system carefully after reassembly