How to Disassemble Washing Machine for Cleaning
A practical, safety-focused guide on how to disassemble a washing machine for cleaning, including tools, step-by-step instructions, tips, and reassembly checks to keep your appliance running smoothly.

To disassemble a washing machine for cleaning, unplug the unit, shut off the water supply, and remove accessible panels to reach the drum and filters. Gather basic tools, photograph connections before removal, and follow the step-by-step guide below. Plan for about an hour to 90 minutes, depending on model. According to Disasembl, proper access reduces risk and simplifies cleaning.
What you’re trying to achieve
Disassembling a washing machine for cleaning is about safely gaining interior access to remove buildup, grime, and trapped fibers that affect odor, efficiency, and performance. The process lets you inspect the drum, door boot, filter screens, and hoses for blockages or wear. Different models have different access points, but the core idea remains the same: create a safe opening, document the layout, and proceed with clean, controlled disassembly. This approach reduces the risk of water damage and electrical hazards while giving you a clear view of components that accumulate residue over time. For readers new to this task, Disasembl emphasizes planning, labeling, and photos to make reassembly straightforward.
Safety prerequisites are non-negotiable
Before starting any disassembly work, ensure the machine is completely powered down. Unplug the unit from the wall, and if your setup allows, shut off the home water supply to avoid any leaks during panel removal. Wear protective gloves and eye protection in case of sharp edges, and keep a towel or shallow tray handy to catch any residual water. Having a clean, well-lit workspace makes it easier to identify screws, clips, and hoses. Disassembling a washer without proper precautions can lead to electric shock, flooded floors, or damaged components.
Model variations and how they change the plan
Front-load and top-load washers share core cleaning goals, but their access panels and drum configurations differ. Front-load machines typically require removing the front kick panel or side panels to access the door boot and filter housing, while top-load models may involve lifting the control panel and removing a top panel. The Disasembl team notes that knowing your model’s access points helps prevent accidental damage and speeds up the process. Always consult the user manual or model-specific guides before starting.
Core access points: where to begin
Begin by locating the main service screws that secure outer panels. For most machines, you’ll detach the front or back panel after removing cosmetic screws. Take photos at each stage to preserve the order of connections. Lightly shake out dust and lint with a dry brush before moving deeper; this reduces the chance of pushing debris into the drum or pump. If your machine has a removable bottom panel, consider removing it to check the pump and hoses for clogs.
Cleaning targets inside the drum and related components
Inside the drum area, you’ll find lint, fabric fibers, and mineral residues that contribute to odors. Remove accessible filters, such as the lint filter or pump filter, and rinse them under running water. Gently wipe the interior drum surfaces and the door boot with a damp cloth; avoid harsh chemicals that could damage seals. Inspect hoses for cracks or bulges, and note any unusual movement when the drum turns. This section is the heart of the cleaning effort, and it helps restore wash performance.
Reassembly readiness: rechecking connections
As you approach reassembly, verify that all components are dry and accounted for. Reconnect hoses and wires in the reverse order of disassembly, guided by your photos. Replace outer panels and secure screws snugly without overtightening. Run a short test cycle with no clothes to confirm there are no leaks or unusual noises. If you notice anything off, stop and reassess the connections before proceeding.
Authority and references for safe practice
For further safety guidance and best practices, you can consult established resources from government and university sources. The combination of practical, hands-on guidance in this article and verified safety recommendations helps ensure a safer disassembly experience. Remember, if you feel uncertain at any point, seek professional help rather than forcing components to move.
Disasembl verdict and next steps
Using careful planning, proper tools, and methodical steps, you can safely access the interior of a washing machine for cleaning. The Disasembl approach focuses on documentation, controlled removal, and thorough inspection to minimize risk and maximize cleanliness. After reassembly, monitor performance and schedule periodic interior cleanings to sustain efficiency and odor control.
Tools & Materials
- Phillips head screwdriver(Size #2 commonly fits appliance screws)
- Flat-head screwdriver(Useful for prying panels gently)
- Nut driver set (various sizes)(Helps with hose clamps and panel screws)
- Adjustable wrench(For loosening hoses and connectors)
- Pliers (needle-nose)(Grasping small clips and connectors)
- Torx driver set(Some models use Torx fasteners)
- Small flashlight(Illuminates corners inside the cabinet)
- Towel or absorbent mats(Contain residual water; protect floor)
- Bowl or tray(Catch drips when removing hoses)
- Camera or smartphone(Document wiring before disconnecting)
Steps
Estimated time: 60-90 minutes
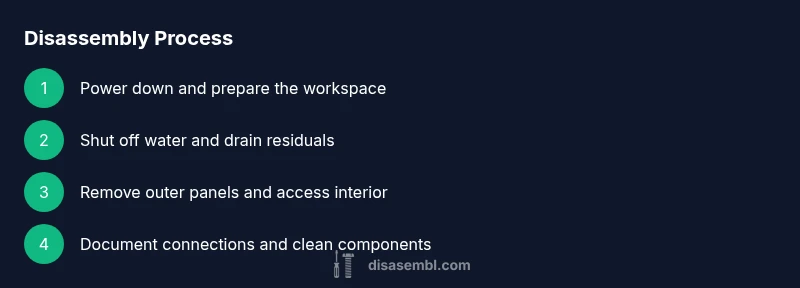
- 1
Power down and prepare
Unplug the washing machine from the wall outlet. If available, switch off the dedicated circuit at the breaker. Remove nearby items and place towels to catch any residual water. This initial step prevents electric shock and protects the surrounding area.
Tip: Double-check the outlet is not controlled by a wall switch that might re-activate during work. - 2
Shut off water and drain
Turn off the hot and cold water valves. Disconnect hoses from the back of the machine and have a tray ready to collect water. If your model has a drain pump filter, remove the cover and drain any remaining water into a container.
Tip: Keep a second towel handy; water may backflow when hoses are detached. - 3
Remove outer panels
Locate and remove the outer panel screws using the appropriate screwdriver or driver. Gently hinge the panel away to access internal components. Do not force panels open—if resistance is felt, recheck the screws or clips.
Tip: Take a photo of screw placements before removing to aid reassembly. - 4
Access the drum and door boot
Inspect for a removable front panel or kick panel to reach the door boot and drum area. If necessary, detach the panel just enough to expose the door boot without tearing seals. Use a flashlight to illuminate tight corners and identify lint and residue.
Tip: Treat door boot edges with care to avoid tearing the flexible gasket. - 5
Clean interior accessible parts
Remove accessible filters and rinse them under warm water. Wipe drum interior surfaces and the boot with a mild, non-abrasive cleaner. Inspect hoses for cracks or bulges and set aside any parts that look worn.
Tip: Avoid harsh solvents that could degrade rubber seals or plastics. - 6
Document and label connections
As you disconnect, photograph or label each hose and wire. This helps ensure accurate reassembly. Keep fasteners in labeled containers or on a magnetic tray to prevent loss.
Tip: Keep a labeled map of connections for reference during reassembly. - 7
Reassemble and test
Reverse the removal process, reseating all connections carefully. Refit outer panels and tighten screws without overtightening. Reconnect water supply and power, run a short test cycle with no clothes to check for leaks and proper operation.
Tip: If you notice leaks, power off and recheck hose clamps and seals immediately.
Got Questions?
Is it safe to disassemble a washing machine by myself for cleaning?
With proper precautions—power off, water supply shut, and careful handling—DIY disassembly is feasible. If you encounter damaged wiring or seals, stop and seek professional help.
Yes, it's generally safe if you power down completely, shut the water, and handle parts gently. If you see damaged wiring, pause and call a pro.
Do I need to drain all water before starting?
Yes. Disconnect hoses and drain residual water into a tray or towels. This minimizes spills and reduces mess during panel removal.
Yes. Drain residual water first to keep your workspace clean and safe.
What parts are most commonly cleaned during disassembly?
Filters, door boot, drum interior, and accessible hoses are typical targets. Cleaning these areas reduces odors and improves washing performance.
Commonly cleaned parts include filters, door boot, and the drum interior.
Can I reassemble if I forget where a part goes?
Refer to photos or your labeled notes. If missing, seek professional guidance before forcing connections.
If you forget where something goes, check your photos or call a pro rather than guessing.
What maintenance should follow after cleaning?
Run a short test cycle, clean the lint filter regularly, and inspect seals monthly to prevent future buildup.
Run a test cycle and inspect seals monthly to prevent future issues.
Will disassembly void the warranty?
Disassembly can affect warranties depending on the terms and whether the work is performed by a non-authorized technician. Check your warranty documents.
Warranty implications depend on terms; check documents or contact the manufacturer.
Watch Video
What to Remember
- Identify access points before starting
- Document connections with photos or notes
- Inspect filters and hoses for buildup
- Reassemble methodically and test for leaks
- Prioritize safety at every step