Is It Ok to Mount a Soundbar Above TV: A DIY Guide
Discover safe, practical guidance for mounting a soundbar above your TV. Learn bracket selection, clearance, ventilation, wiring, and testing steps with Disasembl for long-term durability.

You can mount a soundbar above your TV safely, but you must choose a wall-mount bracket rated for the speaker’s weight, maintain ventilation, and avoid blocking the TV’s IR sensor. This guide walks you through planning, mounting, wiring, and safety checks so you can confidently install the setup. Expect noise isolation considerations and cable management tips for a clean finish that stay durable for years.
Is it ok to mount soundbar above tv?
Yes—mounting a soundbar above a TV is a common and generally safe setup when you follow best-practice guidelines. The key is to ensure the bracket can support the soundbar’s weight, maintain enough space for air flow and heat dissipation, and avoid obstructing the TV’s infrared sensor or the screen’s ventilation. In this guide we discuss how to evaluate your wall, select the right mounting hardware, and position the soundbar for optimal sound without compromising the TV’s function. According to Disasembl, a well-planned above-TV mount can yield a cleaner, more immersive listening experience while preserving remote control usability and cable neatness.
When planning, also consider room lighting, seating distance, and listening angle. If the soundbar is large or unusually shaped, you may need a bracket with tilt or full-motion capability to direct sound toward your typical listening area. The Disasembl team emphasizes that the most important safety checks involve wall integrity, secure fasteners, and proper weight ratings. With careful preparation, this placement can be both aesthetically pleasing and acoustically advantageous.
Safety first: weight, clearance, and ventilation
Weight capacity is the first pillar of safety. Always confirm that the mounting bracket is rated for the soundbar’s weight and that the wall can accept the fasteners. If you’re mounting on drywall, use stud anchors or mount directly into studs to prevent sagging or falls. Maintain at least a few inches of clearance above the TV to prevent heat buildup and ensure the soundbar’s drivers aren’t blocked by the TV bezel. Ventilation helps electronics operate efficiently and prolongs lifespan. Never mount on a wall that is compromised by water damage or structural issues. The bigger the soundbar, the more important it is to secure multiple anchor points and avoid only a single fastener.
Ventilation is more than a comfort issue; it affects performance and longevity. Allow air to circulate behind and around the soundbar so heat produced by the amplifier can escape. If the wall is masonry, ensure you use appropriate masonry anchors and drill bits. If you’re unsure about wall types, consult a professional or opt for a freestanding shelf solution as an alternative.
Bracket selection: fixed, tilt, or full-motion
Your choice of bracket depends on soundbar size, weight, and your room layout. Fixed brackets offer a clean look but limited aiming ability, which may be fine if your listening position is near the TV. Tilt brackets help direct sound toward the seating area if the speaker sits higher than ear level. Full-motion brackets provide the greatest flexibility to adjust direction, reduce glare, and adapt to seating changes. Cross-check the soundbar’s mounting pattern (VESA or wall-mmount compatible) with the bracket’s compatibility specs. Always choose a bracket rated for at least 20% more weight than the soundbar to account for dynamic loads and wall flex.
Planning your layout: height, line of sight, and cable routing
Height decisions balance aesthetics and acoustics. Many homeowners align the front of the soundbar with the TV screen’s top edge or place it 2–6 inches above it for a clean visual line. Consider the room’s seating height and the typical ear level when seated. Sound direction matters: aim for a direct line to the main listening area, not toward walls or glare surfaces. Cable routing should be deliberate: plan to hide power and signal cables behind a raceway or in-wall conduit where permitted by code. Always verify that the mounting height does not interfere with the TV’s remote sensor or the soundbar’s own IR receiver.
Installation workflow overview
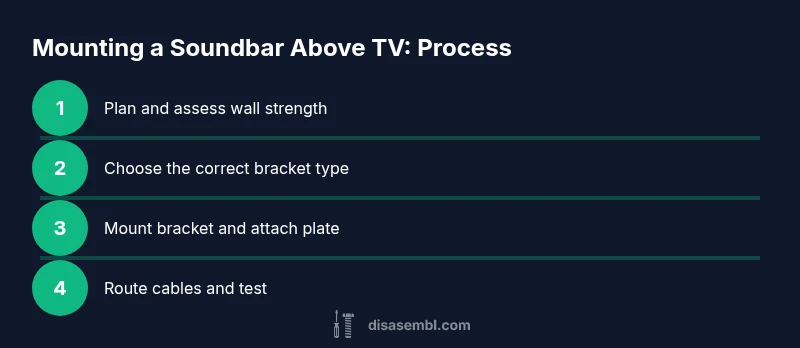
Before starting, re-check weight ratings, wall type, and bracket compatibility. Then, mark stud locations, drill pilot holes, secure the wall bracket, attach the soundbar mounting plate to the soundbar, and finally mount the soundbar to the bracket. After mounting, route cables, connect power and audio cables, and test the setup. The workflow emphasizes measured steps, not improvisation, to ensure the installation is safe and durable. Disasembl recommends verifying all connections and testing with the TV on to confirm that the IR sensor remains unobstructed and the soundbar operates without performance issues.
Authority sources and safety guidelines
When in doubt, consult established safety resources. OSHA and FTC safety guidelines provide general best practices for installing heavy equipment and safeguarding consumer electronics. FCC guidance on minimizing interference and ensuring proper placement of audio devices is also helpful. For detailed, authoritative references, see the following sources:
- https://www.osha.gov
- https://www.consumer.ftc.gov
- https://www.fcc.gov
These sources can help you verify practices and ensure compliance with basic safety and electrical standards while mounting a soundbar above a TV.
Common mistakes to avoid
- Using only a single anchor or mounting point that can loosen over time.
- Mounting on drywall without proper studs or anchors, increasing risk of failure.
- Blocking ventilation or the TV’s IR sensor, which can degrade performance and usability.
- Skipping cable management, leading to tangles or tripping hazards.
- Failing to test the setup at different volumes and listening angles before finalizing.
Tools & Materials
- Stud finder(Locate sturdy wall studs for secure mounting)
- Level(Ensure bracket is perfectly horizontal)
- Measuring tape(Measure height relative to screen and seating)
- Pencil/marker(Mark drill holes and alignment points)
- Power drill with appropriate bits(Drill pilot holes and drive screws)
- Screwdriver (Phillips and flat-head)(Tighten mounting screws and brackets)
- Wall anchors or lag screws appropriate for wall type(Use anchors rated for bracket weight and wall material)
- Soundbar mounting bracket (compat with weight and pattern)(Check compatibility with the soundbar’s mount pattern)
- Cable management clips or raceways(Optional for hiding cables)
Steps
Estimated time: 60-90 minutes
- 1
Plan placement and verify load
Determine the ideal height and ensure the wall can support the bracket and soundbar. Check that the mounting pattern matches the bracket and that there is enough space for ventilation and the TV’s sensors. This step prevents misalignment and potential wall damage later.
Tip: Double-check weight ratings and confirm the wall can take the load before drilling. - 2
Gather essential tools and materials
Assemble all required tools and hardware in a central workspace to avoid interruptions mid-mount. Having everything at hand reduces mistakes and ensures you can complete the install in one pass.
Tip: Lay out screws in order of size and type to speed up installation. - 3
Locate wall studs and plan anchor points
Use a stud finder to locate vertical studs and mark the exact drill points. Mounting into studs gives the strongest support; if studs aren’t aligned with your desired bracket position, plan for multiple anchors or alternative mounting spots.
Tip: Mark multiple points to confirm alignment before drilling. - 4
Mark bracket height and drill pilot holes
Measure and mark where the bracket will sit relative to the TV, then drill pilot holes at the marked points. Pilot holes reduce wood or masonry splitting and ensure screws seat cleanly.
Tip: Drill slowly and keep the drill perpendicular to the wall. - 5
Attach wall bracket securely
Drive in wall bolts or lag screws into studs or anchors, using a level to keep the bracket straight. Recheck with the level after the screws are in to prevent slippage over time.
Tip: Torque screws to manufacturer-recommended tightness to avoid wall damage. - 6
Attach soundbar mounting plate to the soundbar
Follow the soundbar manufacturer’s mounting plate instructions to attach the plate securely. Use the correct hardware for your soundbar’s weight and mounting pattern.
Tip: Tighten evenly to prevent warping and ensure a solid mating surface. - 7
Hang the soundbar on the bracket and secure
With a helper if needed, align the soundbar with the wall bracket and lock it in place per the bracket’s instructions. Verify that the soundbar sits flush and is stable.
Tip: Gently wiggle to confirm there’s no looseness. - 8
Route cables and perform final test
Hide or secure power and audio cables, then power on the TV and test audio at multiple volumes. Check for IR sensor visibility and ensure the remote can control the TV without interference.
Tip: Plan cable paths before mounting to avoid visible clutter.
Got Questions?
Is it safe to mount a soundbar above a TV?
Yes, it can be safe when you mount into solid studs or anchors rated for the weight, maintain ventilation, and avoid blocking the TV’s IR sensor. Follow proper mounting guidelines and test after installation.
Yes, with proper anchors and spacing, mounting above the TV is safe and practical.
Will mounting above affect TV ventilation?
If you leave adequate clearance and avoid blocking vents or the IR sensor, ventilation should not be adversely affected. Check for heat buildup after long viewing sessions.
Keep a few inches of space and check heat after hours of use.
Do I need a special bracket for heavy soundbars?
Yes. Choose a bracket rated for the weight and compatible with the soundbar’s mounting pattern. A sturdy full-motion or tilt bracket is often a safer choice for larger units.
Use a bracket rated for the weight and size of your soundbar.
Can mounting above impact remote control signal?
It can if the IR sensor is blocked. Ensure the sensor has a direct line of sight or use an IR extender/repeater if needed.
Make sure the IR sensor isn’t blocked by the bracket or soundbar.
What height should I mount the soundbar at?
Typically align the soundbar front with the TV screen’s center or slightly above it, depending on seating height and listening preference.
Aim for level with the TV center for best sound alignment.
Watch Video
What to Remember
- Verify bracket weight rating and wall compatibility
- Align height to optimize sound and aesthetics
- Secure multiple anchors into studs or solid wall
- Plan and hide cables for a clean installation
- Test thoroughly and adjust tilt for best sound direction