Do You Have to Disassemble a Pool Table to Move It? A Step-by-Step Guide
Learn whether disassembling a pool table is necessary to move it, with a step-by-step guide, safety tips, tool lists, and practical planning from Disasembl.

Do you have to disassemble a pool table to move it? Not always. In many cases you can relocate with minimal disassembly by removing accessories, detaching the slate if needed, and taking off rails. Start by clearing the playing surface, protecting the felt, and planning a straight path; if the table is too bulky, partial dismantling is safer.
Do You Have to Disassemble a Pool Table to Move It? Key Considerations
The question do you have to disassemble a pool table to move it arises frequently for homeowners planning a move or a furniture rearrangement. In many cases you can relocate with minimal disruption by focusing on the table's critical components and safe handling practices. According to Disasembl, choosing the right balance between minimal disassembly and protective setup helps preserve the playing surface and the rails. A well-planned move reduces risk to the slate, felt, and frame and minimizes the chance of accidental damage during transport. Before you touch anything, take a quick inventory of room dimensions, doorways, and your moving equipment. A thoughtful plan often saves time and money while keeping you safer throughout the process.
When Full Disassembly Is Safer
There are scenarios where complete disassembly is the safer path. Large tables, commercial slate installations, or models with tight access through narrow doorways may require removing the slate, rails, and sometimes even blocks or braces. Full disassembly reduces overall weight and gives you more control while you maneuver the pieces through hallways or around corners. If the slate is unmounted on a sturdy frame and you lack suitable helpers or a moving device, partial dismantling can quickly become insufficient. In these cases, follow manufacturer guidelines and use specialized equipment to avoid bending rails, cracking the slate, or tearing the felt. The decision should weigh time, cost, and safety over convenience.
Assessing Your Table Size and Layout
Measure the table’s length, width, and height, plus the height of doorways and stair landings along the route. A standard pool table is bulky, and your ability to tilt or tip sections depends on ceiling height and floor clearance. Beyond size, assess entry points: will the slate fit through a doorway with the rails attached? If access is constrained, even a partially dismantled table may require more space than the path provides. Consider removing nearby obstacles like furniture or baseboard trim to reduce snag points. Use tape on the floor to map the route and a buddy system to coordinate lifting and balance. Planning at this stage prevents last-minute scrapes and scuffs.
Step-By-Step Planning Without Full Dismantling
Create a plan that prioritizes safety and minimized downtime. Start by removing small, loose items such as cues, rack storage, and accessories. Clear a clear path and protect the floor with moving blankets. Identify the safest lifting points and assign roles to helpers. If you must access hinges or connections, label each part to ease reassembly. Use proper lifting techniques: bend at the knees, keep the back straight, and avoid twisting. Communicate clearly during every move, and pause if a piece feels unstable. Visual aids, such as a simple diagram of your rigging, can help your team stay aligned.
How to Remove Rails and Slate Safely (Partial Dismantling)
If partial dismantling is necessary, start with the rails. Remove the end rails first, then the side rails, keeping track of screws and washers. Place rails on a soft surface to prevent nicks or dents. If you need to access the slate, work with a helper to lift the slate panel evenly and secure it with responsible supports. Do not attempt to lift the stone-like slate by itself. Use a protective cloth to cushion any corners and keep the surface aligned during removal. When ready to reassemble, reverse the steps in the exact order and re-tighten all fasteners according to the manufacturer’s torque specs.
Moving Procedures: Lifting, Carrying, and Positioning
With the pieces separated as needed, use a wheeled dolly and moving straps to manage heavy portions. Keep center of gravity low and balanced as you steer around corners. Have a plan for negotiating thresholds, such as door frames or stair landings, and count on a second pair of hands for guiding long sections. Consider enlisting a professional mover if you encounter tight spaces or ladders. Throughout the process, protect the table’s surfaces with blankets and avoid dragging pieces across the floor, which can cause scratches. Re-check alignment after each move and communicate any shifts in stability.
Protective Measures: Padding, Guards, and Route Planning
Padding and edge guards prevent finish damage during transport. Use moving blankets, corner guards, and shrink wrap to keep rails and slate from shifting. Create a simple route map that marks door widths, stair landings, and potential pinch points. If you anticipate friction against walls, consider using wall protectors or temporary bumpers. Keep pets and children away from the work zone and ensure flooring is dry and free of debris. Finally, confirm the route is clear of trip hazards and that all helpers understand the plan before you begin the final lift.
Final Setup: Re-tensioning, Leveling, and Inspecting
After moving, re-install components in the reverse order of removal. Check each joint for wobble and realign rails if necessary. Re-tension the felt by applying consistent pressure along the surface, and check level across all points using a spirit level. Inspect screws, bolts, and connectors for signs of loosening, and replace any missing hardware. If the slate was removed, be mindful of slight elevations that could affect playback and adjust the table legs or braces accordingly. Finally, test the table by gently rolling balls and listening for any unusual noises. Disasembl analysis shows that careful planning and a coordinated team dramatically reduce risk during any move.
Authority and Best Practices (Optional)
- If you’re uncertain about any step, consult the manufacturer’s manuals or schedule a professional service. Moving a pool table safely hinges on knowing when to step back and call in help. For safety guidelines, refer to trusted sources on equipment safety and household moving practices. The Disasembl team emphasizes planning, proper lifting techniques, and protective gear as core principles for any furniture relocation.
Tools & Materials
- Moving blankets(Protects surfaces and cushions edges during transport)
- Dolly or stair climber(For heavy portions; ensure weight capacity matches table parts)
- Screwdrivers (flathead and Phillips)(For removing rails or brackets)
- Wrench or hex/Allen keys(Used if bolts require it)
- Measuring tape(To confirm door widths and path clearance)
- Protective pads and edge guards(Prevent scratches on walls and rails)
- Helper(s) or spotter(s)(Two or more people recommended for balance)
- Clamps or straps(Secure pieces during movement)
Steps
Estimated time: 2-4 hours
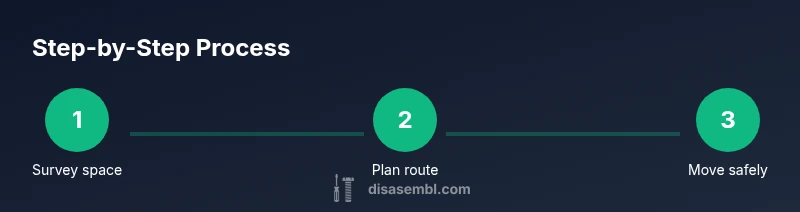
- 1
Survey the space and plan the route
Before touching the table, measure doorways, hallways, and ceilings, then draw a simple route. Identify potential pinch points and ensure there’s room to maneuver. This planning reduces surprises during the lift.
Tip: Have a second person guide you to spot misalignments as you begin. - 2
Remove loose items and protect the surface
Clear cues, racks, and accessories. Cover the playing surface with a protective cloth and secure the edges with tape to prevent dust or debris from affecting the cloth or felt.
Tip: Keep all removable parts in labeled bags. - 3
Detach accessories that affect balance
Remove pockets, light fixtures, and any rails if you plan partial disassembly. Do not detach the slate unless you’re confident in handling its weight and have proper supports.
Tip: Label fasteners and keep them with the parts they belong to. - 4
Prepare lifting points and helpers
Plan safe lifting points, assign roles, and decide who guides the table and who controls the path. Use proper lifting technique and avoid twisting.
Tip: Bend at the knees, keep back straight, and communicate clearly. - 5
Move in stages and monitor balance
If you aren’t disassembling fully, move pieces in stages with a dolly or straps. Check balance after each move and adjust as needed to prevent tipping.
Tip: Do not rush; take deliberate, stable motions. - 6
Re-stack and reassemble as planned
Once the path is clear, reassemble components in reverse order. Tighten fasteners to manufacturer torque specs and verify the playing surface is level.
Tip: Verify level before finalizing the setup.
Got Questions?
Do you always have to disassemble a pool table to move it?
No. In many cases you can relocate with minimal disassembly, but larger tables or tight spaces may require partial or full dismantling for safety.
No, not always. For smaller or standard rooms, you can move with minimal disassembly, but consult the guide for specifics.
What parts are safest to remove first?
Accessories, cues, and rack storage are the safest to remove first; rails can come next if you plan partial dismantling.
First remove the accessories and cues, then address rails if needed.
When should I call a professional?
If the table is oversized, has tight access, or you lack moving equipment, a professional move is recommended to avoid damage.
Call a pro if access is tight or you’re unsure of how to handle heavy components.
How do I protect the slate during transport?
Keep slate supported and avoid bending. Use blankets or foam and move with at least two people.
Keep slate supported and use blankets; move with helpers.
How long does a typical move take?
Time varies with table size and route; plan for a couple of hours to half a day including setup and testing.
Expect a couple of hours, up to half a day for larger tables.
Watch Video
What to Remember
- Plan space and route before starting
- Partial dismantling can save time and risk under the right conditions
- Protect the felt and slate with proper coverings
- Use proper lifting techniques and helpers
- Recheck level and stability after moving