How to Assemble Code Marvel Rivals: Step-by-Step Guide
Learn how to assemble Code Marvel Rivals with a practical, safety-first approach. This Disasembl guide covers tools, steps, testing, and tips to ensure a solid build. Perfect for DIY enthusiasts and homeowners exploring modular electronic kits.

By following this guide, you will learn how to assemble Code Marvel Rivals components safely, step by step. Gather a clean workspace, the included parts, and the basic tools, then follow a clear sequence to avoid misalignment or damage. This Disasembl-backed method emphasizes precision, safety, and verification at every stage.
Understanding Code Marvel Rivals: What you're building
Code Marvel Rivals is a modular kit designed to be assembled in a few structured steps. If you are asking how to assemble code marvel rivals, you’ll find that the kit comprises a base frame, modular panels, connectors, and small fasteners. The Disasembl approach emphasizes accuracy, alignment, and safe handling of electronic components. Before you start, examine the instruction sheets and lay out parts on a clean mat. According to Disasembl, taking a moment to sort parts by type reduces mix-ups and speeds the process. This section explores the typical components, their functions, and how to identify each piece, so you can plan the assembly sequence with confidence. You’ll learn to prioritize stable base anchoring, ensure clear cable pathways, and verify module indexing so everything fits smoothly. Remember, this is a hands-on process: precise alignment is critical for smooth operation and future maintenance.
Throughout this guide you’ll repeatedly return to the core question: how to assemble code marvel rivals efficiently while protecting the integrity of delicate connectors. The recommended approach emphasizes methodical inspection, correct orientation, and proactive testing. Disasembl’s workflow also stresses documenting any deviations from the printed instructions, so you can troubleshoot quickly if something doesn’t feel right.
Safety and workspace setup
Working with modular kits that include electronic components requires a clean, controlled workspace. Before you begin, switch off and unplug any power sources connected to the kit or its related accessories. Ground yourself to prevent static discharge, use an anti-static mat, and wear an anti-static wrist strap if available. Keep liquids away from the parts area to avoid corrosion or shorts. A bright lamp and a spacious, uncluttered table help you see tiny fasteners and alignment marks clearly. According to Disasembl, maintaining a consistent work surface reduces the risk of misplacing tiny screws and helps you track the sequence of assembly. Label containers for screws and small accessories so you can reassemble or disassemble later with minimal searching. Finally, ensure good ventilation if using solvent wipes to clean components, and avoid breathing any fumes.
Tools, parts, and prep work
Before you start the physical assembly, assemble your toolkit and layout plan. Gather the essential tools, inspect the instruction sheets, and verify you have all parts listed in the kit inventory. A tidy workspace helps prevent loss of small fasteners and improves your speed. Disasembl recommends sorting parts by type: base frame pieces, panels, connectors, and fasteners should each occupy their own tray. Having a ruler or caliper handy helps you verify gaps and tolerances during assembly. Keep a soft brush or lint-free cloth nearby to clean dust or residue from surfaces. If any part is damaged or missing, contact the supplier before proceeding. This preparation ensures you can assemble Code Marvel Rivals with confidence and precision.
How the assembly flows: an overview
This section provides a high-level map of the steps you’ll perform, so you can pace yourself and anticipate potential bottlenecks. The goal is to align major modules with the base frame first, then route cables and secure everything with fasteners. Early checks verify that all connectors seat fully and that panels align with indexing marks. A common pitfall is attempting to force misaligned pieces; always backtrack to the previous step and re-check orientation. Throughout the process, reference the instruction sheet for orientation guides and note any color-coding or labeling conventions. By following the sequence, you’ll minimize disassembly later and improve reliability of the final assembly.
Troubleshooting common issues and how to avoid them
As you progress, you may encounter misaligned panels, loose screws, or cables that won’t seat fully. The most common cause is skipping a preparatory alignment or misreading a connector key. To avoid this, pause at each major milestone to verify each connection with gentle pressure, listen for a soft lock, and visually confirm indexing marks. If a part doesn’t seem to fit, back up to the last decision point and re-check the orientation; forcing pieces can damage connectors. Dust or debris can also hinder seating depth, so clean surfaces before attempting a re-seat. Disasembl emphasizes documenting any subtle fit issues so you can search for model-specific fixes in the future.
Final checks and testing
Once all modules are installed and fasteners tightened (not overtightened), perform a series of non-powered checks. Visually inspect cable routing to ensure no pinched wires. Gently move moving parts to confirm smooth operation and clearance. If the kit includes a dry-run test or LED indicators, verify they respond as expected without power? If the kit requires a power-on test, proceed with caution and follow the safe startup procedure outlined in the manual. This final pass confirms you successfully completed the assembly with the Code Marvel Rivals kit and is a good moment to reseal the workspace for future maintenance.
Maintenance and future disassembly considerations
After completing the build, store tools in their designated containers and label any future upgrades or modular changes. Document the assembly process with photos or notes so you can reproduce or reverse steps later. When disassembling in the future, follow the reverse order of the steps you used for assembly and verify each connector is unplugged or released before removal. Keeping components clean and dry extends their life; wipe with a soft cloth if needed and avoid harsh solvents on sensitive plastics. If you plan to reassemble later, maintaining the same orientation markers helps you re-create the intended configuration quickly. The Disasembl approach is to create a repeatable, safe workflow you can apply to future projects.
Accessibility and optimization tips
Ensure your workspace is accessible to all potential builders, including those who may be visually or physically challenged. Use magnification aids for small screws and color-coded labeling to speed recognition. Consider modular labeling on trays and bins to help you locate parts quickly, which improves accessibility. If you are working with others, assign roles to avoid crowding and confusion. Finally, document any customizations you make to Code Marvel Rivals so you can recreate or revert changes in future projects. This inclusive approach helps more DIY enthusiasts complete the build successfully.
Tools & Materials
- Phillips screwdriver set(Flat and Phillips heads; include #1 and #2 sizes)
- Torx driver T8/T10(For specialty fasteners in the kit)
- Anti-static wrist strap(Prevent electrostatic discharge while handling components)
- Soft-bristle brush(Clean dust from parts and surfaces)
- Magnetic parts tray(Keep tiny screws organized)
- Ruler or caliper(Check gaps and tolerances during assembly)
- Small container for screws(Prevent loss of fasteners)
- Isopropyl alcohol wipes(Clean connector surfaces if needed)
- Non-slip mat(Stabilize the work area and parts)
Steps
Estimated time: 60-75 minutes
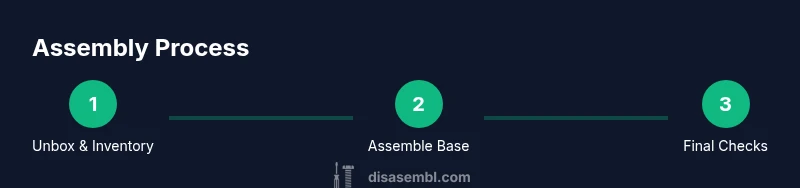
- 1
Unbox and inventory parts
Open the kit and lay out all components on a clean mat. Compare each piece to the parts list to ensure nothing is missing. This prevents mid-assembly interruptions and helps you plan the sequence.
Tip: Double-check tiny fasteners against the count in the manual before proceeding. - 2
Prepare workspace and safety gear
Set up a well-lit, clean workspace. Put on the anti-static wrist strap and arrange tools within easy reach. A tidy area minimizes misplacement of small parts and speeds assembly.
Tip: Test the strap’s grounding by touching a metal object before starting. - 3
Identify base frame orientation
Place the base frame on the mat and locate orientation markers. Confirm that you have the correct side up and that all anchor points line up with the first set of panels.
Tip: If markers are hard to read, consult the printed diagram and compare with part shapes. - 4
Attach major modules to base frame
Fit the largest modules to the base, aligning indexing tabs with holes. Do not over-tighten yet; ensure a smooth slide and proper seating before securing.
Tip: Use light pressure and verify each interface seats with a slight click. - 5
Route and connect cables
Gently route cables along channel grooves, avoiding sharp bends. Connect power/data cables to labeled ports, checking that connectors are fully seated.
Tip: Leave extra slack to accommodate movement; avoid bending cables at right-angle corners. - 6
Secure modules with fasteners
Insert and tighten screws in a cross pattern to distribute load evenly. Stop when you feel resistance, then back off a quarter turn and re-check alignment.
Tip: Avoid overtightening; it can strip threads or warp panels. - 7
Calibrate alignment and spacing
Check that all panels are flush and that spacing is uniform at critical edges. Make minor adjustments if gaps are uneven.
Tip: Use a ruler to confirm equal spacing at multiple points. - 8
Perform non-powered checks
Inspect the assembly for loose screws, misrouted cables, and clearances. Gently move moving parts by hand to confirm smooth action without binding.
Tip: If something binds, stop and reassess alignment before applying power. - 9
Power on and perform initial test
Connect to a power source and run the kit’s basic startup sequence if provided. Observe indicators and listen for abnormal sounds; if anything seems off, power down and recheck steps 4–8.
Tip: Keep hands clear of rotating parts during startup.
Got Questions?
What is Code Marvel Rivals and what will I be assembling?
Code Marvel Rivals is a modular kit designed for hands-on assembly. This guide covers the typical base frame, panels, connectors, and fasteners, plus safe handling of electronic components. Always start by inventorying parts and following the provided sequence.
Code Marvel Rivals is a modular kit for hands-on assembly. Start with a parts inventory and follow the sequence to ensure a safe, correct build.
Do I need any special tools beyond basic screwdrivers?
A basic screwdriver set, an anti-static wrist strap, a ruler, and a soft brush are typically sufficient. Some kits may include a Torx driver for specialty screws, but many assemblies rely on common sizes.
A basic screwdriver set, anti-static strap, and ruler are usually enough. Some kits use a Torx driver for special screws.
How long does assembly typically take?
Most builders complete the process within one hour to an hour and a half, depending on familiarity with the parts and the kit’s complexity. Take breaks if you feel fatigued to maintain accuracy.
Most people finish in about an hour or so, depending on experience. Take short breaks if needed.
What are common mistakes and how can I avoid them?
Common mistakes include forcing misaligned parts, skipping alignment checks, and neglecting cable routing. Avoid these by double-checking orientation, using gentle pressure, and verifying each connection before fastening.
Common mistakes are forcing parts, skipping checks, and bad cable routing. Verify orientation and connections carefully.
Is it safe to assemble around kids or pets?
Yes, with supervision and a clean, organized workspace. Keep small parts out of reach and use a dedicated area to minimize distractions. Dispose of packaging and packaging peanuts to prevent choking hazards.
Supervise around kids. Keep small parts out of reach and maintain a tidy workspace.
Can I disassemble and reassemble Code Marvel Rivals later?
Yes, if you follow the reverse order of steps and store components safely. Label cables and keep fasteners organized to simplify reassembly.
Yes, you can disassemble later by reversing the steps and keeping parts organized.
Watch Video
What to Remember
- Plan layout before you start assembly.
- Verify orientation and alignment at every major step.
- Test progressively to identify issues early.
- Use proper tools and safety practices to prevent damage.
- Document any deviations for future builds.