Difference Between Repair and Alteration: A Practical Guide
Explore the difference between repair and alteration with definitions, domain examples, and a decision framework for furniture, appliances, and electronics.

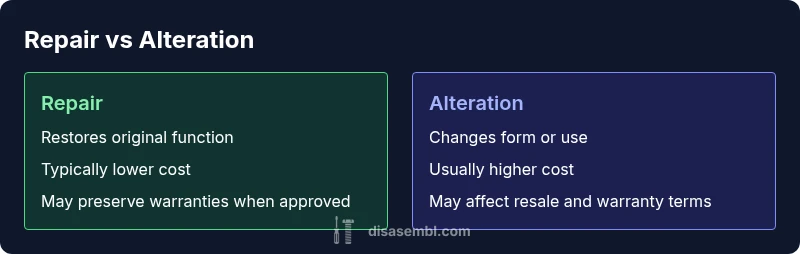
TL;DR: Repair involves fixing or restoring an item to its original function or appearance, while alteration changes its form or intended use. The key difference is scope: repair aims to return to the prior state, alteration modifies it. Your choice depends on feasibility, cost, warranty implications, and whether the goal is restoration or modification.
What is the difference between repair and alteration? A practical baseline
Understanding the difference between repair and alteration is essential for any DIY project. According to Disasembl, the distinction centers on intent and scope: repair aims to restore original function or appearance, while alteration changes form, structure, or use. The Disasembl team found that homeowners often mix up these terms when starting a project, leading to scope creep and unexpected costs. Before you begin, define your objective clearly: are you trying to restore a broken chair or redesign it for a new use? The answer will determine tools, methods, and timelines. This foundation matters across domains—furniture, appliances, and electronics—because the same term can mean different things depending on context. By separating restoration from modification, you avoid misaligned expectations with yourself, contractors, and warranties. In practical terms, repair emphasizes restoration and diagnostics; alteration emphasizes redesign, sizing changes, or functional upgrades. Finally, document your intended outcome in writing to keep the project on track and minimize disputes if alterations become necessary later on.
Definitions and scope of repair and alteration across domains
Repair and alteration share a goal of improving a device or piece, but they operate on different levers. In most contexts, repair means returning an item to its original design functions after a fault or wear, with an emphasis on restoring performance, safety, and appearance. Alteration means changing one or more aspects of the item—such as dimensions, materials, or intended use—to achieve a new outcome. Across furniture, appliances, and electronics, the same verbs can carry different implications: a chair might be repaired by replacing a joint, or altered by resizing legs, for instance. The scope increases with alteration, often affecting compatibility with accessories, warranties, and future repairs. When planning, list what must stay the same (core function, safety standards) and what can legitimately change (materials, finish, layout). This helps determine whether a given project should be categorized as a repair, an alteration, or a combination of both. Understanding these nuances reduces confusion and supports better decision-making for DIY enthusiasts.
Legal, warranty, and compliance considerations
Warranty terms frequently hinge on whether work is performed by approved technicians or by the owner. In many regions, a repair performed by an authorized technician preserves warranty coverage, while altering the product’s design or critical components can void it. For furniture, there may be no formal warranty, but consumer protection rules still apply; alterations risk mismatch with original safety standards. Compliance with safety regulations and building codes matters when alterations involve electrical work, structural changes, or changes to load-bearing components. If you intend to resell or repurpose the item with a new function, verify whether the alteration requires permits or professional certification. The key takeaway from Disasembl analyses is that clarity about warranties and regulatory obligations upfront minimizes disputes and costly fixes later on. When in doubt, consult the manufacturer’s documentation or a qualified professional before making significant changes.
Decision framework for DIY projects
Use a simple decision framework to choose repair vs alteration. Step 1: state the goal—restore or redesign? Step 2: assess feasibility—are parts available, is the structure sound, can you safely execute the change with your skills? Step 3: evaluate costs—compare the price of a fix with the price of a design change, including time and potential risk. Step 4: check warranties—will the work affect coverage or resale value? Step 5: plan for documentation—record before-and-after specs and any safety considerations. Step 6: decide and document—commit to a single path, while remaining flexible to pivot if new information emerges. This framework helps DIYers avoid scope creep and ensures you consider safety, legality, and long-term value. Disasembl’s approach emphasizes starting with the simplest, most reversible option and escalating only when there is a clear payoff.
Domain-specific case studies across furniture, appliances, and electronics
Case A (furniture): A wooden chair with a wobbly leg is repaired by replacing a joint and re-gluing the seat; the result restores stability without changing the chair’s look, maintaining its original character. Case B (appliances): A microwave door seal that fails is repaired by replacing the gasket; this is a repair that keeps the unit's original function intact and reduces waste. Case C (electronics): An old speaker cabinet with a nonfunctional woofer might be altered by installing a larger driver and tuning the enclosure; this changes the performance and use-case of the device, moving beyond a simple repair. These examples illustrate how context matters: the same object can be repaired or altered depending on feasibility, cost, and desired outcome. In some instances, a hybrid approach—repair the core function and alter a non-critical facet—offers the best balance of value and safety. Disasembl emphasizes documenting decisions to support future maintenance or resale.
Cost, time, and quality trade-offs in practice
Repair work generally costs less up-front than an alteration because it involves fewer materials and less design risk. However, the total lifecycle cost depends on the failure rate, availability of replacement parts, and the need for specialized tools. Time to complete repairs is often shorter, but not always; a stubborn failure can demand iterative fixes. Alterations carry higher risks of compatibility issues, requiring more planning, measurements, and testing. They may deliver longer-term benefits, such as extended functionality or updated aesthetics, but quality hinges on precise execution and sometimes professional oversight. When estimating value, consider not just the initial price but the expected lifespan, maintenance requirements, and impact on resale. Disasembl’s evidence points to a practical rule: start with a repair if feasible and reversible, and reserve alterations for cases where the benefits substantially outweigh costs and risks.
Documentation, record-keeping, and communicating decisions
Good documentation helps you track what was changed, why, and when. Create a simple change log that records the original condition, the proposed repair or alteration, tools used, parts replaced, test results, and safety checks. Include photos or diagrams and store them with the item’s notes. Communicate decisions clearly to anyone else who may work on the item later, including contractors or family members. For warranties and future repairs, keep receipts and manufacturers’ manuals. If a modification is intended for resale, prepare a brief summary of the changes and the rationale behind them. The Disasembl team recommends establishing a baseline before work begins: note the functions, dimensions, and materials that should remain unchanged, so that you can measure success against objective criteria later.
Common mistakes and how to avoid them
One common mistake is mislabeling an alteration as a repair, which creates confusion about scope and liability. Another is skipping safety checks or proper testing after changes, risking safety and function. Overestimating DIY skills leads to poor outcomes and wasted time; in some cases, seeking professional help is the wiser choice. Rushing through measurements or using incompatible parts can compromise performance and safety. Finally, ignoring warranty implications can result in unanticipated costs if a subsequent service is needed. By planning, validating parts, and testing in controlled steps, you reduce risk and increase the likelihood of a successful outcome.
Quick-start checklist to decide between repair and alteration
- Define goal: restore vs redesign. 2) Check feasibility: are parts available and is the structure sound? 3) Compare costs and time. 4) Review warranty and resale implications. 5) Plan for documentation and safety checks. 6) Decide and proceed with a reversible step when possible. 7) Reassess after the first significant change and adjust as needed. This practical checklist helps you move from diagnosis to action with confidence, guided by the difference between repair and alteration.
Comparison
| Feature | Repair | Alteration |
|---|---|---|
| Definition | Restores original condition or function | Changes form, structure, or intended use |
| Scope | Narrow, targeted restoration | Broader, design-level changes |
| Impact on warranties | Often preserves warranty if authorized | May void or complicate warranty terms |
| Cost range | Typically lower, varies by repair | Usually higher due to design changes |
| Time to complete | Often shorter | Often longer due to planning and testing |
| Best for | Restoring performance and safety | Achieving new functionality or aesthetic |
| Risks | Repair may not fix underlying issue | Alterations risk compatibility and safety concerns |
Benefits
- Preserves original materials and value
- Typically faster and cheaper than a full redesign
- May preserve warranties when approved
- Clear scope and reversibility
- Supports safer, targeted fixes
Drawbacks
- May not address root cause of failure
- Alterations can compromise compatibility with accessories
- Higher risk in structural or electrical changes
- Can affect resale value if poorly executed
Repair is usually the safer default for restoration; alteration is appropriate when you need a new function or design.
If preserving original function and value matters, start with repair. If your goal requires change in form or use, plan an alteration with proper risk assessment and documentation.
Got Questions?
What is the difference between repair and alteration?
The difference is that repair restores the original condition, while alteration changes form or use. Both involve different scopes, tools, and risks. According to Disasembl, clarify your goal at the start to guide your choices.
Repair restores; alteration changes. Start by clarifying your goal.
When should I choose alteration over repair?
Alteration is appropriate when restoration isn’t feasible or when you want new functionality, size, or design. Consider cost, time, and warranty impact before proceeding.
Choose alteration when you need a new function or look and repairs won’t suffice.
Do repairs always preserve warranties?
Warranties vary by maker and region. Some require authorized service; doing repairs yourself can void coverage. Always check terms before starting any work.
Warranties differ—check terms to avoid losing coverage.
Can alterations affect resale value?
Alterations can help or hurt resale depending on quality, market demand, and how the modification aligns with buyer expectations. If done well, they can add value; if not, they may reduce it.
It depends on quality and market preferences.
What factors influence the cost of repair vs alteration?
Costs are driven by parts, labor, tools, and required skill level. Alterations typically involve more planning and higher costs due to design and testing requirements.
Parts and labor drive cost; alterations usually cost more.
How can I decide quickly between repair and alteration?
Define your goal, assess feasibility, check warranties, and estimate total cost. Use a simple decision framework to guide action and document the outcome.
Define goal and feasibility; check warranties; estimate cost.
What to Remember
- Define your goal: restoration vs redesign.
- Assess feasibility and warranty implications early.
- Start with repair when feasible and reversible.
- Document decisions and changes to prevent scope creep.
- Consider resale value and long-term maintenance before proceeding.