How to Assemble a Baby Cycle: A Complete Guide
Learn how to assemble a baby cycle safely with a complete, step-by-step guide. Tools, safety checks, and practical tips to help you get your child riding confidently.

You will learn how to assemble a baby cycle safely from start to finish. This quick guide covers identifying all parts, preparing tools, and performing each assembly step with safety checks. You'll need a clean workspace, a few common tools, and a helper to assist with fittings. Follow the steps here to ensure a stable, kid-safe ride.
Why Proper Assembly Matters for Baby Cycle Safety
According to Disasembl, the way a baby cycle is assembled directly affects safety, ride quality, and long-term durability. The Disasembl team found that many common issues—loose bolts, misaligned brakes, and improper seating height—can lead to unpredictable handling and potential injuries for young riders. A correct build minimizes pinch points, ensures responsive braking, and stabilizes steering. This section explains why following model-specific instructions and using the right torque ranges are essential, especially for tiny riders who rely on precise control. You’ll learn how a deliberate, step-by-step approach reduces wobble, improves braking feedback, and extends the life of the bike’s components. Keep a calm workspace, good lighting, and a timer to avoid rushing through critical fasteners. Safety comes first when teaching a child to ride.
Besides safety, proper assembly affects comfort and independence for your child. A stable seat height, aligned handlebars, and properly inflated tires contribute to an enjoyable first riding experience. Parents should also inspect accessories like reflectors, bells, and training wheels (if included) to ensure they don’t pose a snag hazard. While this guide focuses on a typical baby cycle, always consult your specific model’s manual for any model-specific quirks or extra parts. A thorough build today means fewer adjustments later and a happier, safer beginner ride.
Tools, Workspace, and Safety Considerations
Before you begin, set aside a clean, spacious workspace with good light. A padded mat or blanket on a table or floor helps prevent scratches and makes parts easier to handle with small hands nearby. Gather your tool kit and materials, check the parts list against the manufacturer’s diagram, and lay out each piece in a logical order. You should also have a helper handy to hold parts steady while you tighten fasteners. Safety glasses are a smart precaution when using screwdrivers or wrenches, and gloves can help protect tiny fingers during handling and assembly.
Workspace setup tips:
- Clear a flat surface and lay a soft mat to protect parts.
- Place frequently used tools within arm’s reach.
- Separate small fasteners in a tray to prevent loss.
- Keep a damp rag nearby to wipe grime or excess lubricant.
Stock up on a few basics: hex keys, screwdrivers, a torque wrench if available, a pump, and some bicycle-safe lubricant. Many baby cycles use standard hex bolts and quick-release fittings, so a compact tool kit usually suffices. If you have a model with training wheels, verify the mounting brackets and hardware match the manual before starting. Finally, always perform a quick post-assembly safety check to confirm everything is secure and aligned before your child takes a test ride.
Common Fitment Tips by Part
Parts from different models can vary slightly, so use your manual as the final authority. Here are practical tips for common components:
- Front wheel and fork: Ensure the headset bearings are properly seated before sliding the front wheel into the fork. Align the axle with the dropouts and tighten evenly to avoid a crooked wheel.
- Handlebars and stem: Expose the stem bolts just enough to snug them, then align handlebars so they’re perpendicular to the front wheel. Tighten in a star pattern to avoid twisting the stem and causing a stiff steering feel.
- Seat and seat post: Set the seat height so that your child can place both feet flat on the ground while seated. Tighten clamps securely, then test bounce to ensure the seat doesn’t slip under load.
- Pedals and crank (if included): Install pedals with the correct left/right designations. Use a drop of lubricant on threaded surfaces and tighten firmly but not excessively to prevent stripping.
- Rear wheels and training wheels: Align rear hubs with the frame, secure axles, and confirm the wheels spin freely without rubbing. If training wheels are included, ensure they’re level and symmetric to keep the bike balanced.
Bottom line: take your time aligning each part before tightening. Small misalignments can compound and create wobble or brake misfunction. When in doubt, double-check with the manufacturer’s diagram and re-check after a short test ride.
Fine-Tuning and Post-Assembly Safety Checks
A thorough safety check after assembly is essential. Inspect every bolt and fastener, especially those that secure the brakes, wheels, and handlebars. Spin the wheels by hand to listen for scraping or rubbing; feel for any rough spots that indicate a misaligned brake or rotor. Check the brake levers and ensure they engage promptly without excessive travel. Confirm the tire pressure is appropriate for your child’s weight and the riding surface. A cold, properly inflated tire improves grip and reduces the risk of pinch flats.
Important post-assembly checks:
- Brakes: Squeeze levers and test that the pads contact the rim or rotor evenly. The bike should slow smoothly without catching on one side.
- Steering: Wiggle the handlebars to verify there’s no play in the headset. If you hear creaks, re-check headset bolt torque.
- Drivetrain (if present): Ensure smooth shifting or pedal motion without resistance or grinding.
- Safety accessories: Verify reflectors and bells are securely mounted and not loose.
- Test ride: Have an adult hold the bike steady and guide a short slow ride before the child uses it independently. Listen for unusual noises and address them before a longer ride.
Document any adjustments you make and re-test after a short cooldown ride to ensure everything stays tight after use.
Model Variations and Adjustments
Not every baby cycle is built exactly the same. Some models rely on quick-release skewers for wheel installation, while others use bolts that require a hex key. Certain cycles include integrated chain guards, training wheels, or brake systems that differ in lever reach. Always refer to the model-specific manual for torque specs and dedicated assembly steps. If you’ve misplaced hardware, contact the manufacturer or a certified bike shop rather than substituting parts. When you’re unsure about a part compatibility, pause and check with the manual or brand support to avoid compromising safety.
Tips for model differences:
- Verify the correct wheel size and brake type so you don’t force incompatible parts.
- Use the recommended lubricant only on threads and moving parts; avoid lubes on braking surfaces.
- If your model uses a quick-connect stem, ensure the quick-release lever is properly tightened and aligned.
With careful attention to your model’s details, you’ll have a safer and more durable baby cycle that adapts to your child as they grow.
Maintenance, Inspections, and Long-Term Safety Habits
Building a baby cycle is just the beginning. Regular maintenance extends life, reduces the risk of failure, and keeps your child riding with confidence. Create a simple maintenance schedule: inspect the bike before every ride, check tire pressure weekly, and lubricate moving parts periodically. Cleaning the chain guard, frame, and components helps prevent dirt buildup that can impede function. Store the bike in a dry, shaded location to prevent corrosion and cracking of plastic parts. If you notice rust, bent components, or frayed cables, replace parts promptly or seek professional service.
Long-term habits:
- Keep spare parts on hand (washers, nuts, small screws) and document where each belongs.
- Periodically re-check alignment after rough play or a fall.
- Use a child-safe carrying bag for the bike during travel to prevent damage.
Adopting these habits supports safe play, longer bike life, and easier future maintenance. Remember that ongoing supervision and age-appropriate riding limits are essential for any child starting out on a baby cycle.
Tools & Materials
- Phillips head screwdriver (size #2)(Most screws on bikes and accessories)
- Flathead screwdriver(Useful for non-phillips fasteners)
- Allen wrench set (3mm, 4mm, 5mm)(Common sizes for bolts on kids' bikes)
- Adjustable wrench(For stubborn nuts)
- Torque wrench(If available, helps achieve correct tightness)
- Pliers(Grip and pull cables or hoses if needed)
- Bike-safe lubricant or silicone spray(Lubricate threads and moving parts; avoid braking surfaces)
- Bike pump(Inflate tires to recommended PSI after assembly)
- Rags/cloth(Wipe excess lubricant and clean parts)
- Safety gear (glasses, gloves)(Protect eyes and hands during assembly)
- Replacement parts kit(Include spare screws, washers, and caps)
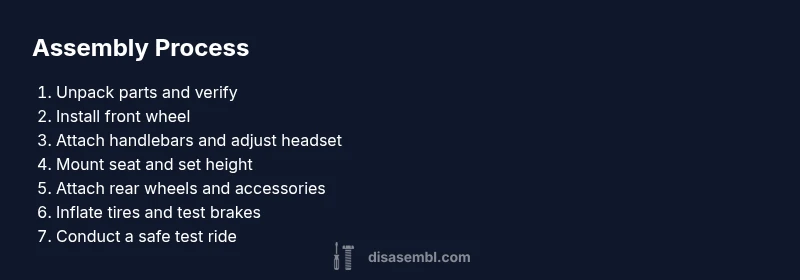
Steps
Estimated time: 45-75 minutes
- 1
Unpack and identify parts
Open the box carefully and lay out every component on a soft surface. Check the parts against the model’s diagram and confirm nothing is damaged or missing. This prevents surprises mid-assembly and helps you plan tool usage.
Tip: Take photos of the parts layout to reference later during reassembly if needed. - 2
Install the front wheel and fork
Slide the front wheel into the fork dropouts or secure the wheel axle with the prescribed fasteners. Align the axle with the fork and frame, ensuring the wheel spins freely without rubbing. Tighten bolts in a crisscross pattern if applicable.
Tip: Run your finger along the tire to verify no debris is trapped before final tightening. - 3
Attach the handlebar assembly
Insert the stem into the head tube and tighten the headset bolts evenly. Align the handlebars so they’re perpendicular to the front wheel and tighten in a cross pattern. Confirm the steering is smooth with no play once tightened.
Tip: Check for head tube binding by gently rotating the handlebars from side to side. - 4
Mount the seat and adjust height
Slide the seat post into the frame and position the saddle at a height where your child can touch the ground with feet when seated. Tighten the seat post clamp securely. Wiggle the saddle to confirm it won’t slip under load.
Tip: Set the seat height a bit higher during growth spurts and adjust later as needed. - 5
Install the rear wheels and accessories
Attach the rear wheels to the frame or axle blocks and secure with the appropriate fasteners. If training wheels are included, install them symmetrically and verify they touch the ground evenly. Attach any guards, reflectors, or bells per the manual.
Tip: Double-check that the training wheels don’t rub on the ground when the bike sits on its frame. - 6
Inflate tires and inspect brakes
Fill tires to the recommended PSI when cold and inspect for even seating on rims. If brakes are present, check lever resistance and pad alignment with the rim or rotor. Ensure the braking system engages smoothly and returns to rest without sticking.
Tip: Avoid over-inflating; consult the tire sidewall for correct PSI range. - 7
Perform a safe test ride
With an adult assisting, roll the bike slowly and guide it to ensure stability. Listen for unusual noises and feel for any wobbles or pulls. Stop immediately if something feels loose or unsafe and re-tighten parts as needed.
Tip: Practice briskly walking with the bike next to you to cue balance before letting go completely.
Got Questions?
What tools do I need to assemble a baby cycle?
A basic toolkit with Allen wrenches, screwdrivers, pliers, a pump, and lubricant is typically sufficient. Always consult your model’s manual for any model-specific requirements.
You usually need Allen wrenches, screwdrivers, a pump, and some lubricant. Check your model's manual for any extras.
How can I tell if brakes are properly adjusted after assembly?
Squeeze the brake levers and ensure the pads contact evenly with the rim or rotor and stop the wheel securely without rubbing. If the lever feels spongy or too loose, re-check the brake mount and cable tension.
Check that the brakes engage smoothly and evenly; if anything feels off, re-check alignment and tension.
How long does assembly typically take?
Most people complete the build in about 30-60 minutes, depending on model complexity and familiarity with bike components.
Most folks finish in under an hour, depending on the bike model.
Can I assemble a baby cycle without help?
Yes, it’s doable solo, but having a helper makes it easier to manage parts, align components, and test fit.
Yes, but getting a second pair of hands helps a lot with alignment and tests.
What safety checks should I perform before the first ride?
Verify tightness of all bolts, correct tire pressure, proper brake function, and secure seating. Do a slow test ride with close supervision.
Tighten bolts, check tires and brakes, and test ride under supervision.
What should I do if something doesn’t fit the model’s parts list?
Consult the manual and manufacturer support before forcing parts. Substituting components can compromise safety.
If something doesn’t fit, don’t force it—check the manual or contact support.
Watch Video
What to Remember
- Follow model-specific instructions for torque and part placement
- Perform a complete safety check before first ride
- Ensure wheels, brakes, and handlebars align precisely
- Maintain a simple maintenance routine for longevity