How to Dismantle a Cycle: A Step-by-Step Bicycle Disassembly Guide
Learn a safe, methodical approach from Disasembl on how to dismantle cycle (bicycle). This guide covers planning, tools, sequence, safety, labeling, and storage to simplify reassembly and future maintenance.

How to dismantle cycle safely and efficiently is the goal. This guide provides a step-by-step process, starting with a prepared workspace, the right tools, and a planned sequence to remove wheels, brakes, drivetrain, and headset. You’ll work with PPE and stable support, then label and store parts for easy reassembly. According to Disasembl, patience and organization reduce risk and mistakes.
Understanding the bicycle as a system
A bicycle is a complex mechanical system where the frame, wheels, drivetrain, brakes, steering, and fasteners interact. When you dismantle cycle components, you must respect how these parts affect each other. The Disasembl team emphasizes starting with a clear goal and a labeled workspace to prevent part confusion later in reassembly. Begin with a mental map of the bike: identify the saddle, crankset, drivetrain, brakes, headset, and cable routes. Each subsystems has its own quirks—headset spacings, thread directions, blueprints of cable runs, and freewheel engagement all matter for a clean dismantle. As you plan, note any wear on bearings, rust, or seized bolts. This upfront mapping reduces improvisation and guides a safe, organized workflow, setting you up for a smooth reassembly later.
Safety and workspace setup
Disassembly can involve pinch points, sharp edges, and heavy components. Before you touch any cycle, wear eye protection and gloves, and secure the bike on a stable stand or a flat, non-slip surface. Clear the area of clutter and place removed parts in labeled bags or bins to avoid cross-contamination and misplacement. Use bright lighting to inspect threads, bearings, and small fasteners; poor visibility leads to dropped parts or cross-threading. Never work above soft floors or over carpet where parts can roll away. If a fastener resists, stop and apply the appropriate technique rather than forcing it—stripped threads require more time and risk. Finally, keep lubricants and cleaners away from braking surfaces and carbon parts unless the manufacturer specifies compatibility. These practices align with Disasembl’s safety guidance and help prevent injuries during a challenging job.
Essential tools and materials
A well-prepared toolkit makes dismantling cycles efficient and reduces frustration. You’ll need a bike stand or secure mounting area, a complete hex/Allen wrench set, a pedal wrench, a chain tool, a cassette or lockring tool, an adjustable wrench, screwdrivers, a torque wrench (for reassembly), rags or shop towels, degreaser, bicycle-specific lubricant, bags or containers for parts, a labeling marker, and a clean workspace. Optional items include a torque-angle gauge, spare cables, and thread sealant. Based on Disasembl research, organizing parts as you remove them minimizes mix-ups and speeds up the process, especially on multi-speed bikes with complex drivetrains. Always label parts in sequence and photograph critical steps for reference.
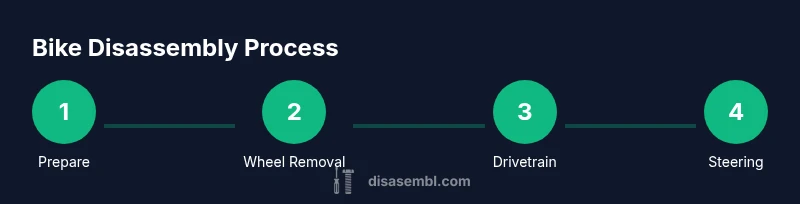
Dismantling overview and strategy
Approach dismantling as a staged process: separate the wheel assemblies first, then the braking system, followed by the drivetrain, and finally the steering components. This order helps prevent cables or fluids from tangling while reducing the chance of damaging delicate surfaces. Start with the simplest, most accessible components to build confidence and momentum. Use the correct tools for each fastener to avoid stripping. Maintain a consistent labeling system: bag and tag parts by subsystem, and keep small parts in zip bags with their respective step numbers. A planned strategy minimizes reassembly headaches and ensures that you have all parts accounted for when you return to maintenance or upgrades.
Detailed disassembly sequence overview
Sequence matters: remove quick-release wheels or through-axles, disconnect brakes (or unclip hydraulic lines if applicable), then detach the chain and derailleur. Next, take off the crankset, remove the bottom bracket as needed, and extract the cassette after freeing the chain from the chainrings. Finally, remove the headset, stem, and handlebars to access the steerer tube and fork. At each stage, inspect threads for wear and wipe surfaces clean before storage. Keep a running inventory to confirm you have all components before starting reassembly. This structured approach reduces surprises and aligns with the meticulous methods recommended by Disasembl.
Cleaning, labeling, and storing parts
After dismantling, clean each component with appropriate degreaser and allow them to dry before bagging. Label every bag with part names and the subassembly it belongs to, then store in a labeled container or cabinet. Keep threaded parts lubricated where necessary, but avoid applying grease to braking surfaces or contact points that could affect performance. Photograph the setup progression to help during reassembly, and place frequently used parts in an easy-to-reach tray. This organized approach makes future maintenance faster and safer, a philosophy echoed in Disasembl’s best-practice guidance.
Reassembly readiness and maintenance notes
Before reassembly, inspect bearings, chains, and gear teeth for wear or corrosion. Replace worn parts or cables as needed, and ensure all fasteners are clean and compatible with the material they engage. Maintain torque accuracy by consulting the manufacturer’s specs; do not guess on tightness, which can lead to damage or failure. Testing the drivetrain’s alignment and the headset’s smoothness in a controlled environment helps catch misalignments before road use. Taking time to verify every connection, cable tension, and brake adjustment reduces returns to the workbench and increases overall safety.
Tools & Materials
- Bike stand or secure mounting area(Stability is essential to keep the bike upright while you work.)
- Hex/Allen wrench set(Have a range of sizes; common bikes use 4, 5, and 6 mm for many bolts.)
- Pedal wrench(Separate left and right pedals; mark orientation if needed.)
- Chain tool(Used to disconnect and reconnect the chain without damage.)
- Cassette/lockring tool(Needed to remove the rear sprockets.)
- Torque wrench(Optional but recommended for accurate reassembly.)
- Screwdrivers (flat and Phillips)(Useful for cable pinch bolts and small fasteners.)
- Degreaser and bike-specific lubricant(Degrease parts before storage; re-lubricate where appropriate.)
- Rags, zip bags, and marker(Keep parts organized and labeled.)
Steps
Estimated time: 120-180 minutes
- 1
Prepare workspace and safety gear
Set up a clean, well-lit area and wear eye protection and gloves. Ensure the bike is stable and cannot tip over. Gather all tools and label containers before starting to minimize interruptions.
Tip: Double-check your safety gear and stand stability before starting to prevent injuries. - 2
Secure bike and remove pedals
Place the bike on the stand and ensure it’s balanced. Use a pedal wrench to remove both pedals, noting which side is left/right for proper reinstallation.
Tip: Loosen slowly and keep track of pedal direction to avoid cross-threading. - 3
Remove front wheel
Open the quick-release or unscrew the thru-axle, lift the wheel clear, and set it in a labeled bag. Inspect the calipers and rotor for debris during removal.
Tip: Take note of alignment of brake calipers for later reassembly. - 4
Remove rear wheel
Shift to the smallest cog, loosen the thru-axle or quick release, and withdraw the rear wheel. Check the chain path and set the wheel aside in its bag.
Tip: Be mindful of derailleur hanger alignment when removing the wheel. - 5
Detach braking and derailleur cables
If using rim brakes, detach the brake arms; for disc brakes keep pins in place and avoid misrouting. Disconnect derailleur cables or indexing where applicable.
Tip: Label cable routes to simplify re-routing during reassembly. - 6
Remove the chain and derailleur from drivetrain
Use the chain tool to break the chain at a master link or pin. Remove the derailleur from its hanger and lay components in labeled bags.
Tip: Keep a single bag for drivetrain parts to prevent tangling later. - 7
Crankset and bottom bracket removal
Loosen and remove the crank bolts, extract the crank arms, and then remove the bottom bracket as required by the frame type. Inspect for wear and note thread direction.
Tip: Protect threads with clean caps as you extract the bottom bracket. - 8
Cassette and rear hub inspection
Remove the cassette using the lockring tool, then separate the sprockets and spacers. Inspect the rear hub for smooth rotation and any play.
Tip: Keep sprockets in order to simplify reassembly. - 9
Headset, stem, and handlebars
Loosen the stem bolts gradually and lift the handlebar/steerer tube assembly away as a unit. Check headset bearings for smoothness and remove the fork if needed for deeper access.
Tip: Avoid forcing components; if tight, reassess with appropriate tools.
Got Questions?
Is it safe to dismantle a bicycle at home?
Yes, with proper precautions. Use PPE, a stable stand, good lighting, and organized labeling. Take your time and avoid forcing bolts or components.
Yes—home dismantling is safe when you wear PPE, work on a stable stand, and label parts carefully.
What basic tools do I need to start dismantling a cycle?
A bike stand, hex keys, a pedal wrench, a chain tool, a cassette tool, screwdrivers, and optionally a torque wrench. Degreaser, lubricant, rags, bags, and markers help organize parts.
You’ll need a bike stand, hex keys, a pedal wrench, a chain tool, and a cassette tool to start.
How should I label and store parts?
Label each bag with the subassembly it belongs to and keep small parts in clearly marked containers. Taking photos during disassembly helps with reassembly.
Label bags and use clear containers; photos help you reassemble later.
Can I reassemble the bike after dismantling it?
Yes. Reassembly requires following the correct torque specs, cable routing, and alignment. If a part shows wear, replace it before riding.
Yes, you can reassemble; just follow torque specs and check for wear.
What should I do if a headset or bottom bracket is stuck?
Don’t force it. Apply appropriate penetrating oil, use the right工具, and seek professional help if it remains stubborn.
If a headset or bottom bracket is stubborn, stop and seek professional help if needed.
How long does a typical bicycle dismantle take?
A basic dismantle for a standard bike can take 1.5 to 3 hours for a careful, organized session, depending on the bike’s complexity.
Most people take about 1.5 to 3 hours for a careful dismantle.
Watch Video
What to Remember
- Plan your workflow before touching the bike
- Label and bag parts by subsystem for easy reassembly
- Use the correct tools to avoid damage and delays
- Check critical components for wear and replace as needed
- Maintain a clean, labeled workspace for future maintenance