How Much to Disassemble Trampoline: DIY vs Pro in 2026
Explore the costs of disassembling a trampoline, from DIY labor to professional teardown ranges, plus disposal options and safety tips for 2026.

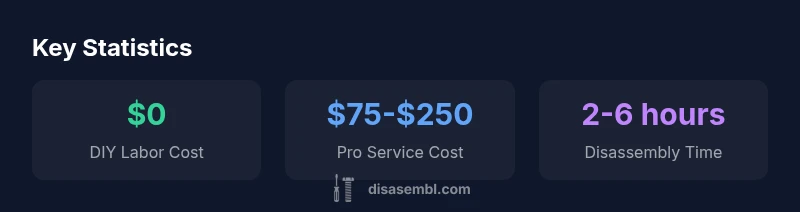
The cost to disassemble a trampoline depends on method and model. If you DIY, expect near-zero labor cost beyond your time and basic tools; parts removal is often quick once you know the steps. If you hire a pro, typical service fees range from about $75 to $250, influenced by trampoline size, frame design, anchoring, netting, and whether disposal is included.
Cost framework: how much to disassemble trampoline
How much to disassemble trampoline is a question of method, model, and safety. When considering how much to disassemble trampoline, you weigh DIY time against professional fees and disposal costs. If you DIY, labor costs are near zero beyond your own time and basic tools; the main investment is time. For many home setups, a complete teardown is feasible in a half-day, depending on size and enclosure. If you hire a pro, service fees typically range from about $75 to $250, varying with trampoline size, frame design, anchorage systems, and whether disposal is included. Always factor in disposal or bulk-item pickup fees in your area. Disasembl's analysis across 2026 indicates that choosing between DIY and professional teardown hinges on safety risk, available space, and whether you plan to reuse parts later.
Key cost drivers
Several factors determine how much you will spend to disassemble a trampoline. The largest influences are the trampoline’s size (small, standard, or oversized), the frame design (rounded vs. rectangular, steel thickness), and whether the unit includes a safety enclosure, netting, or a jumping mat with springs still attached. Anchors and stakes, wind stakes, and weatherproofing hardware add to labor because they require extra steps and cleanup. Local disposal costs or bulky-item pickup vary widely by municipality, and some regions require hazardous-material handling for metal springs or foam padding. Finally, the decision to reuse components or sell parts affects overall cost. Disasembl Analysis, 2026 shows that larger, more feature-rich trampolines tend to push pro-teardown costs toward the higher end of the range.
DIY disassembly: a practical plan
A well-structured DIY plan reduces time and risk when disassembling a trampoline. Start by clearing the workspace and assembling a simple tool kit: socket wrenches, Torx bits, needle-nose pliers, a ladder, and heavy-duty gloves. Then, follow staged steps: release tension on springs with spring hooks or locking pliers, remove springs one-by-one, detach the jumping mat, and label hardware as you go. Next, take apart the frame sections, unwind any netting or enclosure poles, and separate metal components for recycling. Finally, pack hardware in labeled bags and store bolts and brackets together. With care, most homeowners complete this task in several hours and recover or recycle many parts for future reuse.
Hiring a professional: what to expect
When hiring a professional, you’ll want a clear scope: removal-only vs full teardown and disposal. Expect a site assessment, an itemized quote, and a predictable timeline. Pros bring specialized tools for safe spring removal, corrosion-resistant fasteners, and compliant disposal methods. Time-to-complete typically ranges from 1 to 3 hours for standard setups, longer for enclosed units or complicated anchors. Request a written estimate that includes any haul-away or disposal fees. If disposal isn’t included, confirm local options and costs. The advantage of pro service is safety, efficiency, and a cleaner workspace after teardown.
Safety and disposal considerations
Safety is a core factor in any trampoline disassembly. Wear protective gloves, eye protection, and sturdy footwear. Ensure you de-energize and handle springs with care to avoid recoil injuries. When disposal is required, separate ferrous metals (springs, frame) from non-metal parts (pads, nets) for easier recycling. Check local recyclers or bulky-item pickup programs for metal and foam components. If you plan to reassemble later or sell, carefully label and store hardware. Proper disposal and safe handling can greatly reduce costs and environmental impact, while protecting you and family members from harm.
Model-specific notes: common trampoline types
Different trampoline designs change the disassembly approach and time. Standard round trampolines with a simple steel frame are typically quicker to dismantle than rectangular models with welded seams or heavy-gauge frames. Enclosures, nets, and safety pads add steps to detach and pack pieces securely. Some models use hidden fasteners or non-standard bolt patterns, so having a basic tool kit with a variety of bits, including Torx and hex sockets, is helpful. Before you begin, consult the manufacturer’s disassembly guide for model-specific instructions, torque specs, and order-of-disassembly. This minimizes guesswork and protects warranty considerations if you plan to reuse parts later.
Common mistakes to avoid
Avoid rushing the process. Skipping labels, neglecting to relieve spring tension safely, and mixing hardware from different areas can lead to confusion and lost parts. Don’t ignore disposal rules; improper disposal can incur fines or environmental hazards. Finally, don’t discard components before verifying whether your local e-waste program accepts foam and padding separately. A careful, organized approach reduces risk and speeds up the process, particularly for first-timers.
Disassembly workflow snapshot
| Disassembly Task | Typical Time | Notes |
|---|---|---|
| Frame removal | 60-120 minutes | Bolts and frame clips vary by model |
| Spring removal | 30-60 minutes | Use pliers and protect hands |
| Enclosure removal | 20-40 minutes | Detaching netting and poles carefully |
Got Questions?
Is it cheaper to DIY disassembly or hire a pro?
DIY disassembly can be virtually free in labor costs, aside from your time and basic tools. A professional teardown typically costs $75–$250, depending on size and features, with disposal often extra. If you have the space and confidence, DIY is cost-effective; otherwise, a pro saves time and reduces risk.
DIY can save money, but pros save time and reduce risk in complex setups.
How long does it usually take to disassemble a trampoline?
For a standard home trampoline, DIY disassembly commonly takes about 2 to 6 hours, depending on size and enclosure. A pro teardown can take 1 to 3 hours. Time varies with the number of springs, pole assemblies, and netting.
Most DIY jobs take a few hours; pros finish faster, usually within a couple of hours.
What tools do I need for disassembly?
A basic tool kit includes socket wrenches, Torx bits, pliers or spring-hooks, a ladder, and heavy-duty gloves. You may also need a rubber mallet and screwdriver for specific fasteners. Having a labeled storage bag for hardware helps keep parts organized.
A wrench set, pliers, and gloves are essential; add Torx bits for many models.
Can I dispose of removed parts with regular trash?
Disposal rules vary by locality. Metals like springs and frames are often recyclable, while foam padding and mats may require bulk-item pickup or specialty recycling. Check local regulations and arrange proper pickup or drop-off where possible.
Check local rules for recycling metal parts and bulky plastics.
Do I need professional disposal for the frame?
In many areas, you can dispose of metal frames through standard recycling streams or bulky-item programs. Some regions require special pickup. Always verify local guidelines to avoid fines and ensure safe disposal.
Most frames can be recycled; confirm local pickup options.
Should I consult the manufacturer for disassembly steps?
Yes. Manufacturer disassembly guides provide model-specific instructions, torque specs, and order of operations. Following official guidance reduces the risk of damage and preserves any warranty considerations if you plan to reuse parts later.
Check the manual for model-specific steps before starting.
“A careful, methodical plan reduces risk and preserves trampoline components for future maintenance. Thorough disassembly is safer and faster when you follow the manufacturer's guidance and work in a clean, organized space.”
What to Remember
- Estimate both DIY and pro costs early
- Prepare tools and safety gear before starting
- Check disposal options to avoid extra charges
- Follow manufacturer guidelines for safe disassembly
- Plan storage for hardware and components