Before Start or Before Starting: Prep Steps That Protect Your Project
Learn how to properly prep before start or before starting any disassembly or assembly task. This guide covers workspace, tools, safety, documentation, and a step-by-step pre-start routine to prevent mistakes and protect your project.

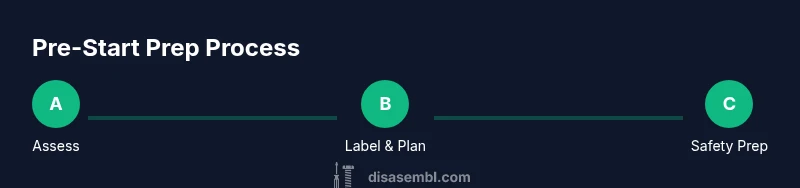
Prepare thoroughly before start or before starting any disassembly task by checking tools, workspace safety, manuals, and labeling materials. This concise pre-start checklist helps prevent damage and accidents and keeps the project on track. By establishing a repeatable routine, you’ll reduce surprises and set clear expectations for everyone involved.
Before You Start: The Psychology of Prep
Starting a disassembly or assembly task is easier when you approach it with intent. The phrase before start or before starting signals an intentional pause that saves time later. When you take a moment to visualize the sequence, identify potential bottlenecks, and acknowledge safety requirements, you reduce the likelihood of rushed mistakes. According to Disasembl, the most successful DIY projects begin with a deliberate mental model: define success, map dependencies, and commit to a fixed start window. In practice, this means clarifying what you want to achieve at the end of the session, listing the critical steps in order, and ensuring everyone involved understands their role. This upfront mental preparation translates into smoother disassembly or assembly, fewer damaged components, and a safer environment. For homeowners tackling furniture, appliances, or electronics, adopting this mindset aligns with best-practice disassembly guidance and promotes consistent results across projects.
Safety First: Personal Protection and Workspace Setup
Your safety and the safety of others come first when you’re about to start or before starting any hands-on task. A clean, organized workspace reduces the chance of tools being misused or misplaced, and it also minimizes trip hazards. Start by selecting a flat, well-lit area with adequate ventilation if you’re dealing with solvents, adhesives, or electronics. Wear appropriate PPE such as safety glasses, gloves, and a dust mask when needed. Keep a fire extinguisher and a first-aid kit within easy reach. Electrical work requires special care: unplug power sources, discharge capacitors when applicable, and use insulated tools. Disasembl emphasizes avoiding distractions—silence devices and set a fixed start time to maintain focus throughout the project.
Tools, Materials, and Documentation You’ll Need
Effective prep hinges on having the right toolkit and references ready before you begin. Create a concise inventory that covers fasteners, prying tools, organizers, labeled bags, marker pens, and a camera or smartphone for documentation. Documentation can include model numbers, part names, schematics, and photos of each step. If you’re working with furniture, cabinets, or electronics, having a labeled workspace for screws and small parts helps prevent cross-contamination of components. Disasembl’s approach is to minimize improvisation—by listing standard tools (screwdrivers, hex keys, pliers, tape, markers) and optional items (magnetic trays, zip ties, label stickers), you reduce the risk of missing essential items during the actual task. A well-documented setup also supports easier reassembly later and serves as a reference for future projects.
Creating a Pre-Start Checklist: What to Verify
A pre-start checklist is a concrete, actionable list of verifications you perform before lifting a tool. Start with the manual: confirm the model, parts list, and safety warnings. Check that all fasteners match the expected type and size, and verify that you have replacement parts if needed. Inventory your hardware: note which screws, nuts, or bolts go where, and record their orientation with photos. Create a labeling scheme for parts and bags, so when you reassemble you can locate each item quickly. Confirm the power status for electrical devices and ensure the environment is appropriate for the components involved (e.g., avoid humidity with electronics). A well-constructed checklist reduces backtracking and improves accuracy during both disassembly and reassembly. In short, this step is your concrete plan for a smooth start.
Planning for Disassembly: Labeling, Photos, and Logs
Before you start removing anything, plan how you will label every part and document the process. Label each component bag with a readable name and the date, then capture high-resolution photos from multiple angles before you touch any hardware. Consider a short video clip to capture assembly orientation and wiring routes. Maintain a change log to record deviations from the standard procedure or unexpected discoveries. This proactive documentation is invaluable if you must troubleshoot later or reverse-engineer steps during reassembly. Disasembl recommends a consistent notation system (e.g., color-coded bags, engraved or printed part numbers) and a simple-to-use photo sequence that maps to the user manual, so you can locate every item quickly while avoiding misplacement.
Anticipating Roadblocks: Troubleshooting Before Starting
Even the best-prepared projects encounter hiccups. Use your pre-start phase to anticipate common problems such as incompatible tools, missing fasteners, or unclear instructions. If parts are stubborn or corroded, plan safe removal techniques and identify alternative tools. Create a fallback plan for sections that may require extra care, such as delicate casings or electrical connectors. If you discover a discrepancy between parts and the manual, pause, reassess, and consult a service manual or support channel. By validating potential obstacles ahead of time, you reduce the risk of mid-task stalls and keep momentum going without forcing the work.
The Start Line: Transitioning from Prep to Action
With preparations complete, you transition to the actual work. The moment you begin, your plan should be actionable and time-bound: set a start window, assign responsibilities, and execute the first critical step with confidence. If you notice a deviation, pause briefly to revalidate the plan against your pre-start checklist. This transition is where good prep pays off: you’ll spend less time guessing and more time performing. Remember to document any early discoveries to feed back into your ongoing process improvements for future projects.
Tools & Materials
- Phillips-head screwdriver #2(Used for most furniture and appliance fasteners)
- Flat-head screwdriver(For prying or prying-like screws; choose a small to medium blade)
- Cordless drill/driver with bits(Optional for speed; ensure battery is charged)
- Magnetic parts tray(Keeps small screws organized)
- Label stickers and permanent marker(Tag parts and bags clearly)
- Camera or smartphone(Document orientation and wiring before removal)
- Notebook or log book(Record changes and part placements)
- Safety glasses(Protect eyes from debris)
Steps
Estimated time: 60-90 minutes
- 1
Inspect project and read the manual
Begin by scanning the instruction manual to identify critical safety warnings, required tools, and the correct sequence. Note any cautions about disassembly directions and sensitive components. This ensures you align your actions with manufacturer guidance before touching anything.
Tip: Highlight model-specific warnings in your manual with a colored marker. - 2
Gather tools and PPE
Assemble the necessary tools and protective equipment in a single, accessible area. Double-check tool compatibility with fasteners and components to avoid damaging heads or threads. Having everything on hand minimizes interruptions during the task.
Tip: Test a fastener head on a spare piece to confirm fit before starting. - 3
Clear and secure the workspace
Eliminate clutter, unplug power sources, and ensure adequate lighting. Establish a safe, dry surface with non-slip footing. A stable environment reduces accidents and keeps components from rolling away.
Tip: Use tape or a grid mat to orient and separate parts. - 4
Create a pre-start checklist and labeling plan
Draft a concise checklist covering model info, part labeling, and photos. Decide a labeling scheme (colors or numbers) for bags and components so reassembly is straightforward. This step anchors your project in order rather than improvisation.
Tip: Label the first bag as 'Part A' and photograph its contents. - 5
Document orientation and wiring
Take wide-angle and close-up photos of the setup, noting wiring routes and connector types. If wiring is involved, label connectors and take notes on any unique features (e.g., color codes or pin counts). This creates a reliable reassembly reference.
Tip: Video a quick walk-through of the back panel to capture connector positions. - 6
Verify safety and start at a controlled pace
Do a final safety verify before initiating work: confirm power is off, tools are in good condition, and you have space to work. Start with a small, simple action to ensure correct orientation before proceeding deeper into the task.
Tip: If anything feels risky, pause and reassess the plan.
Got Questions?
Why is pre-start preparation important for disassembly projects?
Pre-start preparation aligns tools, safety, and documentation, reducing errors and injury. It helps you visualize the sequence and ensures the project proceeds smoothly from the first step.
Pre-start preparation aligns tools, safety, and documentation to prevent errors and injuries, ensuring a smooth first step.
What is the difference between 'before start' and 'before starting'?
Both phrases signal a planning phase prior to action. 'Before start' emphasizes the overall readiness state, while 'before starting' highlights the exact moment you begin the first action.
Both phrases signal planning before action; one focuses on readiness, the other on the first move.
Which tools should I always have ready before starting a task?
Always have a screwdriver set, pliers, utility knife, marker, tape, and a camera for documentation. Add PPE such as safety glasses and gloves as needed for the project.
Keep a basic toolkit and protective gear ready; you can add specialty tools as the task demands.
How can I ensure accurate reassembly later?
Label parts and bags clearly, photograph each step, and maintain a change log. A simple, consistent system reduces guesswork during reassembly.
Label and document every step so you can reassemble with confidence.
What should I do if a part is damaged or not removable safely?
Pause the task, evaluate alternatives, and consult the manual or a professional. For safety, avoid forcing connectors or breaking components.
If something seems damaged or stuck, stop and reassess rather than forcing it.
Is it okay to proceed if I feel uncertain about a step?
No. It’s better to pause, verify information, and seek guidance. Rushing can lead to mistakes and safety hazards.
If you’re unsure, pause and verify before continuing.
How long should the pre-start phase take for a typical project?
Aim for 15-30 minutes for simple tasks and 30-60 minutes for more complex disassembly. Time varies with the complexity of the project and your familiarity.
Expect 15-60 minutes for prep depending on complexity.
Watch Video
What to Remember
- Identify success criteria before you begin.
- Safety and workspace setup prevent accidents.
- Document orientation and part labeling for easy reassembly.
- A clear pre-start checklist reduces delays during the task.
- Use photos and logs to guide post-project improvements.