How to Set Up When: A Practical Disassembly Guide
Learn how to set up when starting any disassembly project with a structured workspace, clear labeling, safety gear, and a step-by-step prep routine. A practical guide by Disasembl to minimize mistakes and speed reassembly.

To how to set up when starting a disassembly, define a clean workspace, secure the item, and gather the right tools. Unplug power sources, wear PPE, and label components before you touch anything. According to Disasembl, a well-structured prep reduces mistakes and speeds reassembly. Prepare waste containers and a disposal plan to keep the area safe and organized. Use a written checklist.
How to set up when you start a disassembly project
Disassembly work benefits greatly from a deliberate, repeatable setup. The phrase how to set up when is not just about clearing space; it is about creating a controlled environment where every tool, fastener, and component has a defined place. A robust prep phase reduces the chance of losing small parts, misplacing screws, or accidentally damaging sensitive electronics. In practice, a strong setup translates into fewer errors during teardown and a faster, more reliable reassembly. Disasembl’s approach emphasizes planning, documentation, and safety as the pillars of a successful start. By visualizing the task before touching anything, you set expectations, schedule, and scope in a way that keeps you organized from the first step to the final reattachment.
Workspace zones and flow
A well-designed workspace is divided into zones: a part removal zone, a labeling and bagging station, a documentation hub, and a disposal and recycling area. Physically separate these zones to avoid cross-contamination of parts, tools, and dust. Position the device so you can access top, sides, and back without repeated repositioning. Maintain good lighting and a flat, stable surface. A simple schematic on the wall showing where bags, markers, and reference photos live helps newcomers and seasoned DIYers alike stay on track. Consistent workflow minimizes backtracking and keeps the project moving smoothly.
Safety and PPE essentials
Safety comes first when you’re learning how to set up when performing disassembly. Before any strike of prying or prying-like activity, unplug power sources and remove any batteries. Wear safety goggles, gloves as needed, and non-slip footwear. If you’re dealing with electronics, consider anti-static wrist straps. Keep a small fire extinguisher nearby for electrical hazards and ensure airflow is adequate for any chemical cleaners. When in doubt, pause and reassess the safety conditions; it’s easier to recheck now than to address a preventable accident later.
Labeling, documentation, and part mapping
Label every fastener and component as soon as you remove it. Use color-coded bags or tape to group fasteners by assembly area, then photograph each step for later reference. Create a simple component map showing where each connector belongs and any orientation notes. If parts are reusable, store them in clearly labeled containers. Documentation is the bridge between teardown and reassembly; a little note-taking now saves hours of guesswork on the rebuild.
Tools, storage, and disposal planning
Assemble a tool kit with the basics: screwdrivers in multiple sizes, pliers, wire cutters, a utility knife, and a torque driver if needed. Use labeled bags or containers for screws, nuts, and small pieces; consider adding a marker or label maker to mark contents. Plan disposal for recyclable plastics and battery-containing components according to local regulations. By aligning tools, storage, and disposal on day one, you reduce misplacements and support a cleaner, safer work environment.
Tools & Materials
- Phillips screwdriver(Size #2 or compatible)
- Flathead screwdriver(Flat-blade for prying and cover removal)
- Torx driver set(Include T10, T15, etc.)
- Pliers (needle-nose)(Grip small parts and wires)
- Wire cutters(Trim or cut zip ties as needed)
- Tweezers(Handle tiny components)
- Marker or label pen(Label bags and maps)
- Masking tape or label tape(Color-code and bag contents)
- Clear plastic bags(Bag by assembly area or subsystem)
- Cable ties (zip ties)(Bundle cables and wires)
- Safety goggles(Eye protection)
- Work gloves(Increase grip and protect hands)
- Anti-static wrist strap(Important for sensitive electronics)
- Rechargeable flashlight(Illuminate dark corners)
- Trash/recycling bags(Dispose of waste responsibly)
Steps
Estimated time: 90-150 minutes
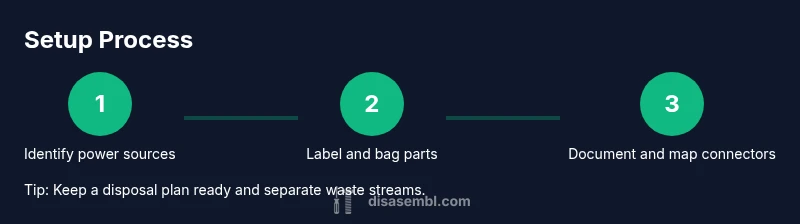
- 1
Identify and unplug power sources
Locate all power connections and unplug the device. If batteries exist, remove them safely. This eliminates shock risk and unexpected movements during teardown.
Tip: Double-check external adapters and any standby power sources. - 2
Clear workspace and establish zones
Create dedicated zones for removal, labeling, documentation, and disposal. Keep tools in a labeled tray and ensure a clean, flat surface for parts.
Tip: Mark each zone with bright tape to avoid cross-contamination. - 3
Create a component map and start labeling
Bag screws by subsystem and attach miniature labels to cables. Take a few photos from multiple angles to capture orientation.
Tip: Use color codes that correspond to the component map. - 4
Secure the item and begin panel access
Stabilize the device and remove non-essential covers with appropriate tools. Avoid forcing panels; use gradual pressure to release snaps.
Tip: Keep track of any torque screws and their original locations. - 5
Document and bag screws and small parts
Place screws and small components into labeled bags. Record the quantity and size on each bag for easy reassembly.
Tip: Place bags in the same relative order as the teardown steps. - 6
Review safety and plan reassembly
Before proceeding, recheck safety, plan reassembly flow, and confirm you have all needed pieces. Restock any missing basics.
Tip: Create a quick checklist for the rebuild phase.
Got Questions?
What is the first step in setting up for disassembly?
The first step is to identify all power sources and unplug the device. Remove batteries if present and assess the workspace for safety before touching any components.
First unplug the device and remove batteries, then assess safety before touching anything.
Why is labeling important during disassembly?
Labels help track orientation and placement, making reassembly predictable. Bag screws by subsystem so you know where each piece belongs.
Labels keep you oriented and simplify reassembly.
What PPE should I wear when setting up?
Wear safety goggles and sturdy gloves. Consider an anti-static wrist strap for electronics and closed-toe shoes for protection.
Goggles and gloves are essential; add anti-static if dealing with electronics.
How do I handle hazardous components safely?
Do not touch hazardous components directly. Use appropriate tools, store them in labeled containers, and dispose of them according to local rules.
Avoid contact and follow disposal rules for hazardous parts.
How long does setup typically take?
Time varies with device complexity. Simple tasks may take about an hour; more complex electronics can require longer planning and documentation.
Expect an hour or more for complex devices.
What should I do if parts are damaged or missing?
Don’t force components. Note gaps, document exact items, and verify with manuals or replacement part sources before proceeding.
Don’t force parts; document and source replacements as needed.
Watch Video
What to Remember
- Plan setup before touching components.
- Label and map each part for easier reassembly.
- Create dedicated zones to improve workflow.
- Protect yourself with PPE and safe handling practices.
- Document thoroughly to reduce errors.