How to Fix Assembly in Onshape: A Practical Guide
A practical, in-depth guide to diagnosing and repairing Onshape assemblies. Learn how to fix mates, constraints, and configurations with proven, step-by-step methods to ensure reliable motion and robust CAD models.

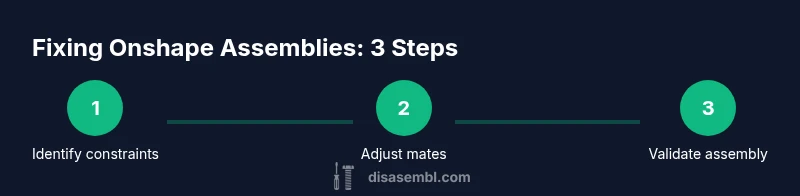
This guide shows how to fix assembly in onshape by diagnosing constraints, fixing mates, and validating the final motion. You'll learn steps to locate underconstrained parts, adjust mates, rebuild features, and verify assemblies across configurations. Requires an active Onshape document and basic CAD skills; follow the steps to achieve a reliable, error-free assembly.
Understanding why assemblies fail in Onshape
Assemblies fail for a variety of reasons, from missed or conflicting mates to configuration drift and misaligned origins. In practice, the most common culprits are underconstrained parts, overconstrained mates, and mismatched reference geometry. When you encounter an error, adopt a structured diagnostic mindset rather than guessing. According to Disasembl, a disciplined approach reduces iteration time and preserves design intent. This section outlines typical failure modes, how they show up in Onshape, and a plan to verify each component of the assembly. The goal is simple: learn how to fix assembly in onshape with confidence, not guesswork. You’ll learn to read error badges, understand constraint hierarchies, and distinguish part-level issues from mate-level ones. With this mindset, you can quickly locate the root cause and target your fixes efficiently.
In this article, we weave practical steps with diagnostic cues so you can start troubleshooting immediately. You’ll see examples of underconstrained segments, overconstrained relationships, and misaligned references, plus how to peel back constraints methodically without breaking the entire model. By the end, you’ll know how to approach repairs with a plan, ensuring your assembly behaves predictably across configurations. Disasembl’s guidance emphasizes traceable edits and conservative changes to protect original geometry.
Tools & Materials
- Onshape account with project access(Sign in to Onshape and open the document containing the assembly you want to fix.)
- A stable internet connection(Maintain connection during live debugging of mates and constraints.)
- Reference drawings or part geometries(Have sketches, exploded views, or part data handy to verify intended motion.)
- Revision-safe workspace(Create a duplicate or branch to test fixes without altering the original design.)
- Optional export tools (STEP/IGES)(Use for external verification or cross-checks if needed.)
Steps
Estimated time: 40-60 minutes
- 1
Open the assembly in Onshape
Locate the target assembly in your document and switch to the Assembly tab. Expand the Mates and Warnings to see active constraints and any flagged issues. This first step establishes your baseline before edits.
Tip: Use the Mate filter to quickly locate and review all constraints involved in the assembly. - 2
Identify constrained vs underconstrained parts
Scan for parts that are fully constrained, underconstrained (floating), or overconstrained (conflicting relationships). Note which parts appear movable and which are fixed by mates. This helps pinpoint where the fix should start.
Tip: If you see red or yellow indicators, focus on those components first. - 3
Check configuration and reference geometry
Verify that the active configuration matches intended use (e.g., default, alternate, or exploded views). Confirm reference geometry (planes, origins, and mate targets) align with the intended design intent.
Tip: Mismatched references are a common root cause; reselect correct targets if needed. - 4
Repair or replace problematic mates
Edit or remove problematic mates. Recreate essential mates using robust types (coincident, concentric, or distance) and avoid overconstraint. Ensure mates reflect real-world movement.
Tip: Prefer fewer, well-defined mates over many small constraints. - 5
Align components and re-check clearance
After re-mating, visually inspect alignment and run an interference check. Ensure parts do not collide and that motion paths are clear across all configurations.
Tip: Turn on lightweight visualization to speed checks on large assemblies. - 6
Validate motion and configuration transitions
Rotate and translate components through expected ranges. Test transitions between configurations to ensure consistency and no unintended changes.
Tip: Use configuration previews to catch issues before finalizing edits. - 7
Save revision and document changes
Once motion is stable, save a revision and document what was changed, including the rationale and references used. This preserves design intent for future edits.
Tip: Add a brief note in the revision comment for easy traceability. - 8
Review with a peer or mentor
If possible, have another engineer or designer review the fixes to confirm that the assembly behaves as intended in real use scenarios.
Tip: Fresh eyes can catch edge cases you might miss.
Got Questions?
What is an underconstrained part?
An underconstrained part lacks sufficient mates to define its position. It may appear loose or move unexpectedly. The fix involves adding appropriate mates or constraining the part more accurately to its intended reference.
An underconstrained part means it isn’t fully defined by mates, so it can move; add precise constraints to fix it.
How do I identify the root cause of an Onshape assembly error?
Start by checking error badges, then inspect constraints and configurations. Isolate the symptom (e.g., a rogue mate or misaligned origin) and verify against the intended motion path.
Look at the error indicators, then trace constraints step by step to locate the root cause.
Can Onshape automatically resolve assembly errors?
Onshape provides diagnostic tools and constraint options, but most fixes require deliberate edits to mates and geometry. Auto-resolve should be used cautiously to avoid unintended changes.
Auto-resolution helps flag issues, but you’ll often need to edit mates yourself to preserve design intent.
What if configurations differ between revisions?
Check each configuration’s feature tree and references, then test motion for all configurations. Align references so that a fix applies consistently across variants.
Test every configuration to ensure the fix holds across all variants.
How should I document Onshape fixes for future work?
Record the problem, the steps taken, and the rationale in the revision notes. Include before/after screenshots, references, and any constraints added or removed.
Keep clear notes and visuals so future edits are straightforward.
What are best practices to prevent future assembly issues?
Plan constraints with motion in mind, group related mates, use configuration management, and validate early with simple references before scaling up complexity.
Prevent issues by designing constraints for intended movement from the start.
Watch Video
What to Remember
- Identify root causes of mate/constraint errors
- Use targeted, minimal edits to restore motion
- Validate across configurations and motion ranges
- Document changes for future revisions