How to Make Disassembly Drone Claws: A DIY Guide
Learn how to make disassembly drone claws with a step-by-step guide covering design, materials, assembly, testing, and safe operation for DIY enthusiasts.

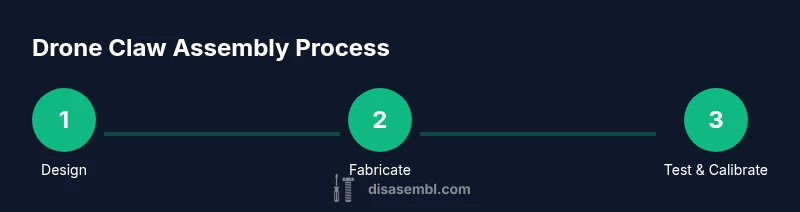
You will learn how to make disassembly drone claws by following a clear, modular process: design the claw geometry for grip clarity, select lightweight materials, assemble with secure fasteners and springs, wire actuators or servos, and test each function step by step. This guide covers safety, tool needs, and common troubleshooting to help DIY enthusiasts build reliable claws for small drones.
Understanding Drone Claw Disassembly Goals
When building drone claws intended for disassembly tasks, the goal is to grip securely without damaging delicate components. A robust claw should adapt to different shapes, apply even pressure, and be quick to attach/detach from the drone frame. According to Disasembl, practical disassembly tasks benefit from modular, guided designs that can be tuned for a range of payloads. This section explains how to set measurable goals for grip strength, jaw closure, and release speed, so you can tailor the build to your drone model and use case. We'll cover core design decisions you must align before you cut or print any parts.
Design Principles for Disassembly Claws
A successful claw design starts with geometry that matches the task: a gripping jaw that closes smoothly and distributes load across multiple contact points. Favor symmetric jaws, gentle contact surfaces, and compliant springs to mitigate shock. Balance weight against required strength to maximize flight time. Keep a modular quick-release mounting pattern so you can swap jaws or actuators without dismantling the whole rig. These principles help you achieve reliable performance in the field.
Material Choices and Sourcing
Material choice drives strength, weight, and durability. Use lightweight aluminum or carbon fiber for the frame to reduce inertia, while opting for printed jaw inserts in a tough, impact-resistant plastic (like PETG or ABS). Springs should provide a gentle clamping force and recover quickly after jaw closure. Gather hardware such as small bolts, washers, and hinge pins, plus heat-shrink tubing and wire for safe, tidy electrical routing. Always prioritize materials that withstand vibration and temperature swings typical of outdoor flights.
Actuation and Control: choosing servos and linkages
Select actuators that balance speed, torque, and power draw. Small hobby servos or compact linear actuators can drive jaw movement via linkages. Use a lightweight control system (an Arduino-compatible microcontroller or similar) with PWM output to regulate speed and force. Implement mechanical linkages with bushings or low-friction pivots to minimize stiction. Keep the control signals simple to avoid jitter during hovering tests.
Building the Modular Claw Subsystems
Think in three modules: jaw module (gripping surfaces and hinge), actuation module (servo or actuator with linkages), and mounting/wiring module (drone attachment and cable routing). Design jaw inserts that can be swapped to handle different objects. Keep the wiring harness tidy with strain reliefs and color-coded cables. A modular approach makes maintenance easier and allows quick swaps if a jaw wears out or a different task requires a new grip geometry.
Wiring, Power, and Safety Considerations
Power the claws from the main flight battery with a dedicated power rail and appropriate fusing. Ensure actuators have a safe current draw and provide adequate decoupling to minimize voltage dips during flight. Use tremor-absorbent mounts and weather-resistant connectors for reliability. Always disconnect power before handling, and verify polarity to prevent damage to servos or the controller.
Testing, Calibration, and Troubleshooting
Start bench tests with the claw mounted on a non-flying rig to measure grip force, jaw travel, and response time. Calibrate servo limits so jaws close consistently. Introduce lightweight test objects before attempting real disassembly tasks. Common issues include stalling servos, binding joints, or misaligned jaws; diagnose with a multimeter, check for binding debris, and re-seat linkage pins. Document any changes for future reference.
Maintenance and Future Upgrades
Inspect joints and springs after every few flights and replace any worn components. Clean dirt and debris from hinges and actuators, re-lubricate pivot points, and re-tighten fasteners. Consider upgrades like stronger jaw inserts, higher-torque actuators, or alternate mounting brackets if you plan more demanding tasks. Keep spare parts on hand to minimize downtime.
Integration with the Drone: Mounting and Flight Tests
Attach the claw system to a sturdy, vibration-damped section of the frame, away from critical sensors and power electronics. Ensure the center of gravity remains balanced with the added mass. Conduct incremental flight tests with tethered power to validate control, grip reliability, and reset behavior. Only proceed to full flight once the claw’s operation is repeatable and safe.
Tools & Materials
- Screwdrivers (Phillips & flat)(Essential for assembly and adjustments)
- Allen keys(Common sizes for small hardware (2mm-4mm))
- Pliers and wire cutters(For bending links and trimming wires)
- Multimeter(Check continuity and verify polarity)
- Soldering iron and solder(Optional for longer-term reliability of connections)
- Heat shrink tubing(Insulate exposed wiring and joints)
- 3D printer or access to printed jaws(Print durable jaw inserts in PETG/PLA with proper tolerances)
- Lightweight aluminum or carbon fiber tubing(Frame components to reduce weight)
- Small servo motors or compact actuators(Actuate the jaws; ensure torque fits jaw design)
- colleary fasteners, nuts and washers(Secure joints and mounting points)
- Battery and power distribution hardware(Drone-compatible LiPo or LiPo-like power source)
- Electrical tape or zip ties(Cable management and strain relief)
Steps
Estimated time: 8-12 hours
- 1
Define Claw Geometry
Sketch the jaw shape and hinge location based on the target objects. Ensure symmetry for balanced grip and plan where springs will provide return force. Create a simple STL/2D sketch to review fit with the drone frame.
Tip: Keep tolerances tight but not zero; print a test jaw to verify clearances. - 2
Prototype Jaw Inserts
Print the jaw inserts in a tough plastic and test different contact layouts. Use soft contact surfaces to avoid marring delicate items. Verify that jaw travel aligns with actuator range.
Tip: Iterate with 2-3 jaw prototypes before finalizing geometry. - 3
Assemble Jaw & Pivot
Attach jaws to the hinge with a stable pivot, add a lightweight spring, and ensure smooth opening/closing through full travel. Check for binding and adjust pivot shims as needed.
Tip: Lubricate pivots lightly to minimize wear. - 4
Install Actuation Linkage
Connect the servo or actuator to the jaw via a simple, rigid linkage. Align linkage so the jaw closes squarely and evenly distributes force.
Tip: Test linkage at multiple angles to prevent binding. - 5
Wire Electronics & Power
Route the motor power and control lines through a clean harness. Add polarity protection and a fuse. Tie wires to frame with strain reliefs to prevent fatigue.
Tip: Keep wires away from rotating parts and hot surfaces. - 6
Mount to Drone Frame
Attach the claw module to a vibration-damped section of the frame. Verify mounting hardware is secure and frame CG remains balanced.
Tip: Use anti-vibration mounts to reduce jitter during flight. - 7
Bench Test & Calibrate
Run bench tests to verify gripping force, travel, and release timing. Calibrate the servo limits to ensure consistent performance.
Tip: Document exact travel settings for repeatability. - 8
Begin Flight Testing
Start with tethered or low-power tests to validate control in real flight conditions. Observe grip reliability and adjust as needed.
Tip: Always have a safety observer and reset procedure. - 9
Finalize Documentation
Record material choices, dimensions, and wiring layouts. Create a quick-reference guide for future maintenance or upgrades.
Tip: Label cables and keep a parts inventory.
Got Questions?
Is it safe to disassemble drone claws?
Yes, safety comes first. Always disconnect power before handling, wear eye protection, and test steps on a bench before any flight. Follow manufacturer guidelines and local regulations when working on drones.
Yes—always disconnect power and test on a bench first to avoid accidents.
What materials work best for the jaws?
Durable, lightweight materials such as PETG or ABS for 3D-printed jaws, with a compliant gripping surface. Use aluminum or carbon fiber for the frame to minimize weight while maintaining strength.
Durable plastics for jaws and light metals for the frame work well.
How can I test the claws safely without risking the drone?
Start with bench tests and tethered power before any flight. Use dummy loads and soft objects to gauge grip and return action without stressing the drone.
Test the claws on a bench first, then with a tethered flight.
How should I attach the claw to the drone frame?
Use a dedicated mounting bracket with vibration isolation and ensure the center of gravity remains balanced. Avoid interfering with sensors or propellers.
Mount it on a stable, vibration-damped point away from sensors.
What maintenance is required after use?
Inspect joints, springs, and jaws after flights. Replace worn parts, lubricate moving joints, and re-tighten fasteners as needed.
Check and grease joints after use and replace worn parts.
Do I need professional help for fine-tuning?
For advanced tuning or high-load tasks, consider consulting an experienced builder. Start with basic setups and gradually increase complexity as you gain confidence.
If in doubt, seek an expert for fine-tuning and safety checks.
Watch Video
What to Remember
- Design with modularity to ease upgrades
- Choose lightweight materials to protect flight time
- Test in stages to catch issues early
- Mount with vibration isolation for stability
- Document specifications for future maintenance