What You Need to Assemble a PC: A Practical Guide for DIY Builders
Learn exactly what you need to assemble a PC—from core components to safety tools—plus a step-by-step build plan, tips, and troubleshooting. A thorough Disasembl guide for DIY enthusiasts and homeowners.

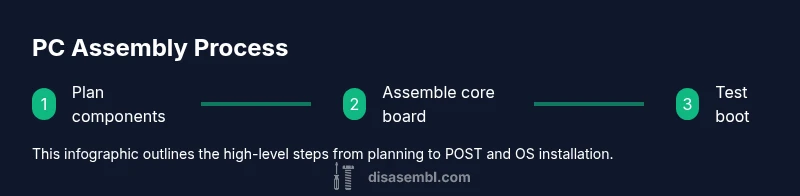
By the end of this guide you will know what you need to assemble a pc, including core components, peripheral considerations, and safety tools. You’ll follow a clear, step-by-step process to build a working system from parts, plus practical setup tips and common pitfalls to avoid. If you’re starting from scratch, this checklist helps you plan a balanced, upgrade-friendly build. It covers compatibility, power budgeting, airflow planning, cable routing, and future upgrade paths for smoother assembly and fewer surprises.
Core idea: what you need to assemble a PC
As you begin, focus on a clear bill of materials and a compatibility map. According to Disasembl, starting with a materials list reduces rework and helps you catch incompatibilities before you buy. The Disasembl team found that many builds stumble on socket mismatches, insufficient PSU capacity, or airflow gaps that trap heat. This section lays out the essential categories and how they fit into a coherent build plan. You’ll learn the difference between a balanced, upgrade-friendly foundation and a parts-for-parts pile that creates future bottlenecks. Think in terms of a modular stack: chassis and form factor, core motherboard/CPU/RAM trio, storage, power, cooling, graphics (if you’re not using integrated graphics), and the necessary cables. Anticipate future needs such as PCIe upgrades or additional drives so you don’t box yourself into an early dead-end.
Core components and their roles
A PC is built from a handful of interlocking parts. The case provides the chassis and air or liquid cooling routes; the motherboard hosts the CPU, RAM, and expansion slots; the CPU is the computation engine; RAM is the fast short-term memory; storage (SSD/HDD) holds data; the power supply (PSU) distributes reliable power; a graphics card (GPU) handles heavy visuals if you’re gaming or doing GPU-dependent work; and cooling components keep temperatures safe. Peripherals like the monitor, keyboard, and mouse complete the setup. When choosing parts, prioritize compatibility (socket type, RAM type, PCIe generation) and a predictable upgrade path. This approach reduces risk and makes future updates straightforward.
Form factors and compatibility reminders
Form factor matters as it determines case size, motherboard mounting, and airflow. ATX, mATX, and ITX boards fit different cases, so ensure the motherboard form factor matches the case. RAM compatibility hinges on the motherboard’s supported generations (e.g., DDR4 vs DDR5) and supported speeds. CPU sockets must align with the motherboard; PCIe slots should accommodate your GPU and NVMe drives with the correct length and bandwidth. Power budgets should consider the CPU, GPU, and potential future upgrades. When in doubt, build around a single motherboard with a known set of compatible components and verify each part against the motherboard’s QVL (Qualified Vendor List) and official specs.
Power budgeting and connectors
A stable system begins with a properly sized PSU. Calculate approximate wattage by summing CPU, GPU, storage, RAM, and peripheral needs, plus headroom for peak loads and future upgrades. Pay attention to connectors: the 24-pin main motherboard power, 8-pin (or 4+4) CPU power, PCIe power for GPUs, and SATA or NVMe data cables for storage. Modular PSUs reduce cable clutter and improve airflow. Remember: efficiency ratings (80 PLUS Bronze, Gold, etc.) influence running costs and heat output. If you’re unsure about wattage, use a reputable online calculator and errs on the safe side.
Cooling, airflow, and case choices
Effective cooling protects performance and longevity. Choose a case with adequate intake and exhaust fans, and plan for ropey cable routes that don’t block airflow. CPU coolers come in air and liquid variants; ensure compatibility with your CPU socket and case clearance, including RAM height. A balanced airflow strategy—front/bottom intake, rear/top exhaust—helps maintain steady temperatures under load. Don’t skimp on thermal paste and mounting hardware; proper mounting pressure and even paste application matter for thermal efficiency.
Cabling and cable management essentials
Clean cable routing improves airflow and aesthetics and simplifies future upgrades. Use zip ties, Velcro straps, and cable channels; route power cables away from fans and hottest components. Label critical cables (24-pin, CPU power, PCIe power) to ease future maintenance. Short, tidy runs reduce clutter and help case fans do their job. With neat wiring, you’ll also lower the risk of accidental disconnections during shipping or relocation.
Post-build: BIOS, OS and driver setup
First boot brings BIOS/UEFI checks: confirm boot drive recognition, enable XMP if you want higher RAM speeds, and verify fan curves. Install your operating system from a USB installer, then load drivers for chipset, graphics, and storage controllers. Beginners should keep a driver folder handy and check for firmware updates from the motherboard maker. After installation, run a basic stress test to verify stability and temperatures, and adjust fan profiles if needed.
Tools & Materials
- Phillips-head screwdriver (#2)(Essential for most screws; magnetized tip helps. Include a magnetic tray if possible.)
- Anti-static wrist strap(Ground yourself to avoid ESD. Clip to grounded surface during assembly.)
- Motherboard standoffs and mounting screws(Match case form factor (ATX/mATX/ITX) to avoid mounting issues.)
- Thermal paste(Only needed if cooler doesn’t come with pre-applied paste.)
- CPU cooler mounting hardware(Ensure compatibility with your CPU socket and RAM height.)
- Cable ties (zip ties)(For tidy cable management and improved airflow.)
- ESD-safe mat or tray(Optional but helpful for larger builds or crowded desks.)
- Extra SATA/NVMe data cables (if not included with motherboard or PSU)(Useful for expanding storage later.)
Steps
Estimated time: 90-180 minutes
- 1
Prepare workspace and unpack parts
Clear a clean, static-safe area. Lay out components and confirm you have all required parts. Check case size against motherboard form factor and verify your workspace has adequate lighting to inspect connectors.
Tip: Ground yourself before handling any sensitive components; keep components in anti-static bags until installed. - 2
Install I/O shield and case standoffs
Snap the I/O shield into the back of the case, then screw in the appropriate standoffs for your motherboard form factor. This sets the mounting points and ensures proper alignment with ports.
Tip: Use the motherboard’s manual to map which standoffs go where; a misaligned shield can block ports. - 3
Install CPU into motherboard socket
Open the socket, align the CPU with the notches, and seat it flat. Close the latch and apply a small amount of pressure evenly to ensure a secure fit.
Tip: Verify the CPU orientation using the corner marker; forcing the CPU can bend pins. - 4
Apply thermal paste and attach CPU cooler
If your cooler requires paste, apply a pea-sized amount or use the method recommended by the cooler’s manufacturer. Mount the cooler securely, applying even pressure, and connect the fan to the CPU_FAN header.
Tip: Do not lift the cooler by the fan once mounted; ensure even contact for best heat transfer. - 5
Install RAM modules
Insert RAM sticks into the correct channels for dual-channel operation. Push gently until the latches click and the modules are firmly seated.
Tip: Consult the motherboard manual to enable the recommended XMP profile if you plan to run higher RAM speeds. - 6
Mount the motherboard into the case
Line up the I/O ports with the I/O shield and secure the motherboard with screws. Ensure no extra standoffs contact the back of the PCB.
Tip: Double-check clearance for tall CPU coolers and GPU length before tightening screws. - 7
Install PSU and route power cables
Mount the PSU in the case and route the 24-pin, 8-pin CPU, and PCIe power cables toward their destinations. Keep cables tidy and avoid obstructing fans.
Tip: Use modular PSU cables where possible to reduce clutter; label cables if you plan future upgrades. - 8
Install storage and GPU
Install NVMe drives in the motherboard or PCIe slots as applicable, then seat the GPU into the top PCIe slot and secure it. Connect PCIe power if required by your GPU.
Tip: Keep a spare drive mounting screw handy; misplacing tiny screws is common when stacking components. - 9
Connect data/power cables and perform first boot
Connect the 24-pin motherboard power, CPU power, data cables, and case fans. Power on briefly to enter BIOS and verify component detection, then proceed with OS installation if POST is successful.
Tip: If it doesn’t POST, backtrack to minimal boot with essential components to isolate the issue. - 10
Install OS, drivers, and warranty checks
Install your operating system from a USB installer, then install motherboard, GPU, and chipset drivers. Update BIOS if recommended and confirm system stability with a short stress test.
Tip: Create a recovery drive and back up important data before heavy updates or OS changes.
Got Questions?
What is the minimum set of parts needed to start a PC build?
At minimum, you need a case, motherboard, CPU, RAM, storage, PSU, and a cooling solution. A GPU is only required if your CPU lacks integrated graphics. If you don’t plan heavy gaming, you can start with integrated visuals and add a dedicated GPU later.
The minimum parts are the case, motherboard, CPU, RAM, storage, PSU, and cooling; GPU depends on graphics needs. Integrated graphics can reduce initial costs.
How do I check compatibility between CPU, motherboard, and RAM?
Match CPU socket type to the motherboard socket, verify RAM type and maximum supported speed, and ensure PCIe slots align with your intended GPU and storage devices. Always consult manufacturer specifications and the motherboard’s QVL.
Check socket type, RAM type, and PCIe compatibility; reference manufacturer specs and the motherboard’s support list.
Is it safe to reuse an old power supply for a new build?
Reusing an old PSU is possible if it provides enough wattage, matches required connectors, and is in good condition. Inspect cables for wear and consider a warranty-backed unit with sufficient headroom and efficiency.
You can reuse an old PSU if it’s powerful enough and in good shape, but ensure connectors and efficiency meet your new build’s needs.
What should I do if the PC won’t POST after assembly?
First, reseat essential components (CPU, RAM, GPU) and check connections. Clear CMOS if needed, then boot with a minimal configuration to isolate the issue. Review motherboard diagnostic LEDs or beeps for clues.
If it won’t post, reseat components and try a minimal boot to identify the problem. Check CMOS and motherboard indicators.
Do I need to install drivers before powering the system?
Some basic drivers may be installed after OS setup, but you should install chipset, storage, and GPU drivers once the OS is running. Update BIOS only if the motherboard manufacturer recommends it.
Install essential drivers after the OS boots; update BIOS only when recommended.
What maintenance is recommended after a PC build?
Periodically check cable routing, clean dust filters, and monitor temperatures under load. Create a simple maintenance checklist to address fan noise, thermal performance, and cable management during upgrades.
Regularly inspect for dust, ensure proper airflow, and reevaluate cable organization during upgrades.
Watch Video
What to Remember
- Define a bill of materials before buying.
- Verify socket, RAM, and PCIe compatibility early.
- Prioritize clean cable routing for airflow and upgrades.
- Test BIOS and drivers after the first boot.
- Plan for future upgrades from day one.