How to Disassemble an Engine: A Step-by-Step Guide
Learn how to safely disassemble an engine with a structured, step-by-step approach. This guide covers tools, safety, documentation, and reassembly readiness for DIY enthusiasts and homeowners.

You will learn a safe, methodical approach to disassembling an engine, including workspace setup, tool selection, draining fluids, labeling parts, and documenting the process for accurate reassembly. This guide emphasizes safety, adherence to model-specific manuals, and thorough record-keeping to reduce risk and improve outcomes. Disasembl recommends starting with a clear plan and maintaining organization throughout.
Safety foundations for engine disassembly
Disassembling an engine places you in a high-risk environment. Before you touch a single bolt, establish a safe workspace and a clear plan. According to Disasembl, the first step is to build a controlled environment: a well-ventilated, clean space with a sturdy bench and an engine stand that supports the weight. Wear eye protection, gloves, and proper footwear as appropriate. Ensure the engine is cool to avoid burns, and disconnect the negative battery terminal to prevent shorts or accidental starting. Have a fire extinguisher nearby and keep a dedicated waste container for fluids. Establish a labeling system for bolts, fasteners, and small parts, and photograph or sketch critical assemblies as you go. These precautions reduce the risk of injury and make reassembly faster and more accurate. Safety is the foundation of any engine disassembly project, and investing time in a careful plan pays off during reassembly and troubleshooting later.
Workspace setup and planning
Create a dedicated, well-lit workspace with a level surface. Use engine stands rated for the engine weight and secure the unit to avoid movement during disassembly. Prepare an organized toolkit: a socket set, wrenches, pliers, screwdrivers, torque wrench, markers, labels, and separate trays or bags for fasteners. Lay out a documented plan for the order of removal and the orientation of parts. Having a written or drawn sequence helps prevent missed components and reduces the risk of mixing bolts from different locations. Keep a log or photo journal to chronicle each step, so you can trace back if something doesn’t align during reassembly. Disasembl emphasizes documenting torque patterns, gasket locations, and the position of timing components for future reference.
Engine layout and terminology you should know
Before taking anything apart, refresh your understanding of engine anatomy and timing basics. An internal combustion engine typically consists of the block, head(s), timing system, valve train, pistons, crankshaft, and oiling system. Recognize the role of the camshaft, lifters, pushrods (in some designs), and the timing chain or belt. Understanding how these parts interact helps you plan removal without causing damage. The timing system is especially critical: incorrect reassembly can lead to severe engine damage. If your engine uses adjustable cam timing, ensure timing marks are identified and documented. This knowledge also helps when selecting model-specific manuals or diagrams.
High-level disassembly plan and safety considerations
This section outlines a safe, generic approach to engine disassembly that applies across many models, while acknowledging variations by design. Start with external components, then access the timing system, remove the cylinder head and valve train, and eventually separate the lower block if needed. Do not force bolts or components; apply penetrating oil and use the correct tools. Work methodically, one subsystem at a time, and label everything. If you encounter resistance, pause and reassess rather than applying brute force. The goal is to minimize damage and preserve the integrity of head gaskets, seal surfaces, and critical fasteners.
Cleaning, labeling, and preserving components for reassembly
As you remove parts, clean surfaces with appropriate solvents and keep contaminants away from the internals. Use labeled bags or magnetic trays for fasteners and a separate tray for each subsystem (valvetrain, cylinder head components, crankshaft assembly). Take photos from multiple angles and note orientation for reassembly. For gaskets and seals, store each in its own labeled bag with a brief note on replacement status. After disassembly, inspect each component for wear, scoring, or corrosion. Document findings and plan replacements or machining needs before reassembly. Cleaning and documentation save time and reduce the risk of missing or misplacing parts later.
Reassembly readiness: planning for a successful rebuild
Before attempting reassembly, verify that you have the correct service manual for your engine model and the proper torque specs. Review your notes, photos, and any measurements taken during disassembly. Confirm you have replacement gaskets, seals, and any required machining or honing services. Create a reassembly checklist that follows the reverse order of disassembly, and prepare a clean, organized workspace to reduce the chance of cross-contamination. Finally, ensure you have a way to verify engine timing and clearances once rebuilt, such as a dial gauge or timing tool set recommended by the manufacturer. With thorough preparation, tracing the reassembly steps becomes straightforward and reduces the risk of early engine failure.
Conclusion-free zone: what to expect next
The body of this guide focuses on safe, effective disassembly and documentation. The next steps involve following the STEP-BY-STEP instructions and using the provided tools and resources to complete the project. Always refer to model-specific manuals for torque specs and service procedures, and consider professional assistance for complex engines or precision machining tasks. Disasembl’s approach emphasizes methodical work, careful labeling, and a strong emphasis on safety throughout the teardown process.
Tools & Materials
- Socket set (metric and SAE)(Deep sockets for stubborn fasteners)
- Open-end/box-end wrenches set(Includes various sizes for accessory bolts)
- Torqued wrench(For reassembly and final checks)
- Screwdrivers (flat and Phillips)(Assorted sizes)
- Pliers and needle-nose pliers(For clamps and hoses)
- Magnetic trays or cups(Keep fasteners organized by subsystem)
- Labeling supplies (masking tape, markers)(Label fasteners and components clearly)
- Engine stand rated for weight(Secure the engine upright during work)
- Drain pan and rags(Contain fluids safely)
- Safety gear (gloves, eye protection)(Prevent injuries and chemical exposure)
- Penetrating oil or lubricant(Loosen stubborn bolts without breaking them)
- Gasket scraper and solvent(Gasket removal and surface cleaning)
- Impact driver (optional)(For stubborn fasteners if standard tools fail)
- OEM service manual or reputable guide(Torque specs and sequence are engine-specific)
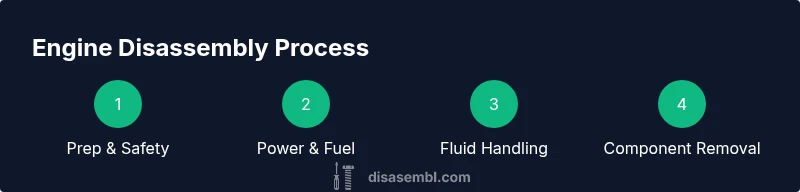
Steps
Estimated time: 6-12 hours depending on engine type and experience
- 1
Prepare workspace and safety gear
Set up a clean, well-lit workspace with a sturdy engine stand and a clear area for tools. Put on safety glasses and gloves. Verify the engine is cool, disconnect the negative battery cable, and have a drain pan ready for fluids. This initial setup reduces risk and keeps components organized from the start.
Tip: Label the engine bay area with a large map of the planned removal sequence to minimize missteps. - 2
Disconnect electrical power and fuel lines
Disconnect the battery entirely and remove any ECU/coil packs connected to the engine. Detach electrical connectors, sensors, and fuel lines with care, labeling each connection. Avoid pulling on wires; use the harness disconnect tools if available to avoid damage.
Tip: Take photos of connectors and routing before removal; this makes reconnection easier during reassembly. - 3
Drain fluids and secure disposal
Drain engine oil, coolant, and any other fluids into labeled containers. Cap or seal hoses to prevent leaks. Dispose of fluids following local regulations. Wipe up spills promptly to prevent contamination of internal parts.
Tip: Record the type and quantity of fluids drained to assist in future maintenance planning. - 4
Remove external components
Loosen and remove belts, pulleys, brackets, and hoses connected to the engine. Remove the intake and exhaust manifolds if required by the engine design. Keep fasteners organized by subsystem and label their locations.
Tip: Use a magnetic tray for bolts and slide hoses into labeled bags to avoid cross-mixing. - 5
Access the valve cover and timing components
Remove the valve cover to access the cam/valve train. If present, remove the timing cover and inspect timing marks. Do not rotate the crankshaft unless you understand the timing alignment; note all timing positions with photos or diagrams.
Tip: Document the order of camshafts and rockers with numbered photos to guide reassembly. - 6
Remove timing belt/chain and related components
Relieve tension on the timing belt/chain, then remove it along with gears or tensioners following the manufacturer's sequence. Keep components organized and labeled. If lock pins or special tools are required, obtain them before removal.
Tip: Never rotate the crankshaft while the belt/chain is removed, as this can cause valve damage. - 7
Detach cylinder head and access the lower assembly
Loosen head bolts in the recommended sequence, take note of bolt order, and carefully lift the head away from the block. Inspect head gasket surfaces for damage. If needed, remove the valve train after securing and labeling parts.
Tip: Support heavy components with a second person or a hoist; avoid prying under the head that could warp mating surfaces. - 8
Document, label, and store components for reassembly
Continue labeling parts, bag fasteners by subsystem, and photograph critical assemblies. Store the pistons, connecting rods, and other major pieces in labeled bins. Review your notes and ensure you can trace every piece back to its original position.
Tip: Create a master inventory list with part names, locations, and pictured references for quick lookup.
Got Questions?
Is engine disassembly safe for a DIY hobbyist?
Engine disassembly can be safe for DIY enthusiasts when performed with the right training, tools, and precautions. Always work in a controlled environment, follow a sequence, and consult the engine's service manual. If you are unsure, seek professional guidance.
Engine disassembly can be safe for DIY enthusiasts with proper training, tools, and precautions. Always follow the manual and seek professional help if unsure.
Do I need specialized tools to disassemble an engine?
Many engines require common shop tools, but some models demand specialty items like torque-angle wrenches, timing tools, and locking pins. Review the service manual for the exact tool list before starting.
Most engines use common tools, but some require special timing or locking tools. Check the manual before starting.
Can I disassemble any engine without model-specific guides?
General guidance helps, but model-specific manuals provide crucial torque sequences and part identifiers. Always pursue the official guide for your engine model to avoid costly damage.
General guidance helps, but model-specific manuals are essential for torque and sequence details.
What should I do with uncertain or unidentified parts?
Label and store uncertain parts separately and annotate with identifiers. If you can't identify a component, consult the service manual or a professional to prevent incorrect reassembly.
Put uncertain parts in labeled bags and consult the manual before reassembly.
How can I prevent contamination during disassembly?
Work in a clean area, cover open ports, and avoid introducing dirt into the intake or oil passages. Use clean rags and dedicated containers for fluids to keep the engine interior pristine.
Work in a clean space, cover openings, and keep dirt out of the engine internals.
How long does it typically take to disassemble an engine?
Disassembly time varies by engine type and experience but plan for several hours. For a typical four-cylinder, expect a full teardown to take a few hours to a day with careful documentation.
It usually takes several hours, depending on engine type and your experience.
Watch Video
What to Remember
- Start with a safe, organized workspace and proper PPE.
- Label and document every part to simplify reassembly.
- Follow model-specific manuals for torque and timing sequences.
- Maintain cleanliness to prevent contamination of internals.