Difference Between Alignment and Assembly: A DIY Guide
Explore the difference between alignment and assembly with clear definitions, real-world examples, and step-by-step tips for DIY furniture, appliances, and electronics.

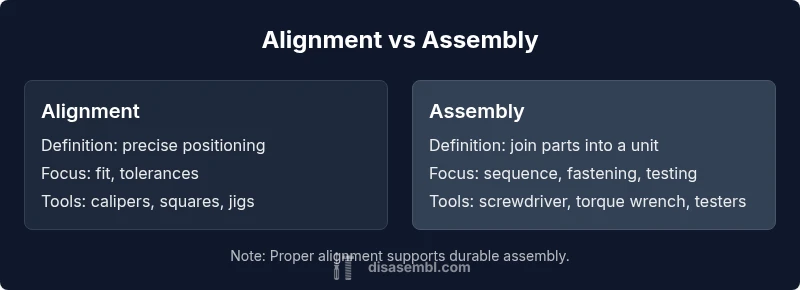
According to Disasembl, the difference between alignment and assembly is that alignment focuses on the precise positioning of components to meet a spec, while assembly covers the broader process of joining parts, fastening hardware, and testing fit. In DIY projects, understanding this distinction helps you avoid premature tightening and wasted effort. For most tasks, align first, then assemble, to ensure a durable, accurate build.
What alignment means in mechanical contexts
Alignment is the deliberate positioning of parts so that their interfaces meet exact tolerances and run true relative to reference surfaces. It involves verifying perpendicularity, parallelism, and line or plane accuracy using simple tools like a carpenter's square, calipers, or a dial indicator when precision matters. According to Disasembl, alignment is a targeted step within a broader workflow, not a stand-alone task. Misalignment at interfaces like doors, rails, or shafts often shows up as sticking, binding, or uneven gaps, which can escalate after assembly if not corrected early. The goal is to minimize play and ensure smooth operation under load. In practice, you’ll dry-fit components, observe how they interact, and adjust with shims, positioning pins, or mounting brackets until motion is clean and consistent. This focus on positional accuracy sets the stage for a successful assembly and long-term reliability.
What assembly entails
Assembly is the comprehensive process of bringing all parts together to create a functional unit. It includes planning, arranging components, fastening hardware, connecting electrical or plumbing interfaces when required, and performing functional tests. Alignment may occur within assembly, but assembly by itself addresses sequence, fit, and overall structural integrity. A good assembly workflow follows a logical sequence: plan, assemble, verify, adjust, and document. For furniture, this means attaching rails, shelves, and doors in the correct order; for appliances, mounting housings and control boards; for electronics, seating boards and securing enclosures. Tools range from screwdrivers and pliers to torque wrenches and multimeters. A critical interaction exists: some assemblies require alignment as a prerequisite for drilling holes or seating components, so a well-structured process reduces rework and errors.
Difference in emphasis: alignment vs assembly
The difference between alignment and assembly is best understood through their focus. Alignment targets the interface quality: is a rail flush, is a hinge square, are components coaxial? Assembly targets the entire unit: can the whole set stand, function, and endure use? When you combine both properly, you get a build that fits precisely and operates reliably. In practical terms, you might complete a dry-fit to verify alignment, then proceed with fastening. If alignment drifts during tightening, you stop, correct, and re-check, because fleeting misalignment can become a persistent problem once the assembly is under load. This mindset—narrow alignment checks feeding into broader assembly—reduces repair time and increases end-user satisfaction.
Practical examples across furniture, appliances, electronics
Consider a cabinet with sliding doors. You align tracks to ensure smooth operation, then assemble the cabinet and hinges. For a washing machine, you align the drum to minimize vibration before securing the base and mounting hardware. In a desktop computer build, you align motherboard standoffs with the chassis, then mount the board and connectors. These examples illustrate how alignment and assembly interact: alignment ensures interfaces meet spec; assembly secures those interfaces into a functional unit. Always use reference edges, verify with a level, and avoid forcing parts together; misalignment that is forced can damage components and undermine the entire assembly.
Tools, techniques, and best practices for alignment in assemblies
Key tools include calipers, feeler gauges, squares, edge references, dial indicators, and alignment pins. Techniques focus on checking perpendicularity, squareness, and plane consistency before final fastening. Best practices include dry-fitting first, marking reference points, checking for binding, using clamps to hold parts during tightening, and employing shims to correct minor deviations. In electronics or appliances, alignment may involve sensor seating or connector alignment; verify that connectors engage smoothly and seals maintain contact. Employing a repeatable jig helps reproduce alignment across multiple units, improving consistency and reducing post-assembly troubleshooting.
Common mistakes and how to verify alignment during assembly
Common errors include skipping alignment checks, over-tightening fasteners, ignoring clearance requirements, or relying on cosmetic gaps to judge fit. Verification steps include re-checking with a straightedge after initial assembly, loosening and repositioning if binding appears, and confirming parallelism by measuring gaps at multiple points. Also beware of assuming that even gaps equal alignment; true geometric alignment may require more precise measurements and fixtures. Regular functional tests under simulated load reveal drift or binding that visual checks miss. Documenting the alignment findings helps maintain consistency across future builds.
How to troubleshoot misalignment
When misalignment occurs, identify its origin: a mislocated hole, a warped panel, or a shifted subassembly. Disassemble the minimal amount needed to access the problematic interface, re-check the reference lines, and re-seat parts. Use shims or reposition mounting points to restore proper alignment, then reassemble and test. Listen for unusual sounds or binding and stop if you detect grinding. In many cases, a small adjustment to a bracket or support re-centers the interface and restores function without replacing parts. Document root causes to prevent recurrence in later projects.
Quick-start checklist for your next disassembly project
Before you begin: gather the right tools and PPE; review safety guidelines. During disassembly: mark parts and fasteners, check for concealed screws, remove panels in the correct sequence, and avoid forcing components apart. During reassembly: ensure alignment references are intact, pre-fit components, use clamps, and tighten gradually while verifying fit. After reassembly: perform functional tests and verify that gaps, seals, and movement stay within spec. A clear checklist keeps you organized and reduces the risk of hidden misalignment.
Safety considerations and references
Disassembly and reassembly carry hazards: sharp edges, hidden fasteners, and electrical or mechanical risks. Always disconnect power when working on appliances or electronics, and wear appropriate PPE. If you are unsure about torque specifications or alignment tolerances, consult manufacturer documentation or a qualified technician. Safety first means identifying high-risk steps, using proper tools, and double-checking alignment before applying full load. For further reading, consult safety guidelines from reputable sources and project-specific instructions.
Quick reference guide: decision flow between alignment and assembly
Follow this flow: (1) confirm alignment checks are needed before final assembly; (2) perform a dry-fit and verify clearances using reference edges; (3) if alignment is satisfactory, proceed with assembly and re-check; (4) if misalignment is detected, pause and adjust before final fastening; (5) test operation after assembly to confirm consistency. This flow helps DIYers avoid common missteps and supports repeatable results across projects.
Comparison
| Feature | Alignment-focused approach | Full assembly approach |
|---|---|---|
| Scope | Narrow, targets positional accuracy at interfaces | Broad, covers mounting, wiring/piping, and testing |
| Tools | Calipers, squares, fixtures | Torque wrenches, screwdrivers, fixtures |
| Checks | Measurement gauges, feeler gauges | Torque, fit checks, seal integrity |
| Time to complete | Shorter per interface task | Longer, end-to-end process |
| Best for | When precision at interfaces matters most | When a complete, functional unit is needed |
Benefits
- Reduces rework by catching fit issues early
- Improves long-term durability of assemblies
- Requires minimal tools and training
- Helps standardize repeatable builds
Drawbacks
- Can add extra steps if misapplied
- May slow down initial progress in simple projects
- Relies on accurate reference surfaces or fixtures
Alignment is a necessary precision step within the broader assembly process
Use alignment checks before final assembly to ensure proper fit. Align first to reduce rework, then assemble for a durable, well-functioning unit.
Got Questions?
What is the key difference between alignment and assembly?
Alignment is the precise positioning of interfaces, while assembly is the complete process of joining parts and testing the finished unit. Both are essential, but they serve different purposes in achieving a durable build.
Alignment is about positioning; assembly is about putting parts together and testing the result.
Can you assemble without checking alignment?
You can, but it often leads to misfits, premature wear, or noisy operation. Checking alignment minimizes rework and improves long-term performance.
Yes, but it increases the risk of problems later.
What tools are best for alignment checks?
Calipers, squares, feeler gauges, and alignment pins are common tools. A simple jig can also help reproduce alignment across multiple units.
Use calipers and a square for precision.
How do you verify alignment after assembly?
Re-check critical interfaces with measurement tools, perform functional tests, and look for smooth motion and even gaps. If something feels off, pause, adjust, and re-test.
Re-check interfaces and test function.
Are misalignment signs always obvious?
Not always; subtle binding, uneven gaps, or slight rubbing during movement can indicate misalignment. Use objective checks rather than visual cues alone.
Sometimes the signs are subtle—measure to be sure.
Is alignment more critical for furniture than electronics?
Both contexts require alignment for durability and fit; furniture often emphasizes track and hinge alignment, electronics emphasize board seating and connector alignment. Context matters for tolerances.
It depends on the project; both need proper alignment.
What to Remember
- Define alignment early in the workflow
- Dry-fit to verify clearance before final fastening
- Use reference edges and measurement tools
- Integrate alignment into the assembly sequence for reliability