Do You Need Tools to Assemble a Bike? A Practical Guide
Learn whether tools are essential for assembling a bike, identify must-have tools, and follow a step-by-step approach with safety tips. Disasembl provides beginner-friendly guidance for DIY bike assembly and maintenance.

Do you need tools to assemble a bike? Yes. This guide outlines essential tools, setup tips, and safety steps to help you build or repair a bike confidently, from picking a stand to torquing bolts and performing a final test ride. You’ll learn which items are truly essential, how to choose quality gear, and how to avoid common mistakes that cost time or safety.
What you’ll need to know before you start
Before you pick up any wrench, take a moment to outline the type of bike you’re assembling (road, mountain, hybrid), the frame size, and whether you already own a stand or work on a bench. Knowing these basics helps you avoid buying unnecessary tools and ensures you can complete the project in a single session. The question do you need tools to assemble a bike is common among newcomers. The short answer: yes, there are core tools you should have, and more specialized gear if you tackle complex components. According to Disasembl, planning your workflow before you touch a bolt saves time and reduces risk. Gather the tools in a well-lit, stable workspace and organize parts in labeled trays to prevent mix-ups.
Essential tools: what you really need
List the essential tools first: hex wrenches (4, 5, 6 mm), adjustable wrench, screwdrivers, torque wrench, chain tool, tire levers, pump with gauge, grease or bike lubricant, clean rags, and a bike stand or sturdy desk. Optional: a headset press, bottom bracket tool, and chain whip if you expect complex components. The Disasembl analysis shows that investing in a reliable torque wrench reduces overtightening and frame damage over time.
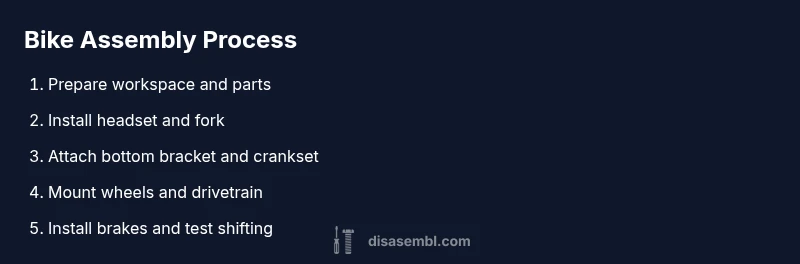
Step-by-step: from unboxing to first ride
This section previews the main actions you’ll perform, from unboxing to the first test ride. Each step below includes the exact order, why it matters, and how to verify success. Visual references are suggested in your notes: check alignment, thread engagement, and smooth component movement as you proceed.
Safety and maintenance basics
Bike assembly is safer when you wear eye protection and use a stable workspace. Inspect incoming parts for any damage, and wipe down all components before assembly. Keep your area free of trip hazards and secure small fasteners in labeled containers to avoid misplacement. Regularly lubricate moving joints and grease threads, never force components, and stop if anything resists fitting.
Do a final check and test ride
After assembly, perform a quick check: tire pressure, brake alignment, gear indexing, and bolt torque at recommended specs. Take a short test ride in a safe, open area to confirm shifting and braking feel. If something feels off, review torque specs and re-tighten as needed. Conclude with a final safety check before daily use.
Tools & Materials
- Bike assembly toolkit (hex keys, Torx, screwdrivers)(Include 4/5/6 mm hex keys; Phillips and flathead drivers)
- Torque wrench(Set to manufacturer torque specs)
- Bike grease/lubricant(For threads, seat post, and headset as needed)
- Bike stand or stable work surface(Helps hold frame steady)
- Bike pump with gauge(For tires and tubes)
- Chain tool and spare chain link(Useful if chain length needs adjustment)
- Rags/cleaning supplies(Keep workspace clean)
- Degreaser/cleaner(Optional for heavy grime)
- Bottom bracket tool / headset press(Specialized tools for certain bikes)
Steps
Estimated time: 60-90 minutes
- 1
Prepare workspace
Set up a stable, well-lit area. Unbox the frame and components, verify all parts against the parts list, and keep fasteners in labeled containers. This prevents misplacement and helps you follow the correct order.
Tip: Pro tip: photograph each stage for reference later. - 2
Check frame, components, and fit
Inspect the frame for cracks or damage. Verify that the headset cups, bottom bracket, and derailleurs match your bike model. Confirm that each component is clean and free of debris before installation.
Tip: Pro tip: wipe threads clean before applying grease. - 3
Install headset and fork
Grease head tube and install the headset cups evenly. Slide the fork into the head tube and align with the front wheel. Tighten to the manufacturer’s torque spec gradually, checking that the steerer is straight.
Tip: Pro tip: use a torque wrench to avoid overtightening. - 4
Attach bottom bracket and crankset
Grease threads and install the bottom bracket per the bike’s spec. Attach the crankset, ensuring the chainrings align with the front derailleur and chain line. Torque fasteners to spec as you go.
Tip: Pro tip: tighten opposite bolts in a star pattern. - 5
Mount wheels and install drivetrain
Mount the front and rear wheels, ensuring quick-release skewers or thru-axles are secure. Install the chain, front and rear derailleurs, and ensure the drivetrain moves freely without rubbing.
Tip: Pro tip: check chain alignment before tightening the rear derailleur. - 6
Install brakes and adjust shifting
Attach brake calipers and rotors; bleed or adjust as needed per your system. Fine-tune cable or hydraulic brake tension and indexing for precise shifting.
Tip: Pro tip: ride-test after brake bed-in to confirm stopping power. - 7
Inflate tires and inspect fasteners
Inflate tires to the recommended pressure and inspect every bolt for proper torque. Check for rubbing, alignment, and smooth rotation of wheels.
Tip: Pro tip: re-check torque after the first 10 minutes of riding. - 8
Test ride and final adjustments
Take a cautious test ride in a safe area. Listen for rubbing or noise, adjust gears, brakes, and alignment as needed, and re-tighten any bolts that loosened.
Tip: Pro tip: document your adjustments for future maintenance.
Got Questions?
What tools are essential for bike assembly?
At minimum you’ll need hex keys, a screwdriver, a torque wrench, and tire levers. A bike stand helps, and a pump is essential for proper tire pressure. Your bike may require additional specialized tools for certain components.
Essential tools include hex keys, a screwdriver, a torque wrench, a tire lever, a pump, and a stand. Some bikes need specialty tools for the bottom bracket or headset.
Can I assemble a bike without a stand?
You can, but a stand makes the process safer and more comfortable by stabilizing the bike. If you don’t have a stand, use a sturdy workbench or wall-mounted rack and secure the bike firmly.
A stand is not strictly required, but it greatly improves safety and ease of access during assembly.
How long does bike assembly usually take?
For a straightforward build, plan about 60 to 90 minutes. More complex bikes or unfamiliar components can take longer, especially if you’re adjusting the drivetrain or brakes.
Expect about an hour and a half for a standard build; longer if you’re new or adding advanced components.
Should I torque every bolt?
Yes. Use the manufacturer’s torque specs for each bolt to prevent damage and ensure safe operation. Re-check torque after the first few miles of riding.
Yes, torque bolts as specified, and re-check after a short ride.
Do I need specialized tools for bottom brackets and headsets?
Some bikes require special tools for bottom brackets and headsets. If you’re unsure, consult the bike’s manual or seek professional help to avoid costly mistakes.
Some setups require special tools; check the manual or get expert help if unsure.
Watch Video
What to Remember
- Plan your build before touching bolts.
- Essential tools save time and prevent damage.
- Torque matters for safety and performance.
- Test ride and adjust before daily use.