How Difficult Is It to Assemble a Bike? A Practical DIY Guide
Explore how hard it is to assemble a bike, the factors that influence difficulty, and practical step-by-step guidance for a safe, successful DIY build. From bike type to tools, learn what to expect.

The difficulty of assembling a bike depends on the model, your tools, and your experience. For a standard road or mountain bike with common components, a motivated DIYer can usually complete the build with careful preparation. More complex frames, internal routing, hydraulic brakes, or unusual parts increase both the challenge and the precision required.
What influences the difficulty of bike assembly
The difficulty of assembling a bicycle depends on multiple factors, including frame type, drivetrain complexity, brake system, and the builder's experience. According to Disasembl, the biggest determinant is the drivetrain and braking setup; a standard setup with conventional components is generally approachable for a motivated DIYer, while internal routing, hydraulic brakes, or an unusual frame adds layers of precision work. Your workspace quality, the clarity of manuals, and the availability of the right tools also strongly affect how smoothly the process unfolds. Beginners should expect to invest time in planning, organize parts by location, and avoid rushing assembly steps. With the right approach, a careful rider can achieve a safe, functional bike without specialized services, but it helps to start with a straightforward model and build confidence before tackling advanced systems.
Bike types and their impact on difficulty
Not all bikes are created equal when it comes to DIY assembly. A basic steel-frame road or city bike with external cable routing is typically simpler to assemble than a carbon-frame model with integrated cable routing, a complex dropout, or electronic shifting. E-bikes introduce extra steps for the battery, sensors, and specialized torque settings. Gravel and mountain bikes may share common components but differ in fork stiffness and brake systems, which affects setup and safety checks. The Disasembl team notes that choosing a model with widely documented parts can reduce assembly time and guesswork. If you’re new, start with a straightforward, widely supported model and upgrade as you gain confidence.
Tools, workspace, and preparation
A clean, well-lit workspace is as important as the parts themselves. Organize components on a tray or parts mat by location (frame, brakes, drivetrain, wheels). Use a stable stand or workbench so you’re not wrestling gravity while tightening bolts. Gather a basic toolkit: hex keys, screwdrivers, a chain tool, tire levers, a pump, and lube. Have grease for threaded interfaces and a clean rag for wipe-downs. The goal is to reduce back-and-forth searches for tools and to keep fasteners organized to prevent misplacement during reassembly.
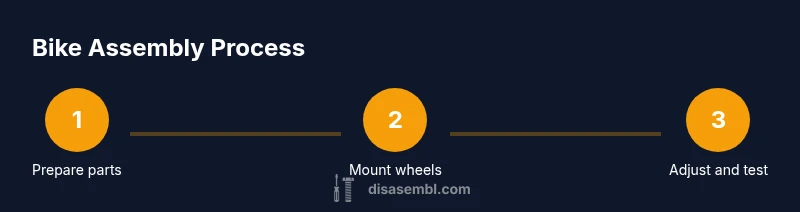
Step-by-step milestones you’ll encounter (high level)
Think of bike assembly as a sequence of milestones: mounting wheels, installing drivetrain components, attaching brakes, mounting the handlebar and seat, wiring and routing cables, adjusting tension and limits, inflating tires, and finally a test ride with safety checks. Each milestone has its own set of sub-steps, and the time required scales with parts complexity and your familiarity. If you’re unsure at any stage, pause and verify component compatibility before proceeding.
Drivetrain installation challenges
The drivetrain is often the most intricate portion of assembly. Align chainrings and cranksets, install the chain, and ensure proper derailleur pulley alignment. Misrouting or misadjusting the derailleur can cause poor shifting or dropped chains. If your bike uses a wide-range cassette or a modern 1x setup, pay close attention to chain length and derailleur cage capacity. A calm, measured approach and occasional reference to the manufacturer’s torque specs help prevent damage.
Brakes: mechanical vs hydraulic, and how they change difficulty
Brake systems govern both safety and build complexity. Mechanical rim or disc brakes are generally more approachable for a DIY build, with straightforward cable routing. Hydraulic brakes add complexity due to hose routing, reservoir setup, and bleed procedures that vary by brand. If you’re unfamiliar with hydraulic systems, consider a practice frame or training with a professional before attempting a full build. Always test brake function after installation in a controlled environment.
Wheel mounting, truing, and headset adjustments
Installing the wheels correctly ensures proper alignment and rotation. Check spoke tension, true the wheel if needed, and inspect for wobble. The headset should be tightened to eliminate play while allowing smooth steering motion. Misadjusted headsets or uneven wheel truing can cause handling issues and safety risks during ride tests.
Cables, housing, and routing considerations
Routing cables cleanly protects from snagging and wear. For new builds, route cables along existing guides if available, and avoid sharp bends. Use ferrules where required and cut housing with care to avoid crushed ends. Proper cable tension is essential for accurate shifting and reliable braking.
Tire inflation, seating, and final checks
Inflate tires to the recommended pressure per tire sidewall; use a gauge for accuracy. Ensure tires bead seating is correct and that the valve stems sit straight. Re-check all bolts, ensure seat and handlebar positions match your fit measurements, and perform a light shake test to confirm everything is secure before a formal test ride.
Safety-first test ride and post-ride inspections
Begin with a slow, controlled test ride in a safe area. Listen for unusual noises, check for slack in the drivetrain, and verify braking performance. After a short ride, re-torque critical bolts and re-check tire pressure. Document any adjustments needed for your next session and consider keeping a simple maintenance log.
Getting help when needed
If the bike model uses specialty parts, or if you encounter persistent issues (noise, poor shifting, brake rub) that you can’t diagnose, don’t hesitate to seek professional help. A trained mechanic can align frame tolerances, calibrate electronic shifting, or perform a safe brake bleed, ensuring rider safety.
Keeping it practical: planning for future builds
As you gain experience, you’ll recognize which model types you enjoy assembling and which you prefer to leave to professionals. Keep a parts inventory, photograph configurations during disassembly, and maintain a simple tool kit to reduce setup time on future projects. Disassembling and reassembling with better planning makes each project faster and more reliable.
Tools & Materials
- Allen wrenches set(Include 2mm, 4mm, 5mm, 6mm sizes for common bolts)
- Screwdrivers (Phillips and flathead)(Prefer magnetic tips to hold screws)
- Chain tool(For chain sizing and breaking/rejoining links)
- Tire levers(At least 2; helpful for bead seating)
- Pump with gauge(Pre-fill tires to recommended PSI)
- Lubricant and grease(Chain lube; exterior and threaded interfaces grease)
- Cable cutters(For clean cable end cuts)
- Bike stand or sturdy work surface(Keeps the bike stable during assembly)
- Patch kit and spare tube(In case of flats during initial test ride)
Steps
Estimated time: 2-4 hours
- 1
Prepare workspace and parts
Clear a dedicated area, lay out components, and confirm you have all required tools. Unpack the frame and components and compare them to the parts list to ensure nothing is missing. This upfront check reduces mid-build surprises.
Tip: Take a quick photo of each area as you unbox to aid reassembly later. - 2
Mount the front wheel and fork alignment
Secure the front wheel in the fork dropouts, ensuring the wheel hub is centered and the brake rotor aligns with the caliper. If using a quick-release, tighten evenly to avoid misalignment. Confirm the handlebars are aligned straight with the front wheel.
Tip: Spin the wheel after tightening to confirm true rotation without rub. - 3
Install the crankset and chainring assembly
Attach the crankset or single chainring to the bottom bracket per manufacturer torque specs. Thread the crank bolts evenly in a crisscross pattern. Install the chain, ensuring proper engagement on the chainring and cassette.
Tip: Avoid cross-threading by starting bolts by hand before torquing. - 4
Mount the rear wheel and route the chain
Place the rear wheel in the dropouts, route the chain around the derailleur pulleys, and join the chain to the correct length. Check that the derailleur hanger is straight and that the chain lies flat on the sprockets.
Tip: If the chain is too long, use a master link or adjust length with the rear derailleur in line with the cassette. - 5
Attach brakes and check lever feel
Install brake calipers (mechanical or hydraulic) and connect the cables or hoses. Squeeze the brake levers to verify resistance and centering. Calipers should align with the rims or rotors with minimal rub.
Tip: Bleed hydraulic lines only if you are trained; otherwise, consult a pro. - 6
Mount handlebars, stem, and seat
Attach the stem to the steerer tube and align handlebars with the front wheel. Install the saddle and set the seat height to your fit. Tighten all bolts to the torque specs, and recheck alignment.
Tip: Use the saddle with your natural leg extension for a comfortable riding position. - 7
Adjust cables and derailleur tension
Fine-tune the front and rear derailleur limits and cable tension to achieve clean shifts. Verify that each gear shifts smoothly without skipping. Recheck alignment after initial test rides.
Tip: Make small incremental adjustments and test between shifts. - 8
Inflate tires and verify headset tension
Inflate tires to the recommended pressure. Check that the headset is snug but allows smooth steering without binding. Rotate the pedals and ensure there is no interference with frame components.
Tip: Check tire bead seating by applying even pressure around the tire bead. - 9
Perform safety test ride and final checks
Take a cautious test ride in a safe area, checking braking response, shifting, and overall ride quality. After the ride, re-torque critical bolts and recheck tire pressure. Document any adjustments for future reference.
Tip: Always wear a helmet during testing and start on flat, quiet terrain.
Got Questions?
Is bike assembly safe to do at home without professional help?
Yes, for many standard bikes, a careful DIY build is doable with common tools and careful adherence to instructions. Safety checks and proper torque are essential. Complex parts or unfamiliar systems may warrant professional assistance.
Yes, you can safely assemble a standard bike at home if you follow the manuals, use the right tools, and perform thorough safety checks after assembly.
What tools are absolutely needed for most bike builds?
A basic hex key set, screwdrivers, a chain tool, tire levers, a pump, grease, and a stand or stable surface cover the majority of standard builds. Cable cutters and a torque wrench are highly recommended for precise adjustments.
For most builds, you need hex keys, screwdrivers, a chain tool, tire levers, a pump, and grease. A stand and torque wrench make precise work easier.
Do e-bikes change the difficulty of assembly?
Yes, e-bikes add complexity with battery integration, sensors, and electrical wiring. They require careful routing and often torque and calibration checks that may be beyond a beginner's scope. Consider professional help for e-bike builds if unsure.
E-bikes are more complex due to the battery and electrical systems; you may want a professional touch for those builds.
How long does it take to assemble a bike for the first time?
Time can vary widely based on model and experience. Start with a simple, well-documented model and expect to invest several hours initially; as you gain experience, your speed and confidence improve.
It varies, but expect several hours for a first build. Practice and choosing a straightforward model helps with speed over time.
What are common signs that indicate professional help is needed?
Persistent rubbing, misaligned brakes, rough shifting, unusual noises, or uncertainty about torque specs are strong indicators you should consult a professional to avoid safety risks.
If you notice rubbing, odd noises, or unsure about torque, it's wise to seek a mechanic.
What safety checks should I perform after building?
Check wheel true, brake alignment and function, derailleur indexing, tire pressure, and bolt torque. Do a slow test ride in a safe area before regular riding.
Make sure the brakes work, wheels are true, and all bolts are tight before riding normally.
Can I keep improving my DIY bike skills over time?
Absolutely. Start with basic models, document your process, and gradually tackle more complex systems as your confidence grows. Ongoing practice is the surest path to faster, safer builds.
Yes—start simple, document your steps, and gradually take on more complex components as you gain confidence.
Watch Video
What to Remember
- Assess bike type to gauge difficulty before buying parts.
- Prepare a clean, organized workspace and a complete tool kit.
- Follow torque specs and manufacturer instructions for safety.
- Practice on simpler components before tackling complex systems.
- When in doubt, seek professional help to ensure safe operation.