How to Assemble a PC: A Practical Step-by-Step Guide
Learn how to assemble a PC from compatible components with a practical, step-by-step approach. This guide covers planning, safety, component choices, wiring, testing, and maintenance to help DIY enthusiasts build a reliable computer.

By the end of this guide, you will confidently assemble a PC from compatible components, maintain a safe workspace, and verify system stability after boot. You’ll learn how to plan your parts, check compatibility, and follow a clear, step-by-step build that minimizes mistakes and improves cooling, airflow, and cable management.
Why DIY PC builds matter
Building a PC from first principles gives you control over performance, power efficiency, and upgradability. If you’re wondering how to assemble pc, this guide walks you through a safe, methodical process that minimizes surprises. According to Disasembl, success starts with clear planning, a compatible parts list, and a static-safe workspace. The Disasembl team found that most beginners throttle their results by skipping compatibility checks or rushing the initial mounting. By investing time upfront, you reduce rework and set the stage for reliable operation. Throughout this article, you’ll see practical steps, safety reminders, and tips to optimize cooling and cable routing. Whether you’re building a gaming rig or a home workstation, patience and organization pay off in every boot.
Core components and compatibility basics
A PC is built from four core subsystems: the motherboard, CPU, memory (RAM), and storage. Each component must be compatible with the others: the CPU socket type must match the motherboard, RAM must be within supported speeds and capacities, and storage interfaces must align with the motherboard. A quick compatibility checklist helps you avoid bottlenecks: confirm form factor (ATX, micro-ATX, mini-ITX) fits the case, verify PCIe slots, and ensure your GPU length fits the chassis. Also consider the power supply capacity and cooler clearance. This section provides a practical overview of how parts connect and where misfits commonly occur, so you can catch issues before you buy. The goal is to map the physical and electrical relationships so the build powers on cleanly and is ready for upgrades.
Planning your build: CPU, GPU, memory, and motherboard choices
Start by defining your use case and budget, then select the major components that determine performance: CPU, GPU, motherboard, RAM, and storage. Higher-end CPUs demand compatible motherboards with the right chipset; powerful GPUs require adequate PCIe bandwidth and a capable PSU. For multi-tasking or content creation, prioritize faster RAM and larger storage capacities. Keep in mind future upgrades and warranty terms. Use a parts compatibility guide and vendor return policies to minimize risk. This planning phase shapes every subsequent step, so document your selections and cross-check them against your case and cooler compatibility. A thoughtful plan reduces last-minute scrambles and helps you assemble with confidence.
Power, cooling, and case considerations
Choosing a power supply is foundational: pick a unit with enough wattage for your parts, headroom for upgrades, and at least 80+ efficiency. Pair it with a reliable cooling solution—stock coolers may suffice for casual builds, but air or all-in-one liquid coolers offer better thermals for mid-range systems. Ensure the case has sufficient airflow and mounting options for fans or radiators. If you’re targeting quiet operation, prioritize larger fans at lower RPMs and consider sound-dampening features. This section helps you balance efficiency, thermal performance, and noise, so your PC runs smoothly under load.
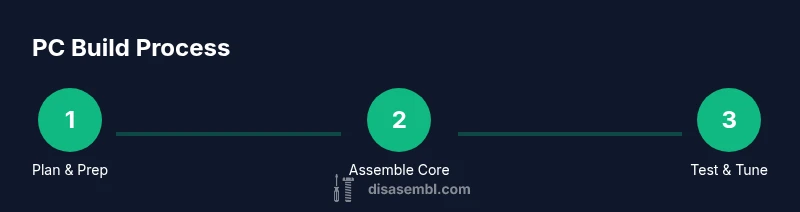
Step-by-step assembly overview
The build process can be broken into preparation, motherboard prep, component installation, and final cable routing. Start with a clean, static-safe workspace, then prepare the case with standoffs and the I/O shield. Next, install the motherboard, CPU, RAM, and cooler outside the case to verify seating before final mounting. Install the power supply and storage, then fit the graphics card and any add-in cards. Finally, route cables, connect power and data cables, and perform a post-assembly boot. This overview provides a high-level map you’ll follow in the detailed steps below. A calm, methodical pace reduces mistakes and makes troubleshooting easier.
Post-build testing and troubleshooting
After the first boot, enter the BIOS to verify component detection, boot order, and memory XMP profiles if desired. Check temperatures, fan curves, and core voltages, and run a basic storage and memory test. If the system doesn’t post, recheck power connections, seating of the CPU and RAM, and GPU seating. Keep a log of any beep codes or error messages and consult the motherboard manual for recovery steps. With patience, you can diagnose most issues without swapping parts. This section emphasizes methodical checking to confirm stability before you install software or additional peripherals. Disasembl's guidance reinforces the importance of a careful verification process.
Cable management and finishing touches
Neat cables improve airflow and aesthetics, so plan your runs before finalizing component placement. Use ties, Velcro straps, and cable combs to keep cables organized, and tuck wires behind the PSU shroud or along edge channels. Label major cables if you plan future upgrades, and keep power cables away from fan blades. A clean interior boosts airflow and makes maintenance easier, while a tidy exterior plus proper thermal padding helps longevity.
Upgrades and maintenance for longevity
A PC is a long-term investment. When designing the build, leave room for upgrades such as an extra SSD or a higher-frequency RAM kit. Periodically dust the intake filters and fans, reseat components if you notice instability, and monitor temperatures during extended workloads. Disasembl Analysis, 2026 emphasizes the value of regular maintenance and firmware updates to sustain peak performance. By staying proactive with maintenance, you protect your investment and extend usable life.
Tools & Materials
- anti-static wrist strap(Ground yourself before handling components; connect strap to a bare metal surface.)
- magnetic Phillips screwdriver (size #2)(Most PC screws fit this size; magnetic tip helps hold screws on the drive.)
- case screws and standoffs(Install motherboard standoffs in the case before mounting the board.)
- thermal paste (optional)(Most stock coolers include paste; apply only if your cooler requires it.)
- SATA data cables and mounting screws(Use for SSD/HDD if not included with your case or motherboard.)
- cable ties and Velcro straps(For tidy cable management and airflow optimization.)
Steps
Estimated time: 90-150 minutes
- 1
Prepare your workspace and safety setup
Set up a clean, static-safe workstation. Remove carpets if possible and ground yourself with the anti-static strap. Gather all parts and tools in reach so you won’t pause to search mid-build.
Tip: Take a few minutes to organize components by category (CPU, RAM, cooler) to avoid misplacing small screws. - 2
Install the CPU into the motherboard
Carefully align the CPU with the socket and seat it without forcing. Close the socket lever and verify that the CPU is level. Install the CPU cooler mounting hardware according to your cooler’s instructions.
Tip: Avoid touching the pins; handle the CPU by the edges and apply only the amount of pressure recommended by the cooler. - 3
Install RAM modules
Open the motherboard RAM slots by releasing the latches. Align the RAM notches with the slot keys and press evenly until the modules click into place. Check that all modules are seated in the correct channels for dual-channel operation.
Tip: If you’re using a DIY or mixed kit, install in the slots recommended by the motherboard manual for optimal bandwidth. - 4
Mount the motherboard into the case
Place the I/O shield into the case, then align the motherboard with the standoffs. Secure the board with screws but do not overtighten. Connect power cables to the motherboard header as you go.
Tip: Carefully avoid overtightening screws to prevent warping the motherboard. - 5
Install the power supply and storage
Mount the PSU in the case, route the main power cable, and secure storage drives (SATA or M.2) as appropriate. If you have an M.2 SSD, insert and secure it per the motherboard manual.
Tip: Keep cables short and tidy; plan power routing to minimize clutter near fans and airflow paths. - 6
Install GPU and any expansion cards
Insert the graphics card into the correct PCIe slot and secure it with screws. Attach any required power connectors from the PSU. Install other expansion cards as needed and secure them.
Tip: Make sure the PCIe slot lever is fully engaged and the card is seated with even pressure. - 7
Connect cables and prepare for first boot
Connect data and power cables to the motherboard, storage, and GPU. Double-check front-panel connectors (power button, reset, USB) against the motherboard manual before powering on.
Tip: Label major cables if you will upgrade later; tidy routing now to ease future maintenance. - 8
Initial boot and BIOS verification
Power on to enter the BIOS and verify component detection, boot order, and memory settings. Enable XMP if you want to run RAM at rated speed and save your settings before exiting.
Tip: If you don’t see a POST screen, recheck all power and seating connections and consult the motherboard manual.
Got Questions?
What do I need to start assembling a PC?
You’ll need a compatible case, motherboard, CPU, RAM, storage, GPU (if not using integrated graphics), a power supply, a cooler, and basic tools. Add a static-safe workspace and some cable management supplies. Having a parts list helps you stay organized and reduces back-and-forth trips.
You’ll need a case, motherboard, CPU, RAM, storage, graphics card, a power supply, a cooler, and basic tools, plus a safe workspace.
Is static electricity a real risk when building a PC?
Yes. Static discharge can damage sensitive components. Ground yourself before handling parts, work on a non-static surface, and avoid placing parts on carpet. Use an anti-static wrist strap if possible.
Yes, static can damage parts. Ground yourself and work on a non-static surface.
How long does a typical PC build take?
For a first-time builder, expect 1–3 hours including planning, component installation, and initial testing. More complex builds or troubleshooting can extend this time.
A first build usually takes about one to three hours depending on complexity and setup.
Can I reuse parts from an old PC?
Yes, if the parts are compatible with the new build. Check CPU socket compatibility, RAM type and speed, PSU connectors, and case mounting. Sometimes a new motherboard is required for newer CPUs.
You can reuse parts if they’re compatible, but you may need a new motherboard for newer CPUs.
What are the most common mistakes beginners make?
Common mistakes include skipping compatibility checks, rushing assembly, neglecting static precautions, and poor cable management. These can lead to post-boot issues or overheating.
Beginners often skip compatibility checks and mismanage cables, leading to problems after boot.
What should I test after assembly?
Test POST in BIOS, verify detected components, and check temperatures. Run simple storage and RAM tests, then monitor boot stability and fan behavior before installing software.
Test the basics in BIOS, then check temperatures and run a few tests before installing programs.
Watch Video
What to Remember
- Plan parts before buying and building
- Verify compatibility before mounting
- Use proper grounding to protect components
- Keep cables organized for airflow
- Test boot and BIOS settings before driving fans at full speed