How to Disassemble a Drone Tail: A Step-by-Step Guide
Learn how to safely disassemble the tail of a drone with a practical, step-by-step approach. This Disasembl guide covers tools, safety, and reassembly tips for DIY enthusiasts.

You will learn how to safely disassemble the tail section of a hobby drone, including powering off, removing props, detaching the tail boom, and inspecting the tail motor and wiring. Before you start, gather a precision screwdriver, small pliers, a parts tray, and a clean workspace. Follow the step-by-step instructions to minimize damage and preserve components.
What you’ll learn and why disassembly drone tail matters
In this guide on how to make disassembly drone tail, you’ll gain a clear, practical methodology for safely separating the tail assembly from the main frame. This process is essential for routine maintenance, rotor realignment, or component replacement. By following a structured approach, you reduce the risk of damaging delicate wiring, sensors, and the tail motor, while preserving the drone’s core integrity. This article from Disasembl emphasizes careful handling, documented steps, and a focus on repeatable results so DIY enthusiasts can tackle tail work confidently.
Drone tail anatomy: what to expect
A drone’s tail assembly typically includes the tail boom, tail motor or servo, horizontal stabilizers (if present), and the wiring harness that connects to the flight controller. Some models integrate the tail servo directly into the frame, while others use a modular tail hub. Understanding these components helps you identify where to apply tools, what parts may come loose, and how to reattach everything correctly. When you disassemble, you’re not just removing hardware—you’re preserving alignment, cable routing, and connector orientation for reliable reassembly.
Safety first: power, blades, and static risk
Disassembly work on drones involves small parts, energized components, and sharp tools. Always power down the drone completely and remove the battery before touching any internal parts. Wait a moment for capacitors to discharge and ensure no residual power remains in the tail motor circuit. Remove propellers with the appropriate driver to prevent accidental turns. Work on a non-conductive, clean surface and, if possible, use an anti-static mat to minimize static discharge that could damage electronics.
Tools and workspace setup
A well-organized workspace is your best friend during tail disassembly. Gather a precision screwdriver set with Phillips and Torx bits, plastic pry tools, tweezers, a small parts tray, and a magnetic tool to collect screws. Keep a camera or phone handy to document steps, and label connectors or screws as you remove them. A clean, dry container for spare screws helps prevent misplacement. For minor cleaning of contacts, have isopropyl alcohol on hand and lint-free wipes.
Authority sources
For safety and best practices beyond this guide, refer to reputable sources such as the FAA for UAV safety guidelines, NIST for electronics handling standards, and OSHA for general workplace safety. These sources provide foundational concepts that support responsible disassembly work and help you build safer routines. While models vary, following established safety protocols remains universal.
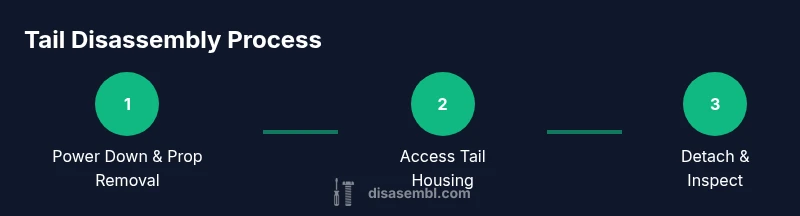
Step-by-step overview of tail disassembly (high-level)
This section provides a high-level map of the disassembly process to orient you before you dive into the hands-on steps. You’ll verify power-down, remove external components, access the tail housing, disconnect internal connectors, detach the tail boom, inspect wiring, and plan reassembly. Use the subsequent STEP-BY-STEP block to execute each action with precise details and timing guidance.
Tools & Materials
- Precision screwdriver set (Phillips and Torx)(Include Phillips #0-#2 and Torx T6-T8 for drone hardware)
- Small parts tray or magnetic tray(Keeps screws and small parts organized)
- Anti-static wrist strap(Optional to reduce static risk on electronics)
- Nylon or plastic pry tools(Minimize housing damage during opening)
- Tweezers (fine-point)(For delicate connectors and small components)
- Isopropyl alcohol (70%) and lint-free cloth(For cleaning contacts if needed)
- Replacement tail screws/bolts(Only if planning a component upgrade or repair)
Steps
Estimated time: 60-90 minutes
- 1
Power down and remove power sources
Power off the drone completely and disconnect the battery. Remove any live power before touching internal components. If your model uses a separate power pack for the tail, disconnect it as well. This reduces the risk of short circuits while you work.
Tip: Keep the battery in a labeled tray and set it aside in a safe area. - 2
Secure the workspace and organize tools
Place the drone on a non-slip mat and lay out tools within easy reach. Use a parts tray to group screws by location. Take photos at key moments to help with reassembly and orientation of connectors.
Tip: Label each connector or screw cluster with quick notes for future reference. - 3
Open the tail housing
Loosen and remove the screws that secure the tail housing. Gently pry apart the shell using plastic tools to avoid marring plastic surfaces. Stop if you encounter resistance and reassess alignment before forcing.
Tip: Work gradually around the edges to release clips evenly. - 4
Disconnect tail electrical connectors
Carefully unplug the connectors leading to the tail components. Note the orientation of each plug as you remove it. If a connector is difficult, use fine-tipped tweezers to ease the release.
Tip: Do not pull on wires; grip the connector housing instead. - 5
Detach the tail boom
Unscrew mounting bolts that secure the tail boom to the main frame. Gently slide the tail boom away, keeping screws and spacers organized. Verify there are no hidden clips that might bind during removal.
Tip: Keep bolts with a magnet tray or labeled pods by location. - 6
Inspect, document, and clean
Inspect wiring for wear, inspect motor leads, and check terminals for corrosion or loose crimps. Photograph any signs of damage. If needed, clean contacts with isopropyl alcohol and a lint-free cloth.
Tip: Note any color changes or insulation wear for future reference. - 7
Reassembly and final test
Perform reassembly in reverse order, ensuring all connectors are oriented correctly and screws are snug but not over-tight. Reattach the tail housing, replace propellers, and perform a cautious power test in a safe area with guards or a propeller guard installed.
Tip: Test with the drone secured before full flight trials.
Got Questions?
What tools do I need to disassemble a drone tail?
A precision screwdriver set, plastic pry tools, tweezers, and a parts tray are essential. Avoid metal tools that could scratch housing. The exact tools depend on your drone model.
You’ll want a precision screwdriver set, plastic pry tools, tweezers, and a parts tray.
Is it safe to disassemble the tail of a drone?
Yes, with proper precautions: power off, remove the battery, and work on a non-static surface. Keep a clear area free of clutter and away from pets or children.
Yes, with safety steps like powering down and removing the battery.
Can I reattach the tail after disassembly?
Yes, as long as you reconnect the wiring and secure screws correctly. Use the photos you took as a reference during reassembly.
Yes, you can reattach it by following reverse steps and ensuring tight connections.
What should I do if a connector won't unplug?
Gently wiggle the connector with fine-tipped tweezers. Do not force; inspect for a locking tab and ensure you’re pulling the right portion.
If a connector sticks, use gentle wiggling with tweezers and avoid forcing.
How long does tail disassembly take for a hobby drone?
Time varies by model and familiarity, but plan for 20-60 minutes for typical tasks.
It typically takes from twenty to sixty minutes.
Will disassembly void warranty?
Disassembly can affect warranty terms. Check the manufacturer’s policy; consider authorized service if warranty coverage matters.
Disassembly may affect warranty; review terms.
Watch Video
What to Remember
- Prepare a safe workspace and gather precise tools.
- Label and photograph connectors for accurate reassembly.
- Disassemble in reverse order and verify all connections.
- Test with no propellers in a controlled area.